Chapter 4 of 11
Pages, menu and blog
Creating pages, arranging the menu and running your blog.
On this page
This is where you govern the structure of your website: which pages it has, where their addresses point, how they link to each other from the navigation menu and, if you have a blog, how you write and publish your articles. All of this lives inside a project: open your site with Open Editor on the dashboard and use the icons in the vertical bar on the left — the sheet of paper (Pages), the book (Blog) and the picture (Media). All three are available in both Easy and Advanced mode.
4.1Your pages
What it's forIt's the list of every page on your site: the home page, "our bakery", "contact"… and this is where you create them, edit them, change their address or delete them.
How to get thereInside the editor, click the sheet-of-paper icon (Pages) in the left-hand bar.
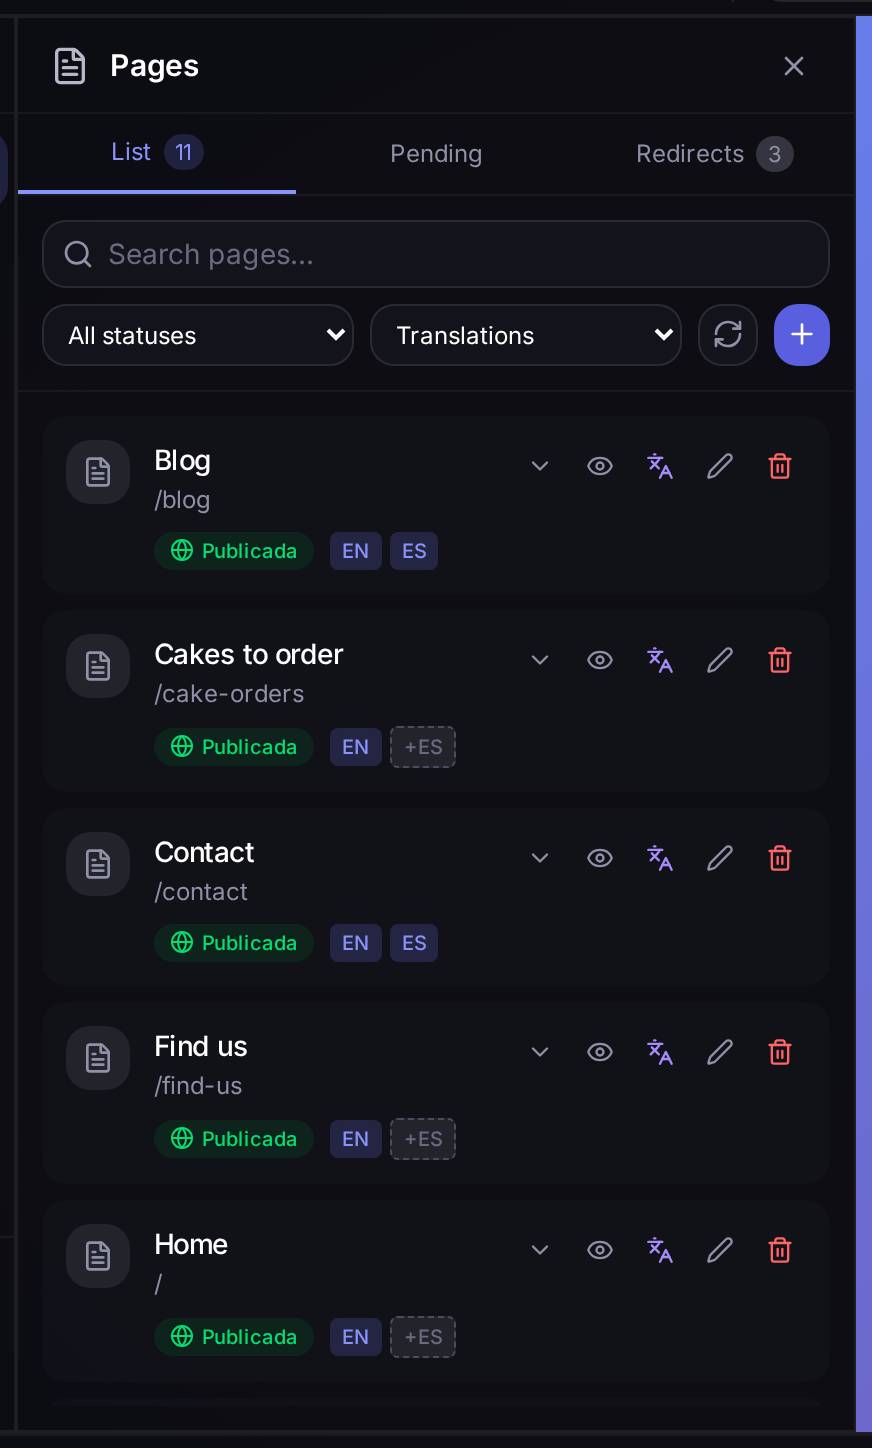
What's on screen. Look closely at the labels on each page:
- Published (green) or Draft (amber). Nobody sees a draft page on your site until you publish it.
- EN, ES… the languages that page already exists in, in a solid colour. A language with a dotted outline (for example
+ES) means you haven't translated it yet into that language: clicking there opens the translator (you'll see it further down, in Your site in several languages). - The eye icon opens the page exactly as a visitor sees it; the pencil opens its details (see The title, the address and the details of a page); the bin deletes it.
Watch out for… Deleting a page cannot be undone. If that page had links pointing at it from the menu or from other pages, those links are left pointing at an address that no longer exists — which is precisely what the Pages waiting to be created section further down detects, so if you delete something by mistake, that's where you'll notice it.
Creating a new page with AI
What it's forAdding a page to your site without writing a line of code: you describe what it's about and the AI writes and lays it out for you.
How to get thereIn Pages, click the + button in the header of the list.
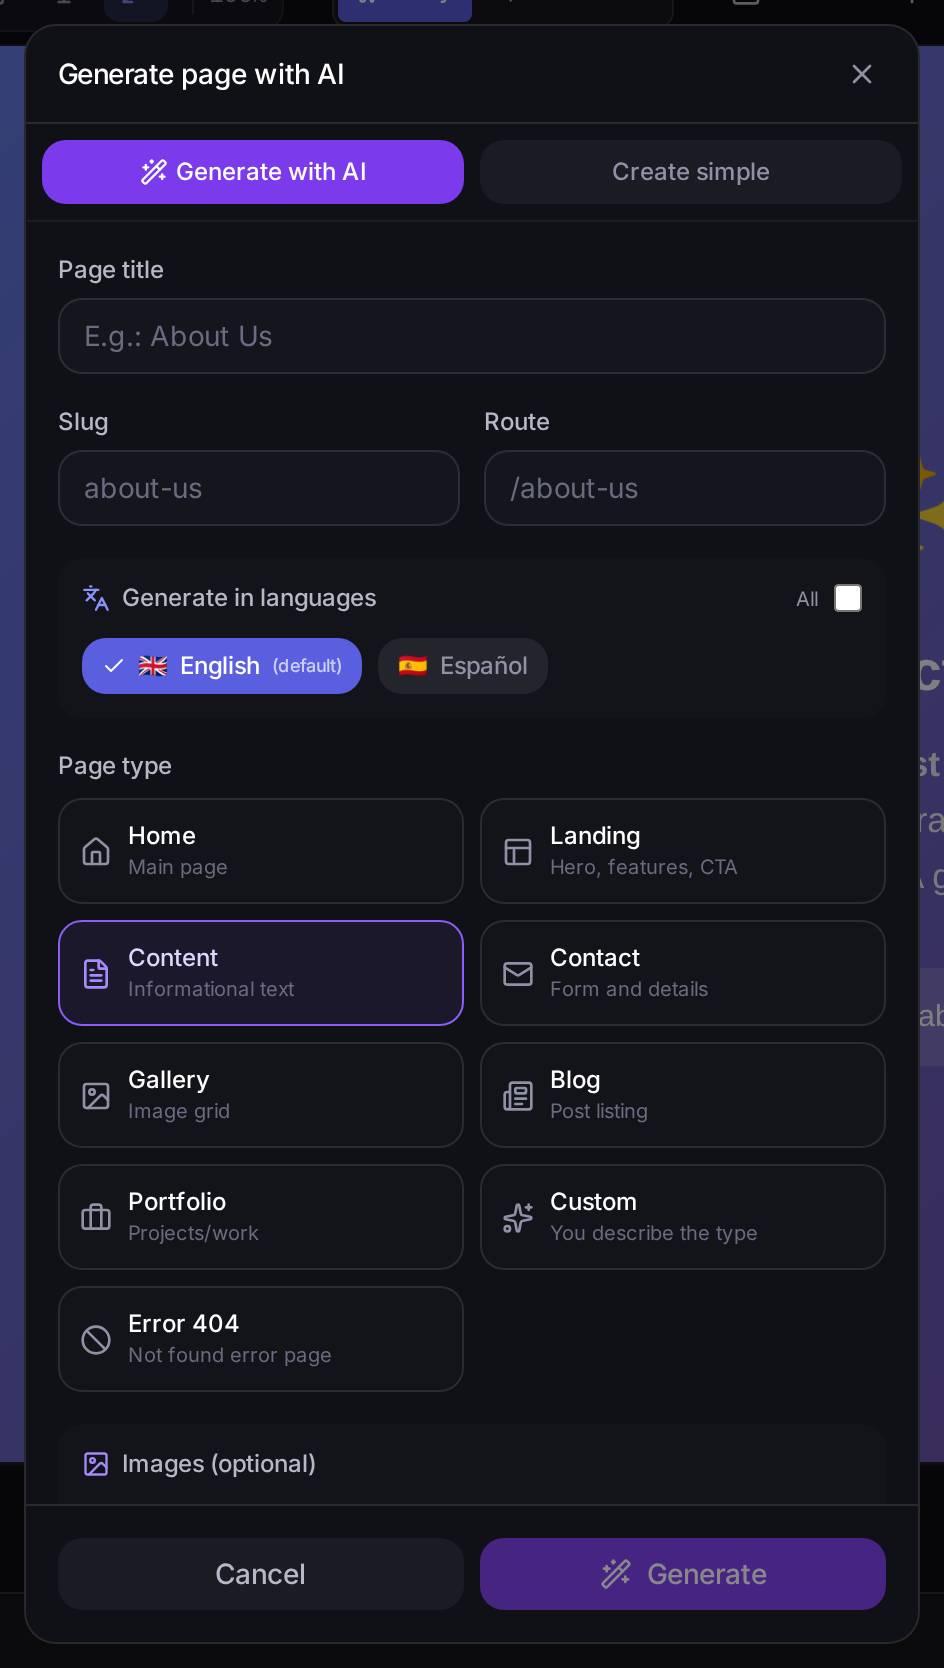
What's on screen. The Create simple button, at the top right of the dialog, switches to a far shorter form: title, address and language only, with no AI writing anything — the page is created empty and you fill it in yourself later, inside the editor. It's the route you'd take for a page you plan to write by hand, or to build up later through a few requests in the chat.
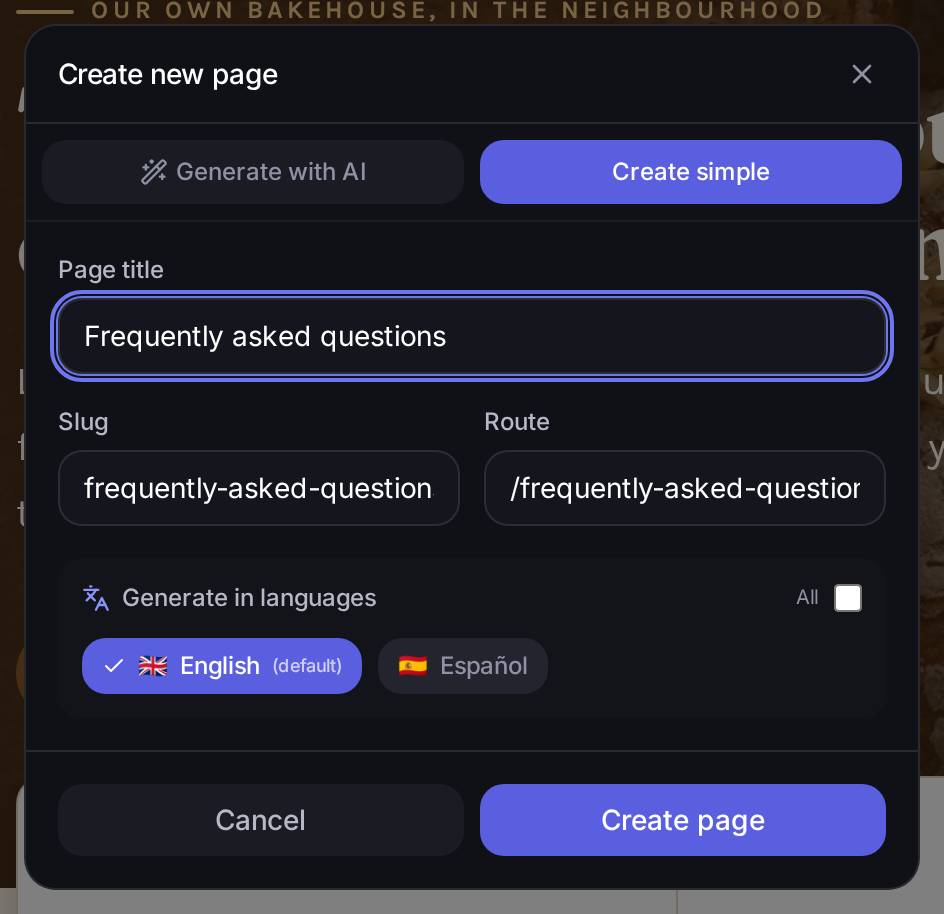
frequently-asked-questions / /frequently-asked-questions) and the Create page button is already active.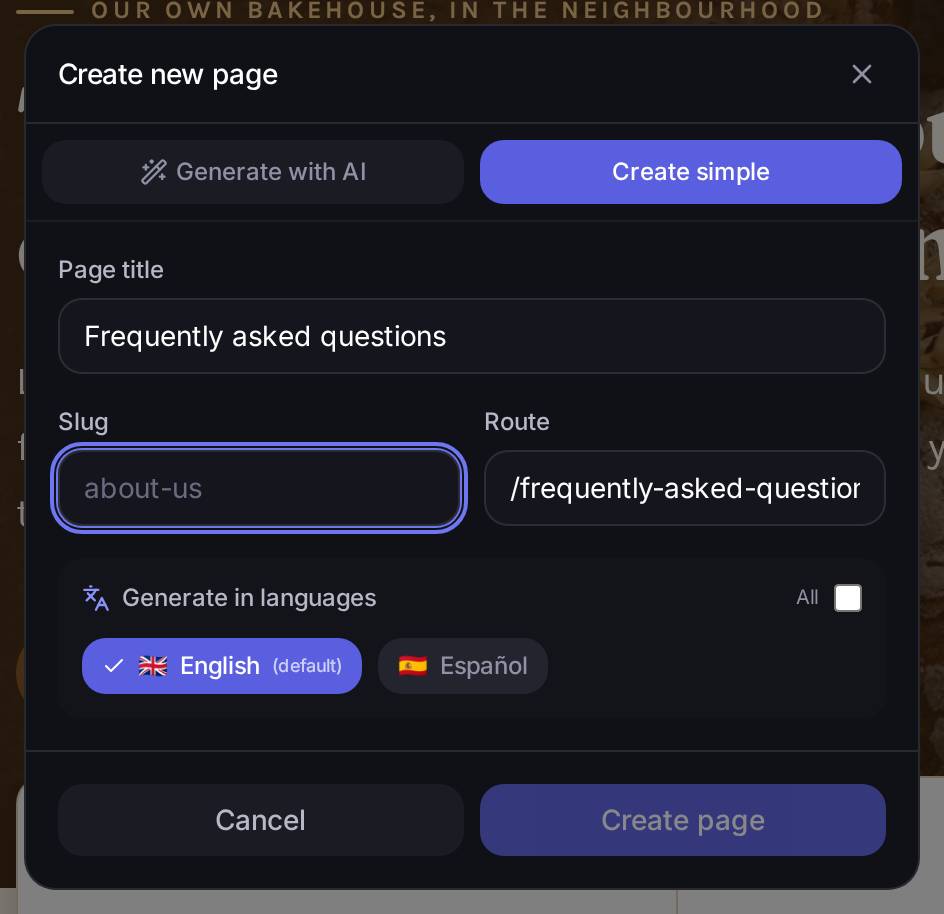
A concrete exampleYou're going to add a frequently asked questions page: Pages → + → Create simple → type "Frequently asked questions" in Title (the address /frequently-asked-questions fills itself in) → Create page. A few seconds later you'll see it in the list, as a draft, ready for you to write its content inside the editor or to ask the AI for it in the chat.
Watch out for… If you type a title or an address that another page is already using, the platform should warn you before creating it — in this round of testing that warning never actually appeared when we tried it in Generate with AI mode (see "The 'address already in use' warning never appeared" in the bug annex). Before creating a new page, check the list to make sure that address isn't already taken.
The title, the address and the details of a page
What it's forChanging the title, the address (slug and route), the status (published or draft) and the SEO details — the title and description Google will show — of a page that already exists.
How to get thereIn the Pages list, click the pencil on the card.
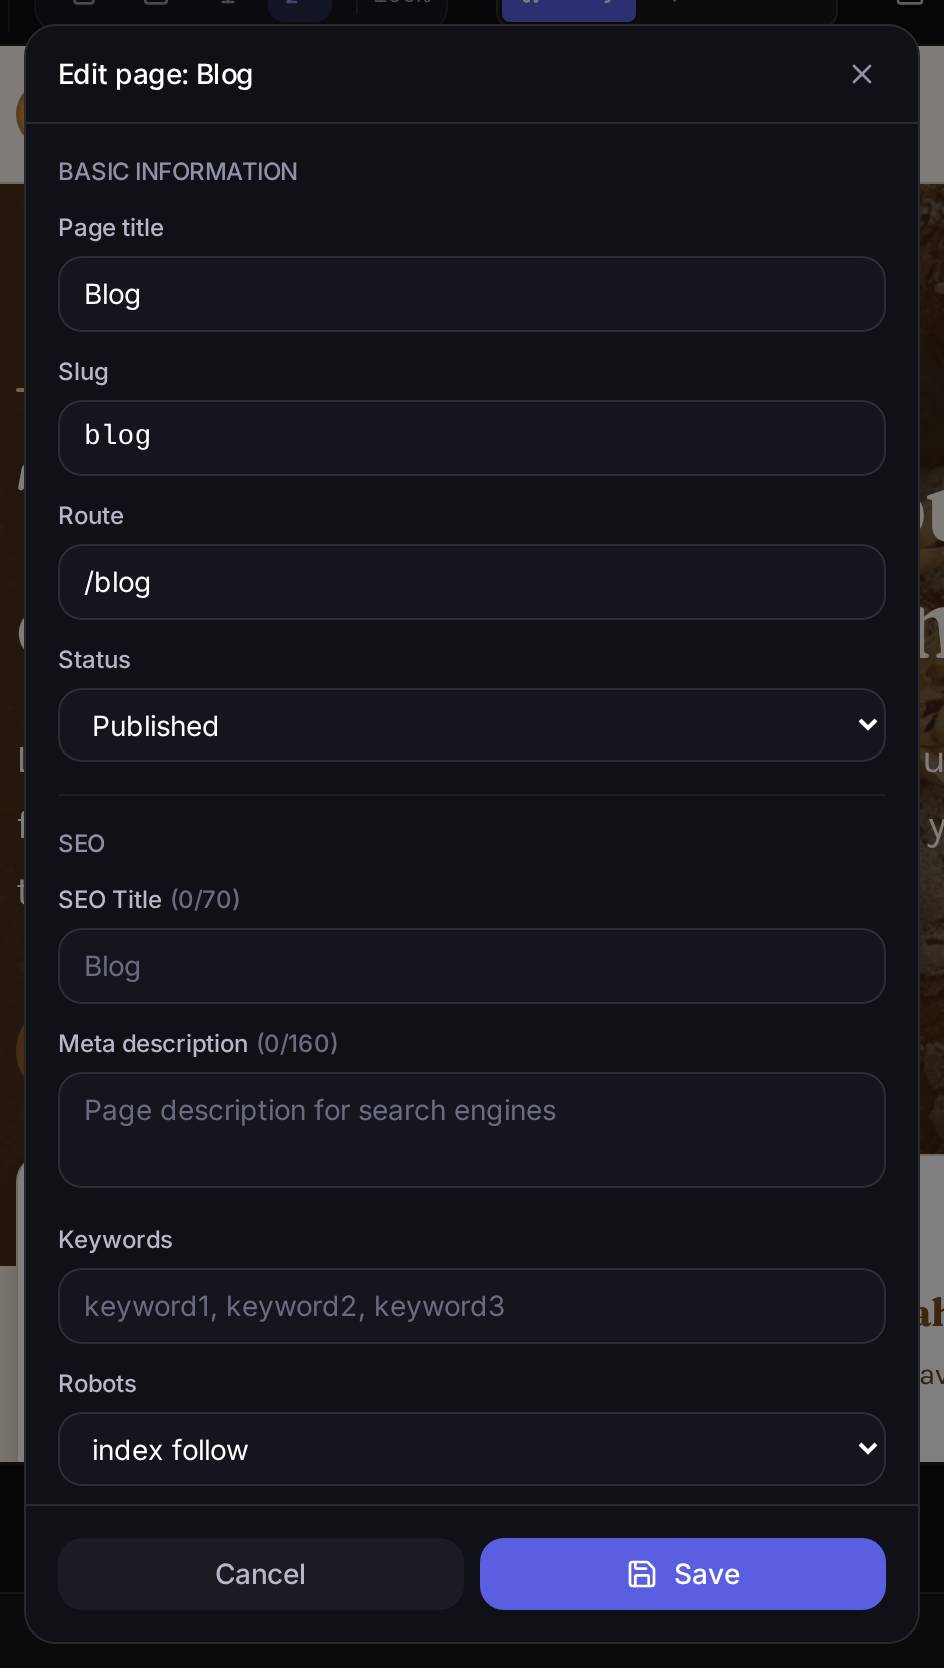
robots directive (which tells search engines whether to index the page and follow its links) underneath.Watch out for… Changing the slug or the route of a page that is already published changes its real address: any external link or bookmark pointing at the old address stops working. That's what Redirects are for (further down): if you're going to move a page, create a redirect from the old address to the new one first.
Seeing only your drafts
How to get thereIn the Pages list, the All statuses dropdown → Drafts.
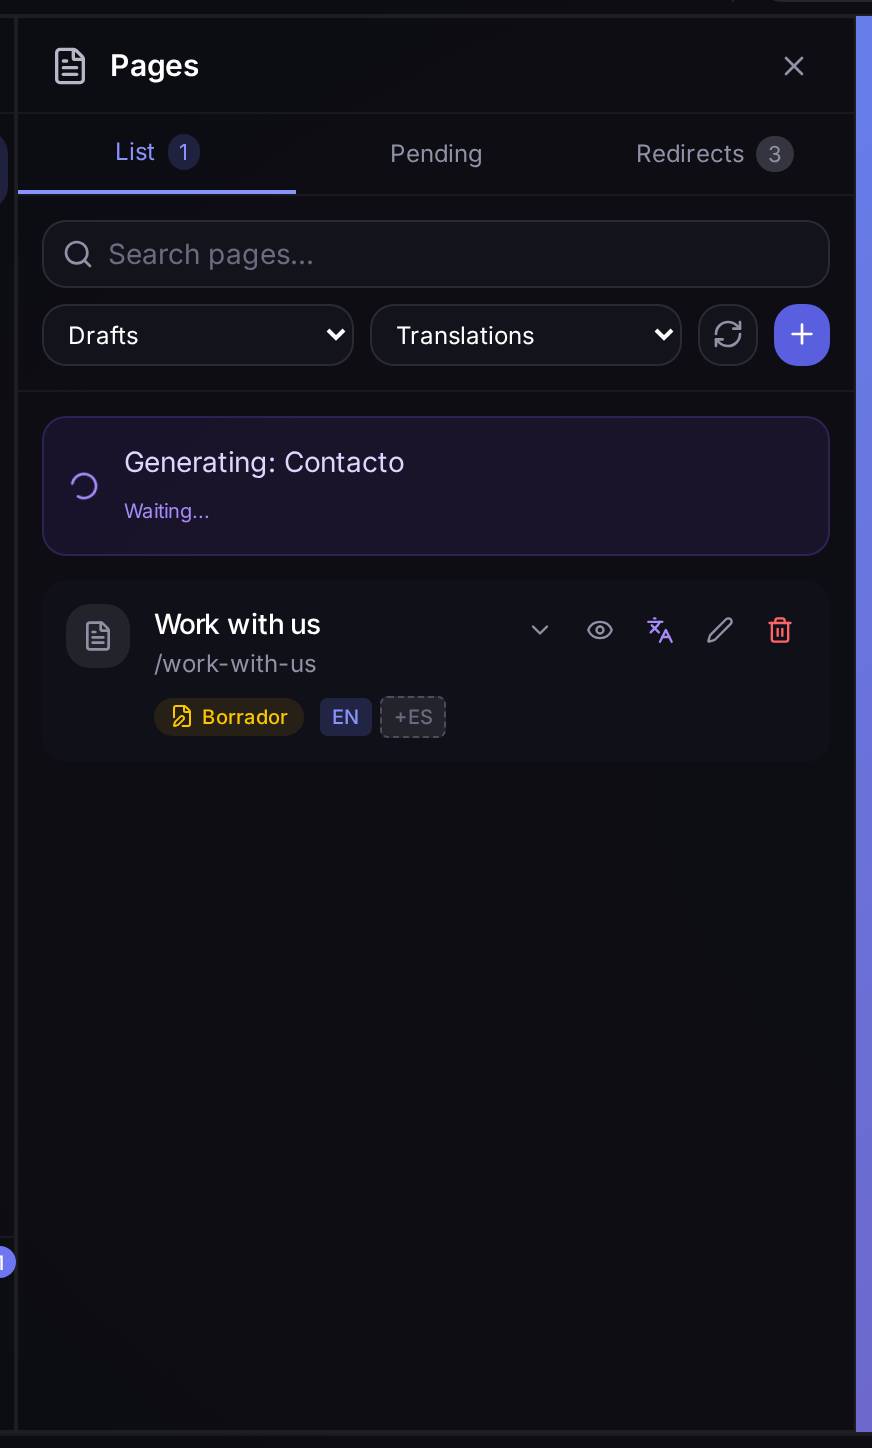
What it's forBefore you publish your site, it's the quickest way to see what you still have to finish: everything still marked as a draft is content that you (or the AI) created but your visitors can't see yet.
Pages waiting to be created
What it's forIt warns you when a link somewhere on your site — usually in the menu or the footer — points at an address that doesn't exist as a page yet. It's a common situation when the wizard sketches out a site with more pages than it ended up generating.
How to get thereIn Pages, the Pending tab.
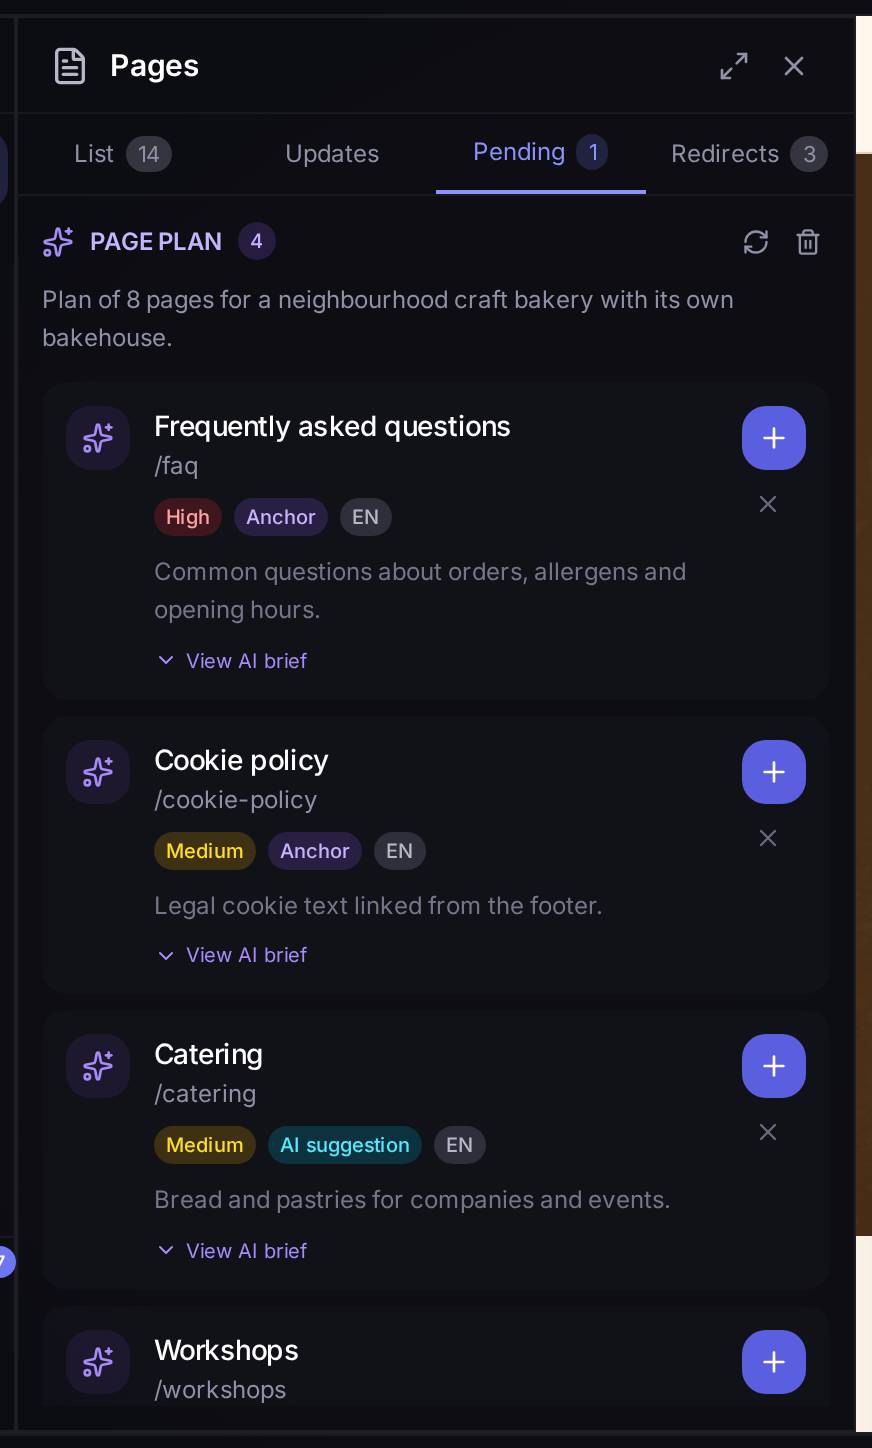
What's on screen. The + button on each card creates that page with the brief the AI proposes as its starting point (it doesn't generate it on its own: it takes you to the same Creating a new page dialog, with those details already filled in). The amber broken-link warning can't be resolved from here: it tells you where the link is (for example, "Footer, line 6") so you know where to fix it — or which page you still have to create.
Watch out for… A broken link in the footer or the menu is visible to any visitor who clicks it: it isn't a technical detail, it's a link that leads nowhere on your published site.
The page plan
What it's forIt's the map the AI drew up when your site was generated: which pages it proposed, why (the reason can be "you asked for it in the brief", "it comes from the menu" or "AI suggestion") and at what priority.
How to get thereIn Pages, the Pending tab, right at the top, the Page plan block.
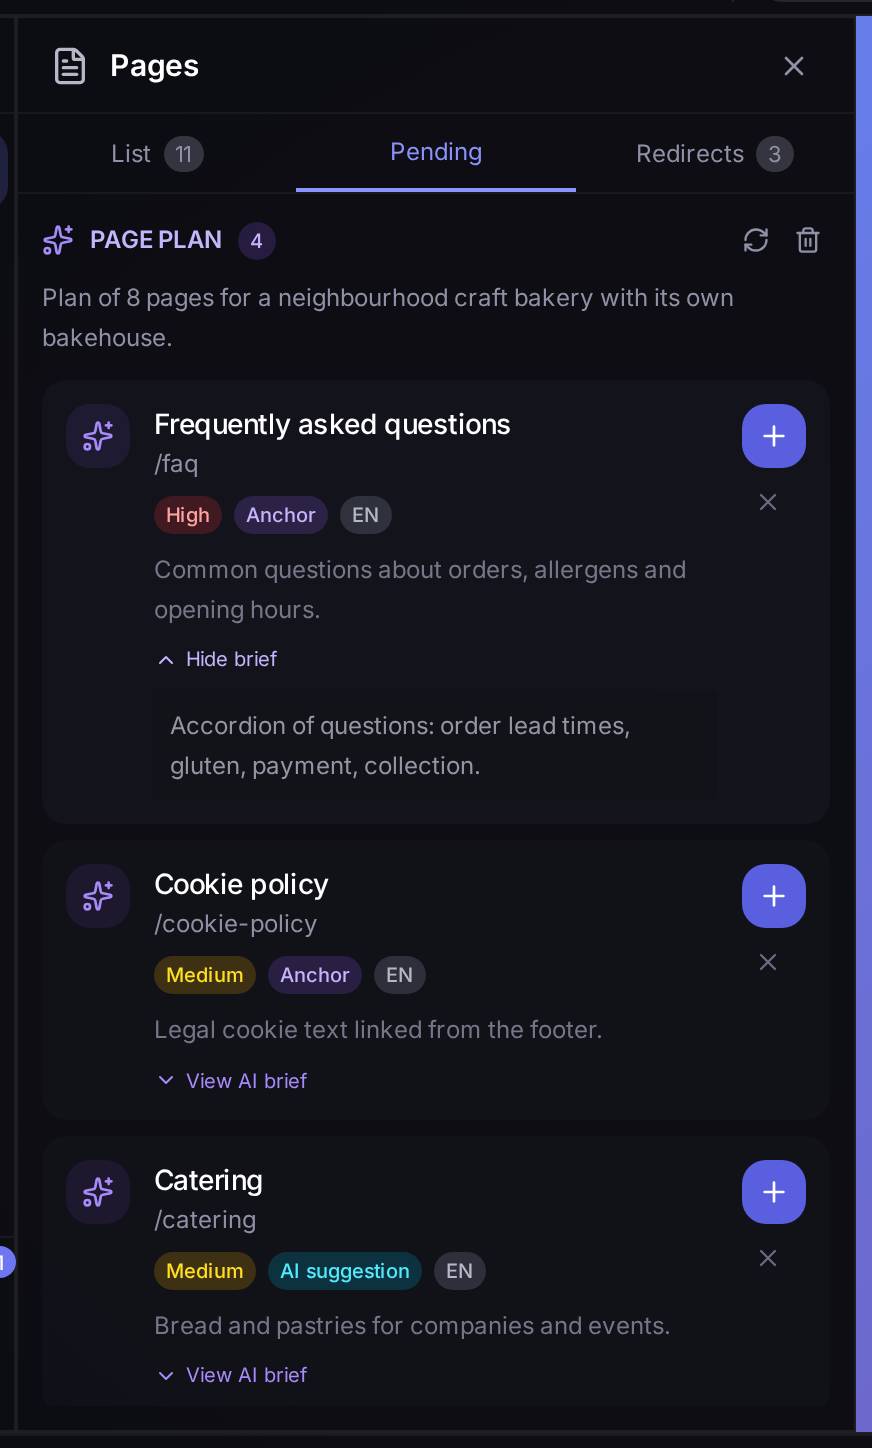
What's on screen. Pages you've already created appear struck through with a green tick; the ones still missing show their priority (High / Medium / Low) and a View AI brief button that unfolds the notes the AI left itself for when you generate them.
Redirects
What it's forWhen you change a page's address (or delete it), a redirect makes sure that anyone visiting the old address still ends up somewhere, instead of hitting an error.
How to get thereIn Pages, the Redirects tab.
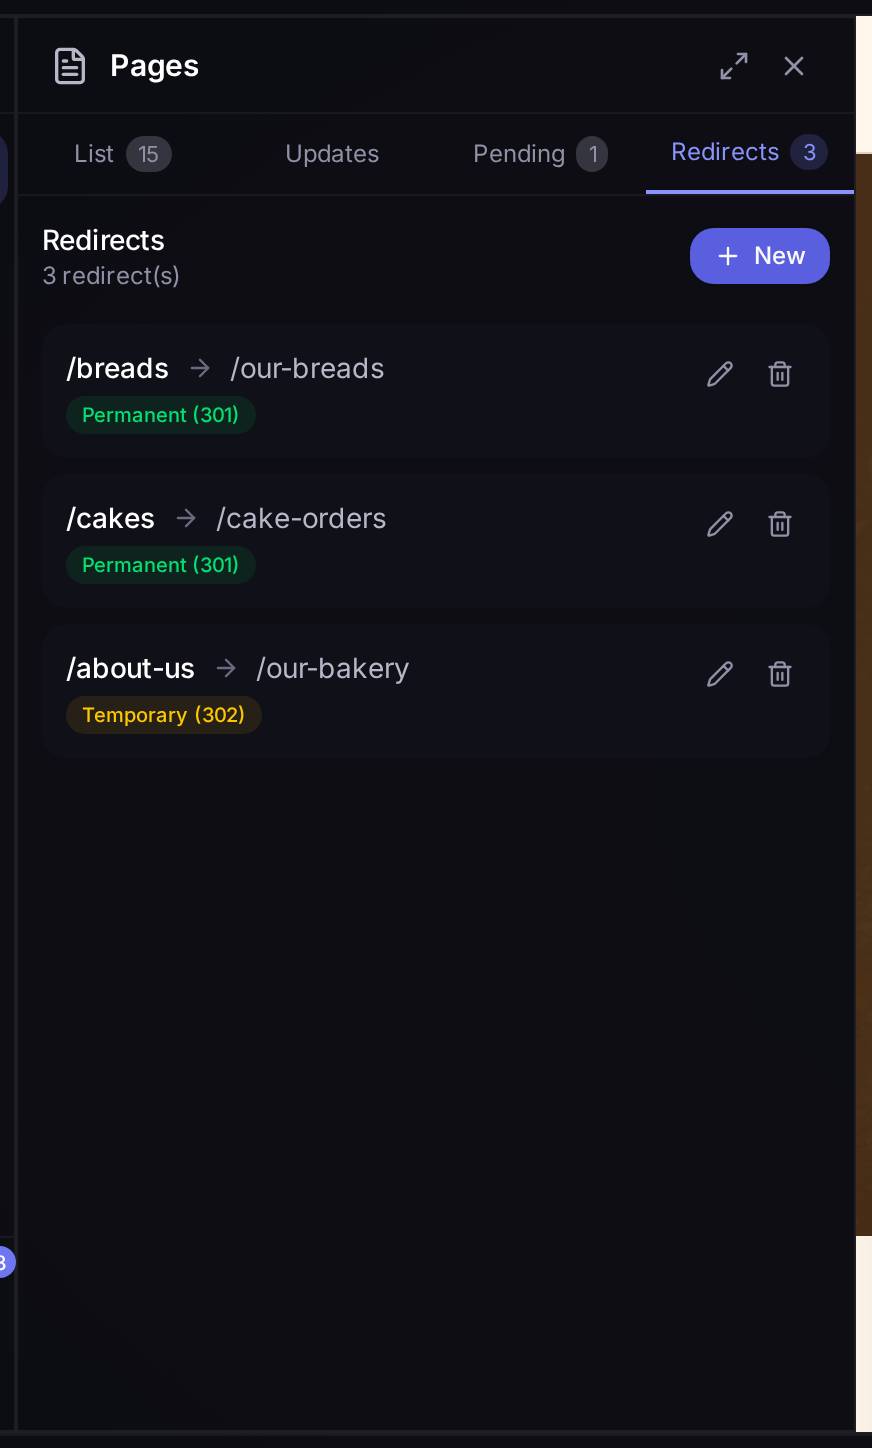
A concrete exampleYou had a page at /cakes and you've renamed it to /cake-orders. Without a redirect, anyone who had saved the old link or found it in Google would see an error. With the redirect /cakes → /cake-orders (Permanent), they land on the new page without noticing the change.
Watch out for… Use Permanent (301) only when the change is final: search engines memorise permanent redirects and can be slow to "forget" them if you later change your mind.
Earlier versions of a page
What it's forLooking back at — or restoring — how a page was before a change.
How to get thereThis screen only exists in Advanced mode: flip the Advanced switch in the editor header, open Pages and click View history on the page you want to review (the button doesn't appear in Easy mode).
Watch out for… While we were testing this manual, this screen gave the same "no history yet" message whether the page genuinely had no history or the history had failed to load because of a server error (see "Page history: the server error disguised as an empty screen" in the bug annex). If you were expecting to see earlier versions and this message comes up, don't take it at face value: reload the editor page and try again before assuming nothing was saved.
Your site in several languages
What it's forIf your site has more than one language, this is where you see which pages are translated into which, and translate the ones that are missing.
How to get thereIn the Pages list, click the language chip of a translated page (or the one with the dotted outline, +ES, if a language is missing) to unfold the group.
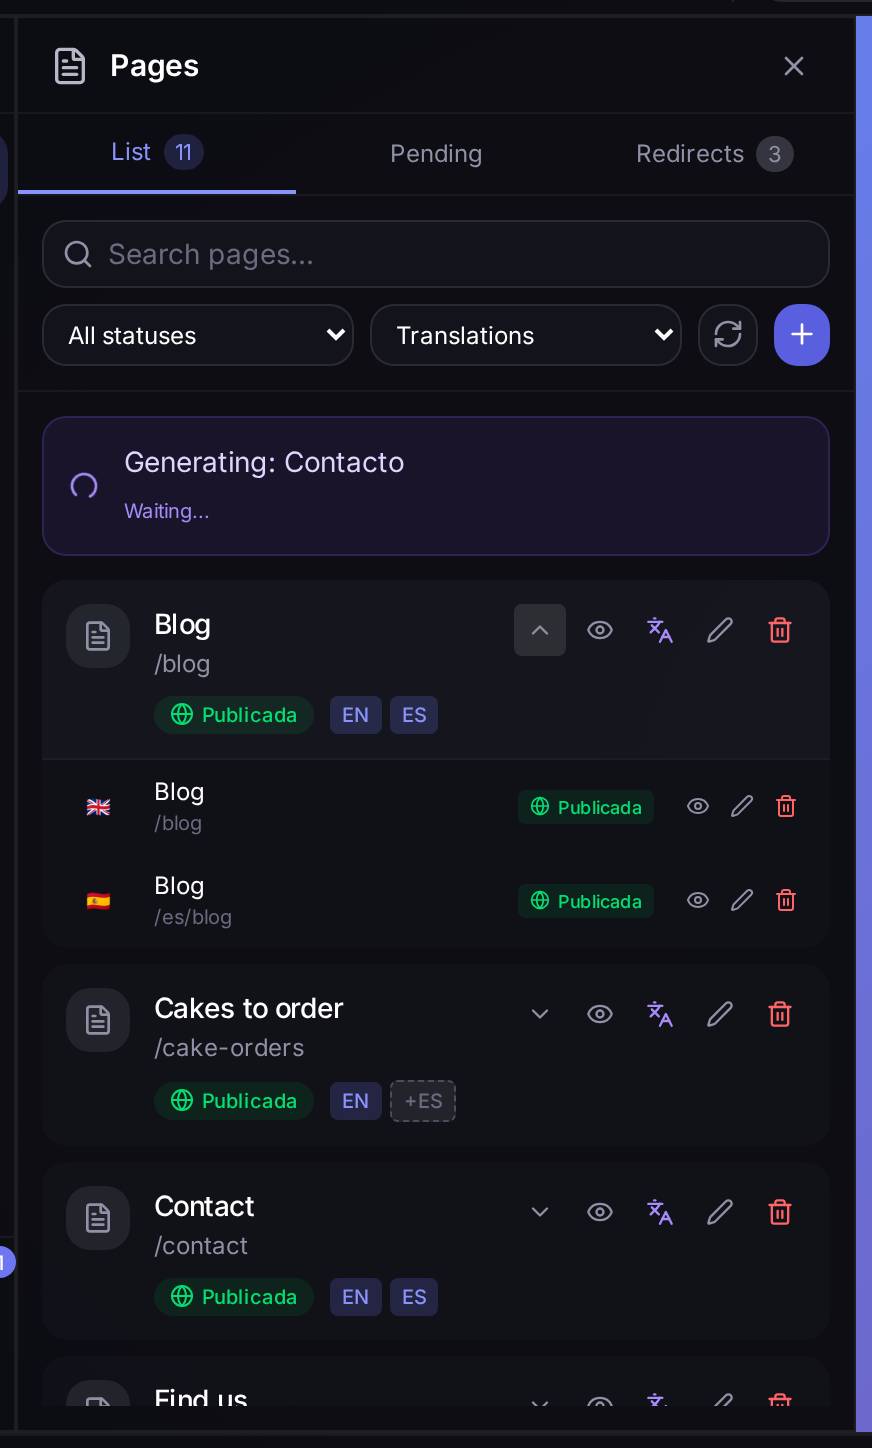
/blog) and the Spanish one (/es/blog), each with its own view, edit and delete buttons.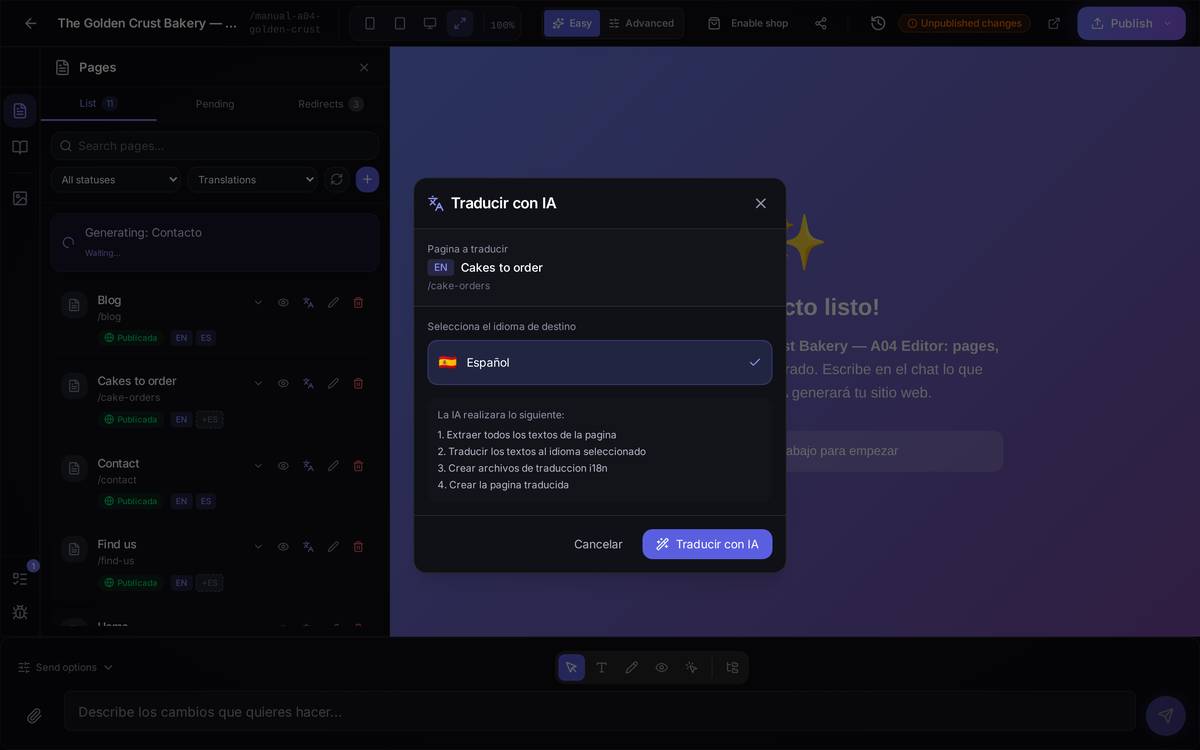
A concrete exampleYour "Find us" page only exists in English. You click the +ES chip on that page → Translate with AI opens with Spanish already ticked → Translate with AI. In a moment you have the same page in Spanish, linked to the English one as its translation.
Watch out for… Translating with AI creates a new page from the original as it stands at that moment. If you later change the English version, the translation doesn't update itself — you'll have to translate that page again, or edit the translation by hand, for the two to say the same thing.
4.2Your site's menu (and why there's no screen to edit it)
This has to be said plainly: there is no screen anywhere in the panel for building or editing your site's navigation menu. Don't go looking for it in Pages, or in Settings, or anywhere in Advanced mode: it isn't there. It's a genuine gap in the product right now, not something you've overlooked (it's written up in the bug annex too).
The menu does exist — your site renders it, and the wizard generated it when it built your site — it's just that there are two ways to touch it, neither of them a dedicated form:
Ask the AI, in the chat
This is the normal route, and the one we recommend. Type what you want changed into the editor's chat box, in the same words you'd use with a person:
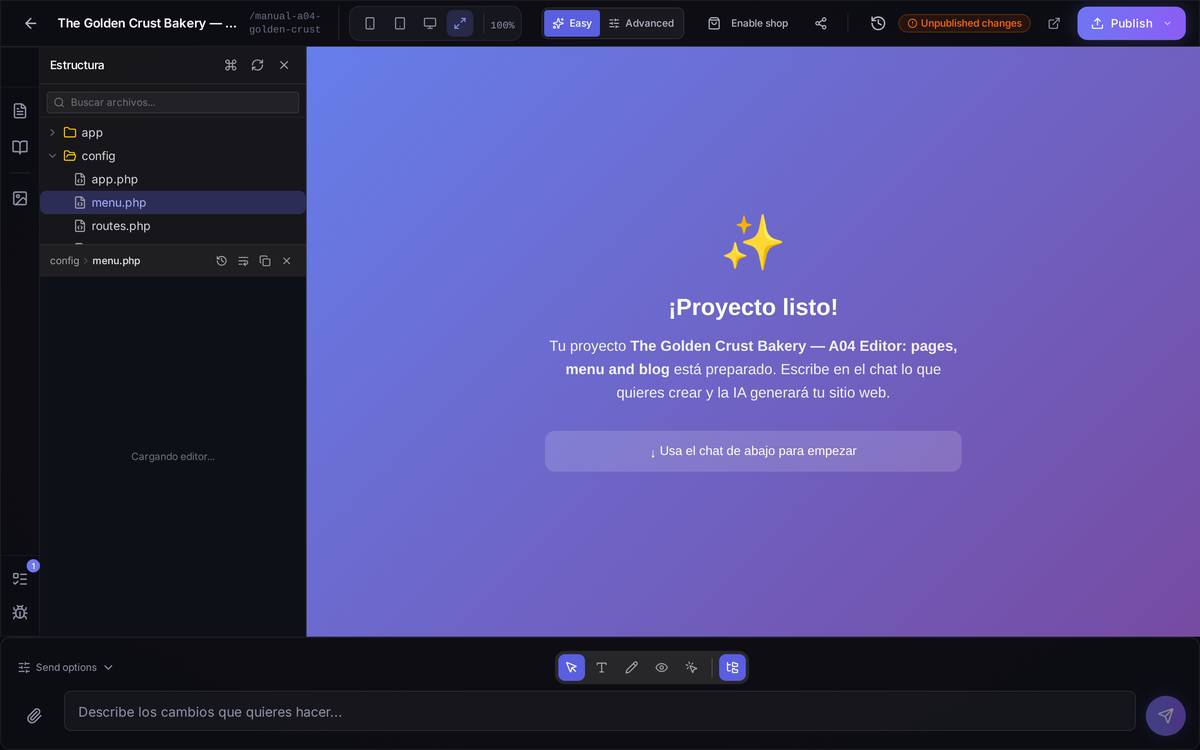
The more specific the request — what text you want in the menu, which two entries it goes between, what address it links to — the fewer rounds you'll spend adjusting the result afterwards.
The Code structure panel (for those who can read it)
Your site's menu lives, internally, in a file: config/menu.php. If you can read code — or want to show it to someone who can — you can look at it (and touch it) directly. This panel is not just for the menu: it's a window onto every file that makes up your site, meant for the curious and for developers. If you've never programmed, you don't need it for anything in your day-to-day: everything you'd do here can just as easily be asked for in the chat.
How to get thereIn the editor, next to the chat box, there's a row of small icons with the editing modes (select, direct edit, draw…); the last one in that row, set slightly apart from the rest, opens the Code structure panel.
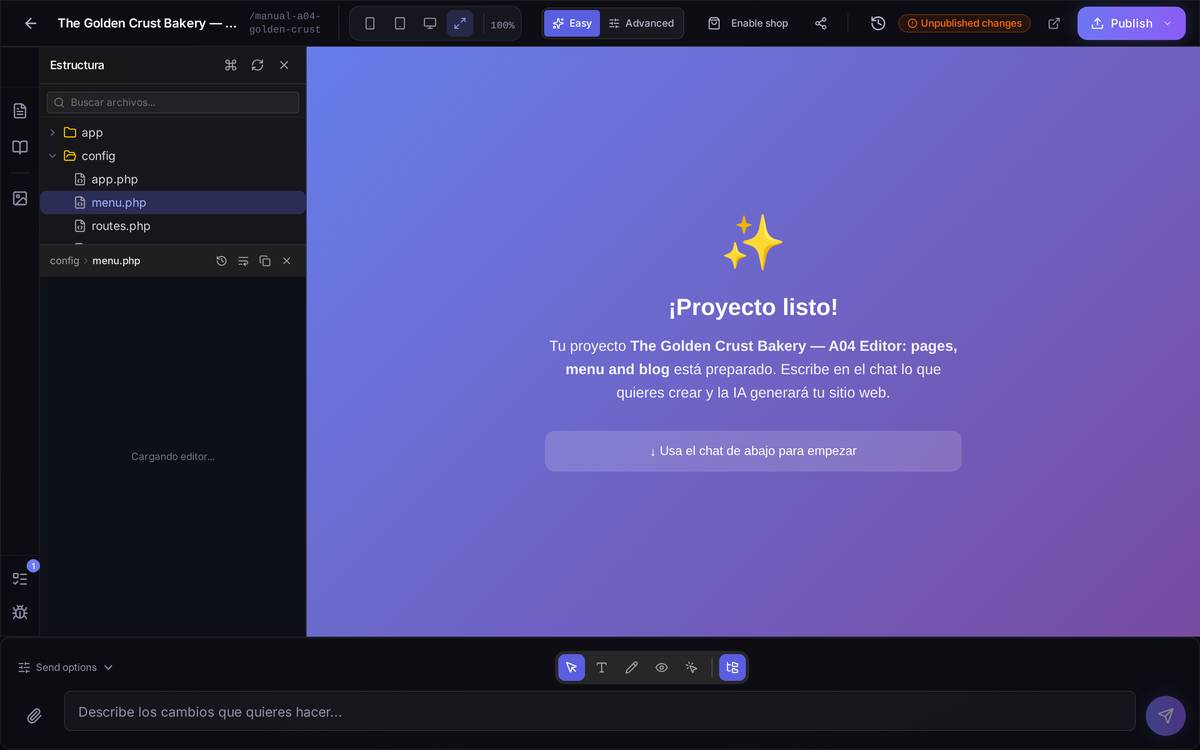
app, config…) with config unfolded and menu.php already selected; below it, the contents of that file, still loading. Right at the bottom, the chat box with its row of editing-mode icons — the last one, highlighted in blue, is the one that opens this panel.What's on screen. A list of folders and files on the left — config, app/Views, app/Controllers… the same structure a programmer would use — and, when you pick a file, its contents in a code editor with syntax highlighting. Treat it as read-only unless you know what you're doing: the code can be edited by hand from here, but a syntax error in a file like menu.php can break the navigation across your whole site.
Watch out for… This isn't a tool designed for the average Speaksite customer. If you open this panel out of curiosity, look; if you need to change something, ask the AI in the chat instead of editing the code by hand — it's much harder to break and you don't need to know how to program.
4.3The headline flow: creating a new page and linking it in the menu
Here's the complete route, start to finish, for the most common case: you think of a page you're missing and you want it to appear in your site's navigation.
1. Create the page. Pages → + → Create simple → title "Frequently asked questions" (the address fills itself in) → Create page (the steps, with a screenshot, are in Creating a new page with AI, above).
2. Check that it's on your site. Look for it in the list to confirm it was created properly:
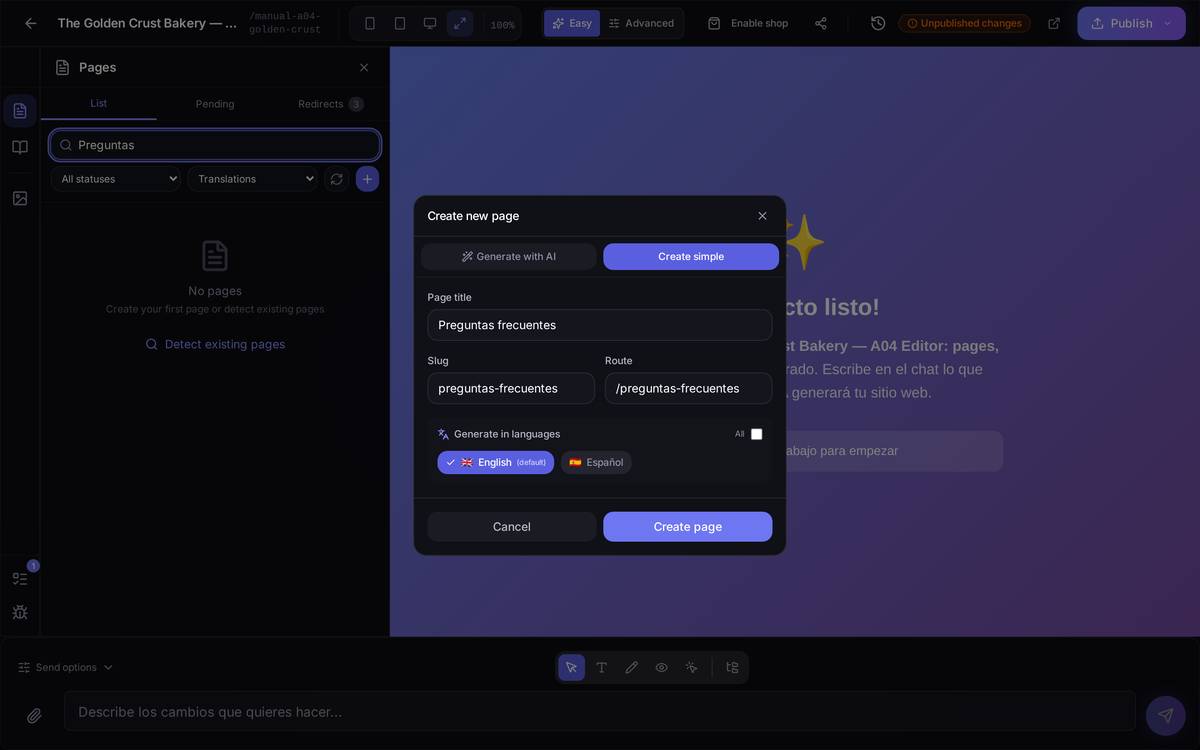
At this point the page exists and can be reached at its direct address (/frequently-asked-questions), but it still doesn't appear in your site's navigation menu: nobody will get to it by clicking from another page.
3. Ask the AI to link it in the menu. Since there is no menu screen (as explained just above), you type the request into the editor's chat: 'Add "Frequently asked questions" to the navigation menu, between "Blog" and "Contact", linking to /frequently-asked-questions' — the same request as in the screenshot above (Your site's menu) — and send it.
4. Publish. Once the AI confirms the change, publish your site (outside this area, with the Publish button in the editor header) so that the new menu really shows up on your site.
Watch out for… If your site is multilingual, the menu is translated separately for each language: asking for the change in English doesn't automatically add it to the Spanish menu. Say so explicitly in your request if you want it applied to every language.
4.4The blog
If your site has a blog, this is where you write your articles, sort them into categories and control what's published and what's still a draft.
Turning the blog on
What it's forNew projects don't come with a blog: turning it on prepares everything it needs — its own database, the /blog page and the public routes — so that you can start writing.
How to get thereThe book icon (Blog) in the editor's left-hand bar. If the blog isn't enabled on that project, you'll see the activation banner instead of the list of posts.
/blog page, routes) and the note that it's reversible — you can turn it on and off whenever you like.Watch out for… "Reversible" means you can switch the blog off and on again; it doesn't say here whether switching it off deletes the posts you'd already written, so don't use it as a way of "archiving" your blog without checking first with a test post.
Your posts: draft and published
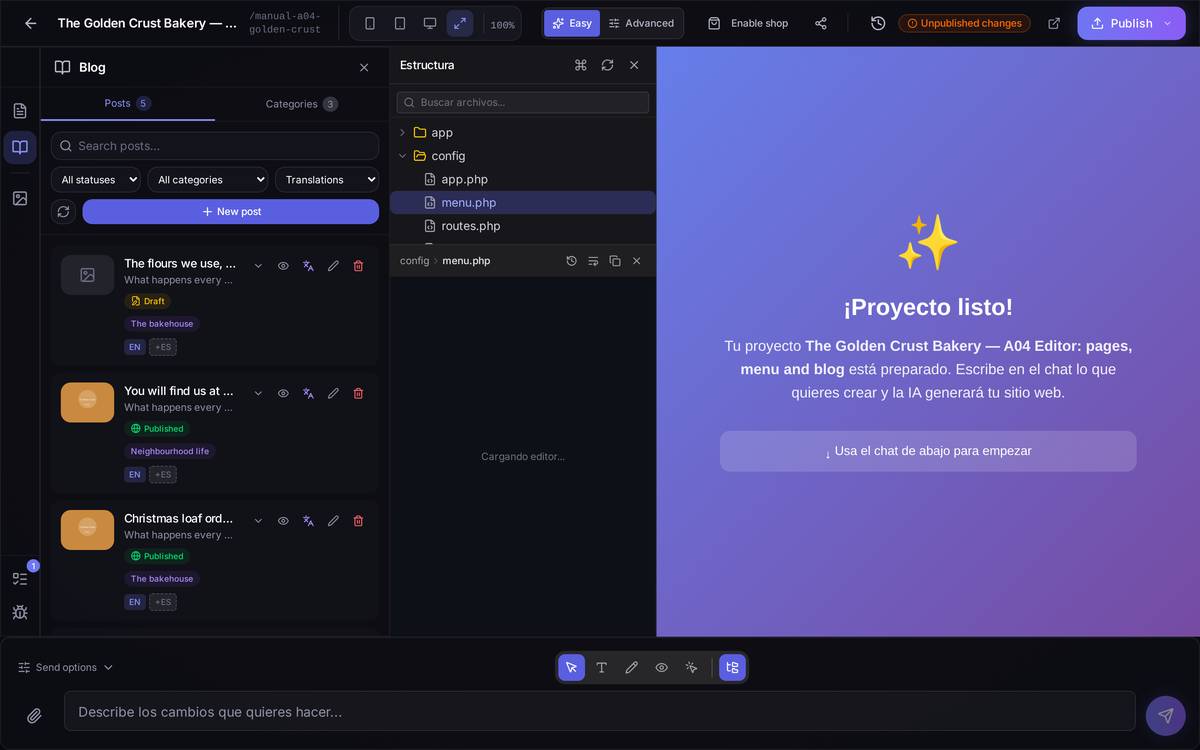
How to get thereThe book icon (Blog), the Posts tab.
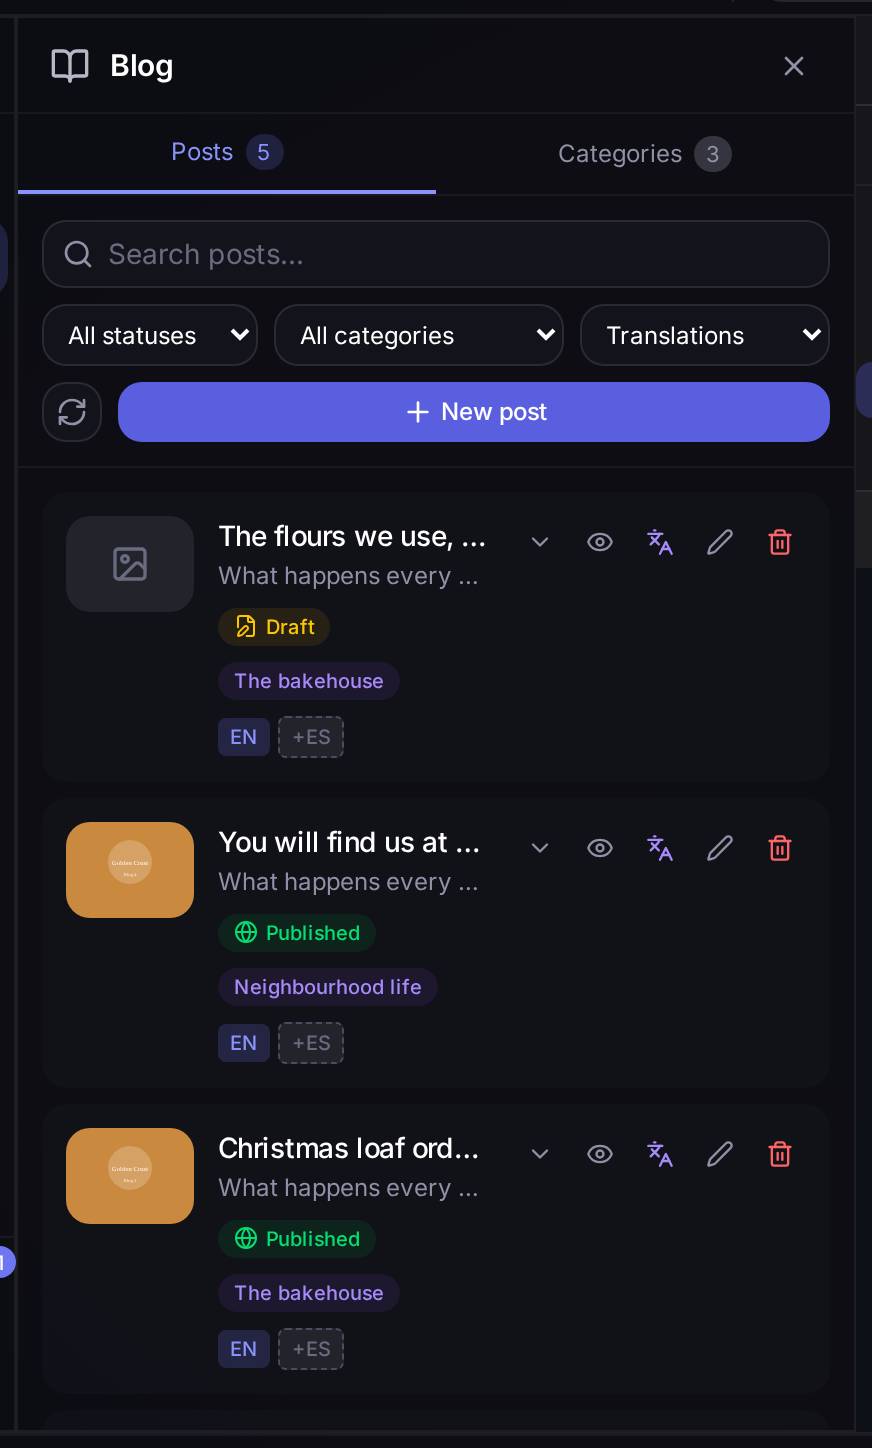
What's on screen. Just as with pages, Draft means only you can see it in the editor; Published means it's already on your site for any visitor. The filters at the top (status, category, translations) work the same way as in the page list.
Writing or editing a post
What it's forWriting a post's content by hand: title, address, excerpt (the summary shown in the blog listing) and the body of the article.
How to get thereIn Posts, click the pencil on a post (or create a new one with New post and choose Create manually instead of with AI).
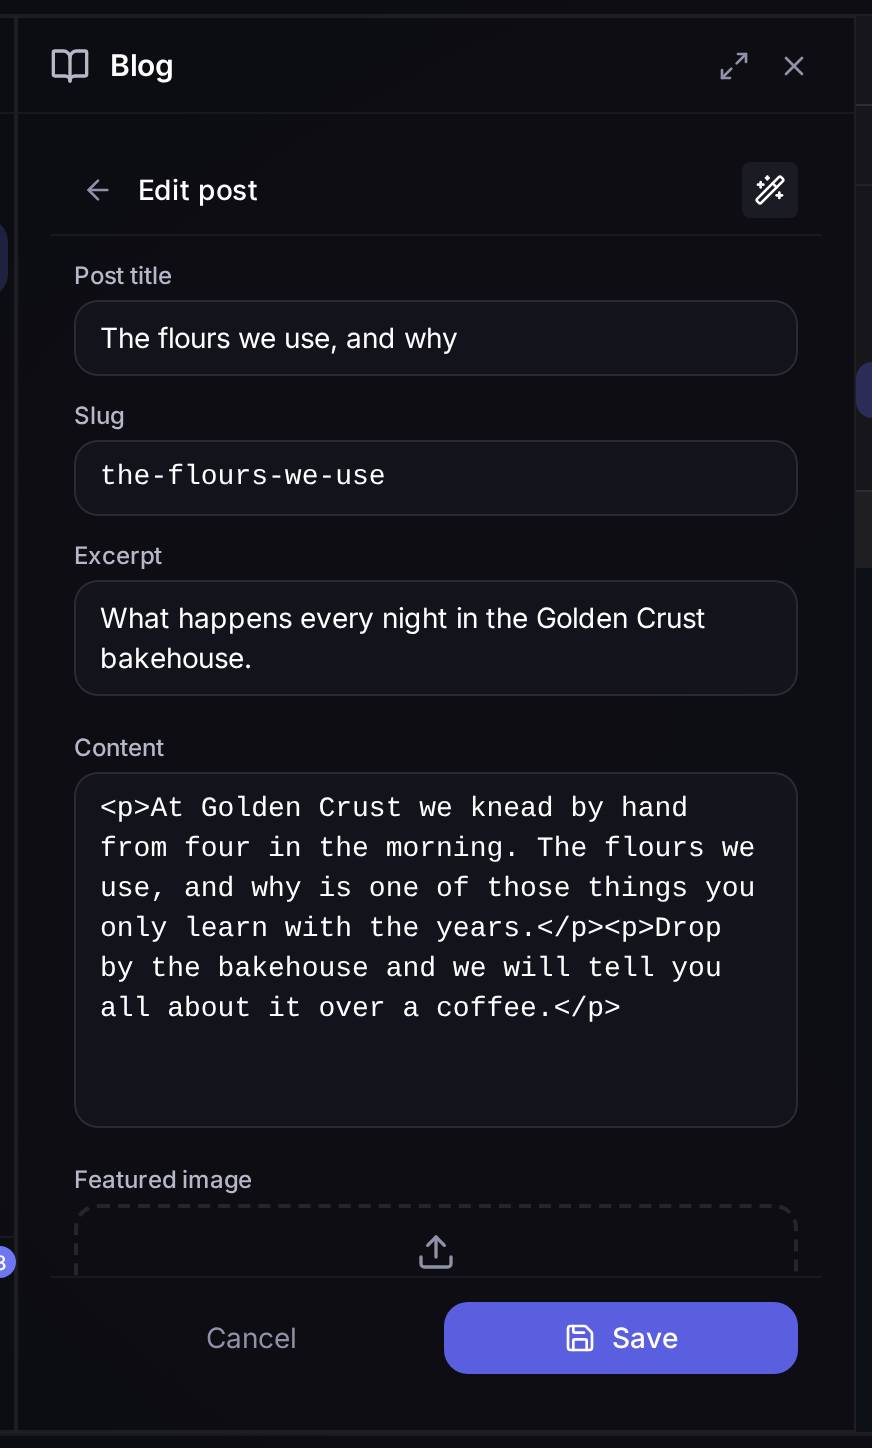
Watch out for… The content is written with basic HTML tags (<p>, for example) rather than in a visual, what-you-see-is-what-you-get editor. If you've never seen HTML, it's more comfortable to generate the article with AI (next section) and then just touch up the already-formatted text.
Generating a post with AI
What it's forSame as with pages: you describe what you want the article to be about and the AI writes it.
How to get thereIn Posts, the New post button → Create with AI.
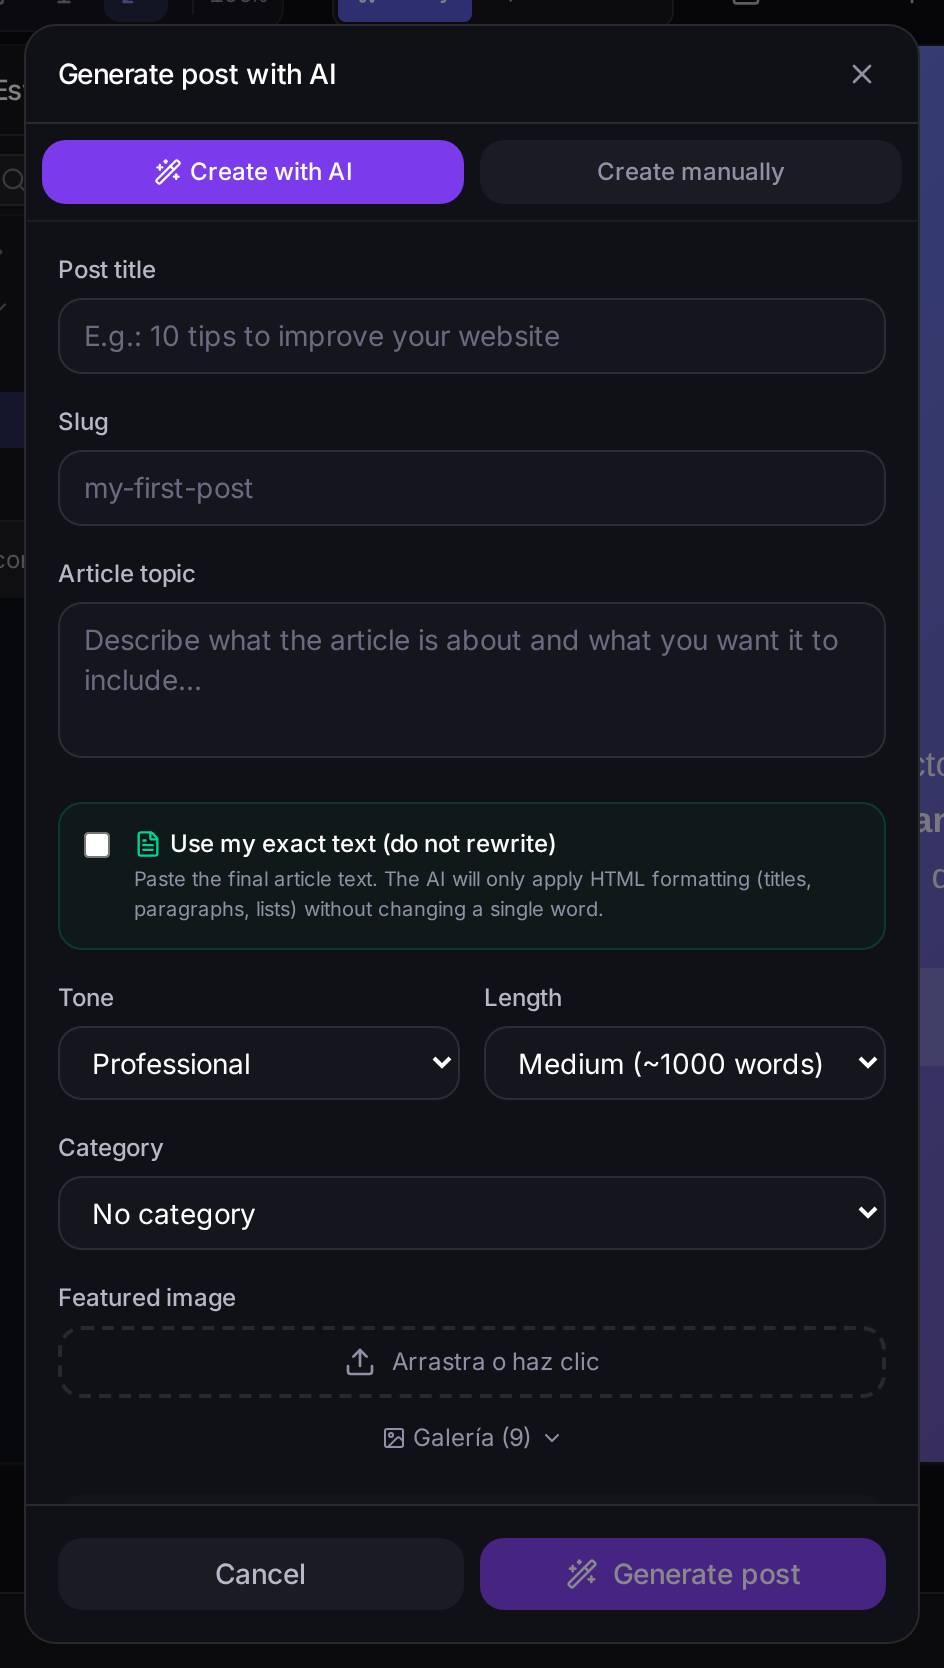
What's on screen. The Use my exact text (do not rewrite) checkbox changes what the AI does: if you tick it and paste in text you've already written, the AI only formats it (headings, paragraphs, lists) without changing a single word of yours. Left unticked, the AI writes the article from whatever you tell it in "Article topic".
A concrete exampleYou want to announce that cakes can now be ordered through the website: New post → Create with AI → title "You can now order cakes online" → in "Article topic" you write "Announce that we've opened cake orders through the website, with at least two days' notice" → tone Casual → Generate post. In a moment you have the article written and ready to review before publishing.
Temporary posts: hiding themselves on time
What it's forFor anything with an end date: an offer, a seasonal campaign, an event or special opening hours for a bank holiday. You say how long it stays visible and, at that time, the post stops showing on your website by itself, without you having to remember to take it down.
How to get thereIn a post's editor (or when creating it), tick Hide automatically (temporary post) and pick the day and time in Visible until.
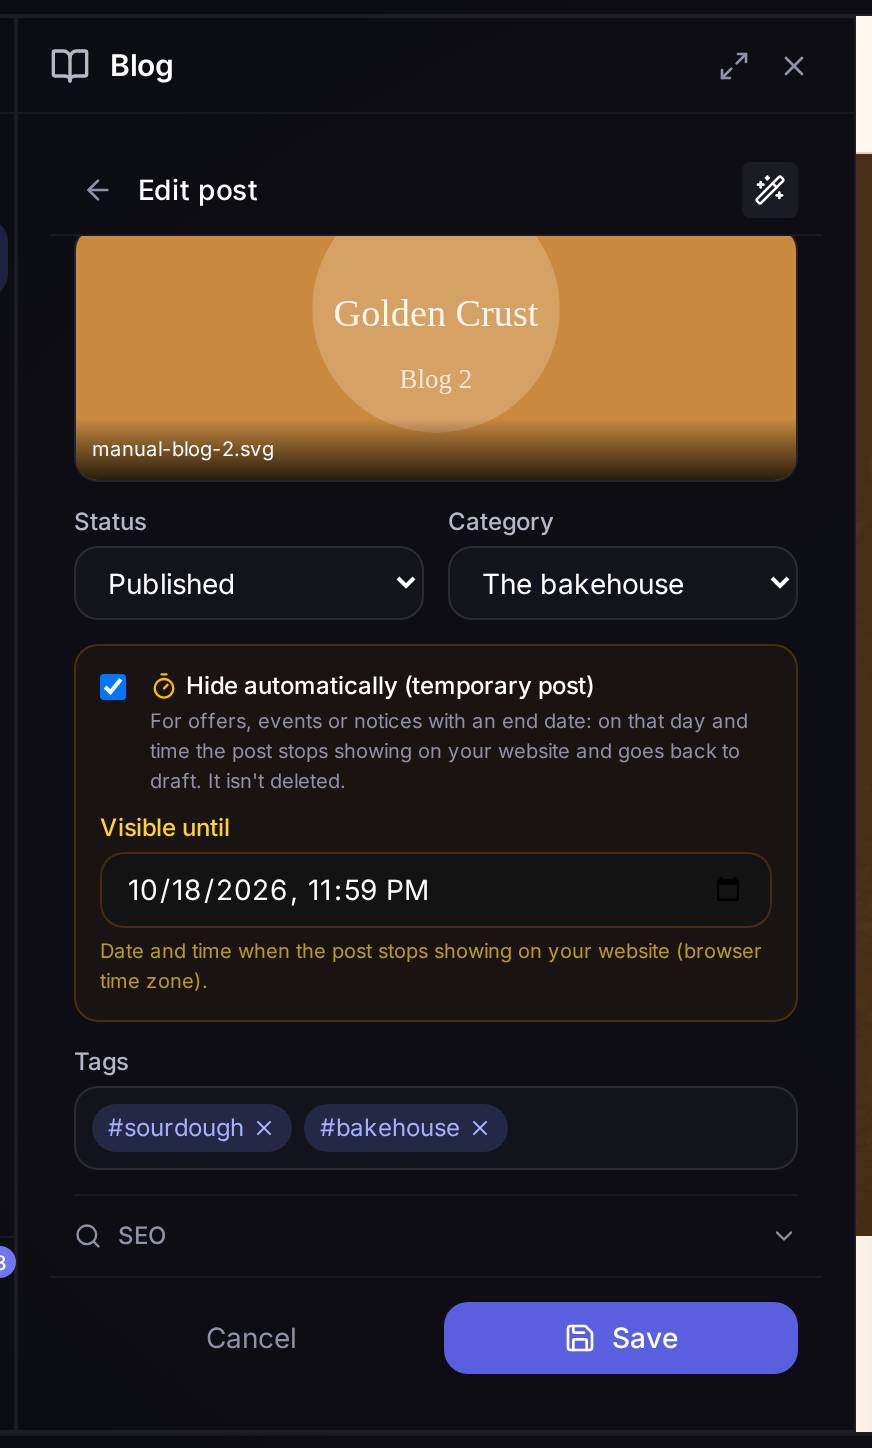
What happens at that time. The post goes back to Draft and stops showing on your website: in the blog listing, at its own address and in the sitemap for Google. It isn't deleted. In the panel listing it carries the label "Until …" while it's visible, and "Hidden on …" once it has hidden itself.
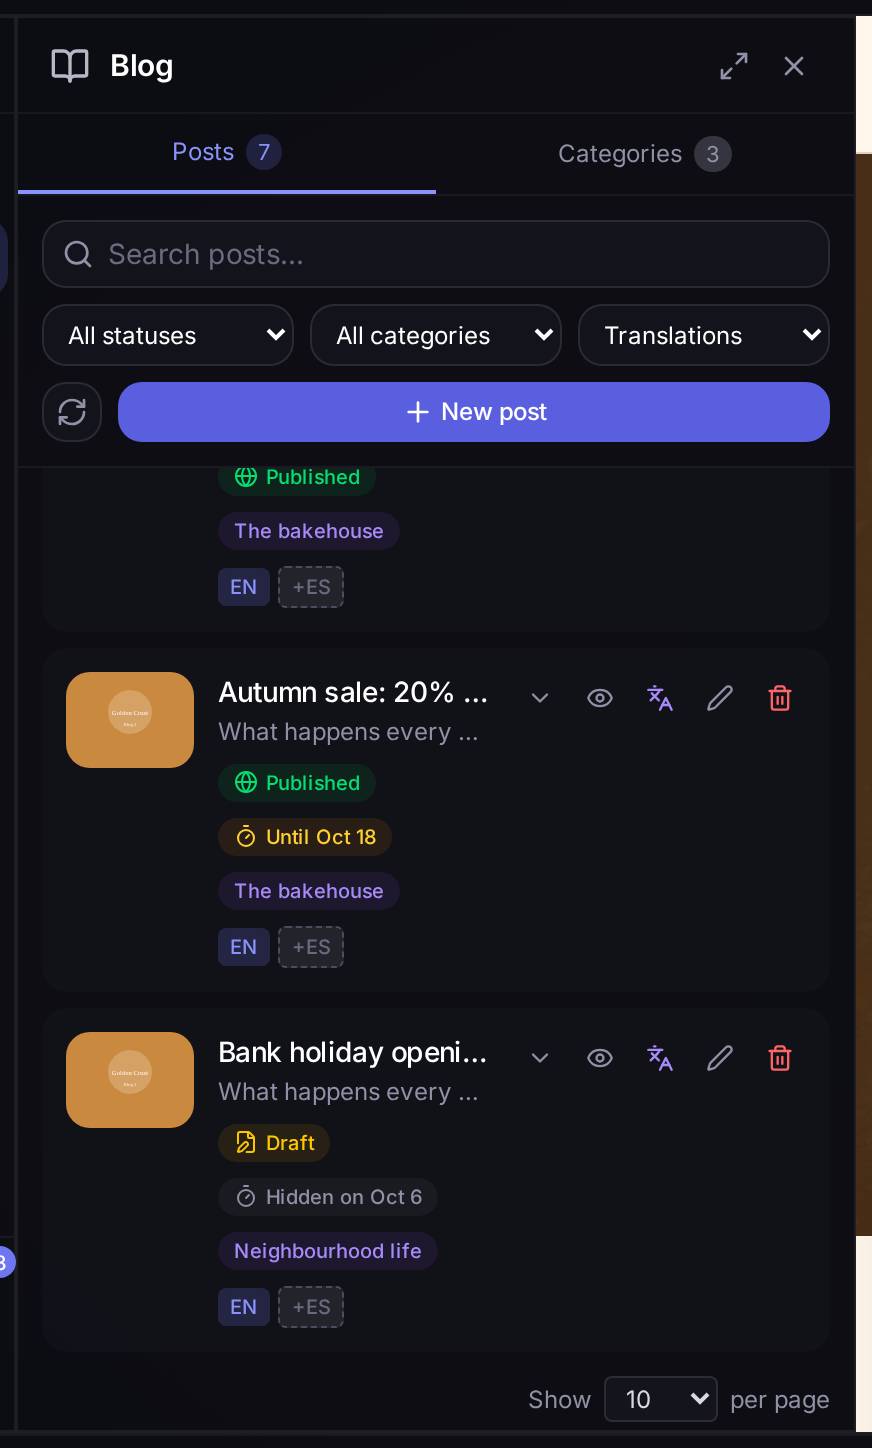
Let the AI do it. You don't need to set the date by hand. If, when you ask for the post, you say how long it's valid for —in Create with AI or in the editor chat—, the AI recognises it and sets the date itself. You'll then see it in the post's editor, in case you want to change or remove it.
A concrete example: an offer that ends on Sunday
- In the editor chat, write: "Publish a post about our autumn sale: 20% off every sourdough loaf until Sunday".
- The AI writes the post, publishes it and sets "Visible until" to Sunday at 23:59.
- In Blog → Posts the post carries the label "Until …".
- On Monday it's no longer on your website. If you extend the offer, open the post and change the date.
Watch out for…
- The time you pick is your browser's time.
- The date doesn't publish anything by itself: the post has to be Published (or Scheduled) to be visible until then. If you ask the AI without saying "publish", it leaves it as a draft, with its date already set.
- Publishing again a post that has already hidden itself leaves it with no end date, unless you set a new one.
- The date has to be in the future and, if the post is scheduled, later than its publication date.
- Each language has its own date. A translation starts with the original's date, but if you later change it in one language, change it in the others too.
The featured image
What it's forIt's the photo that represents the post: the one shown in the blog listing and when the link is shared on social media.
How to get thereInside a post's editor, under Featured image, click Gallery to pick an image already uploaded to the project (or drag a new one straight onto the upload area).
Watch out for… If the post already has a featured image set, this picker changes: instead of the gallery, you see the chosen image directly, with the option to remove it. The gallery only shows while the post has no image yet.
Blog categories
What it's forGrouping your posts by topic, so your visitors can filter the blog down to what interests them.
How to get thereThe book icon (Blog), the Categories tab.
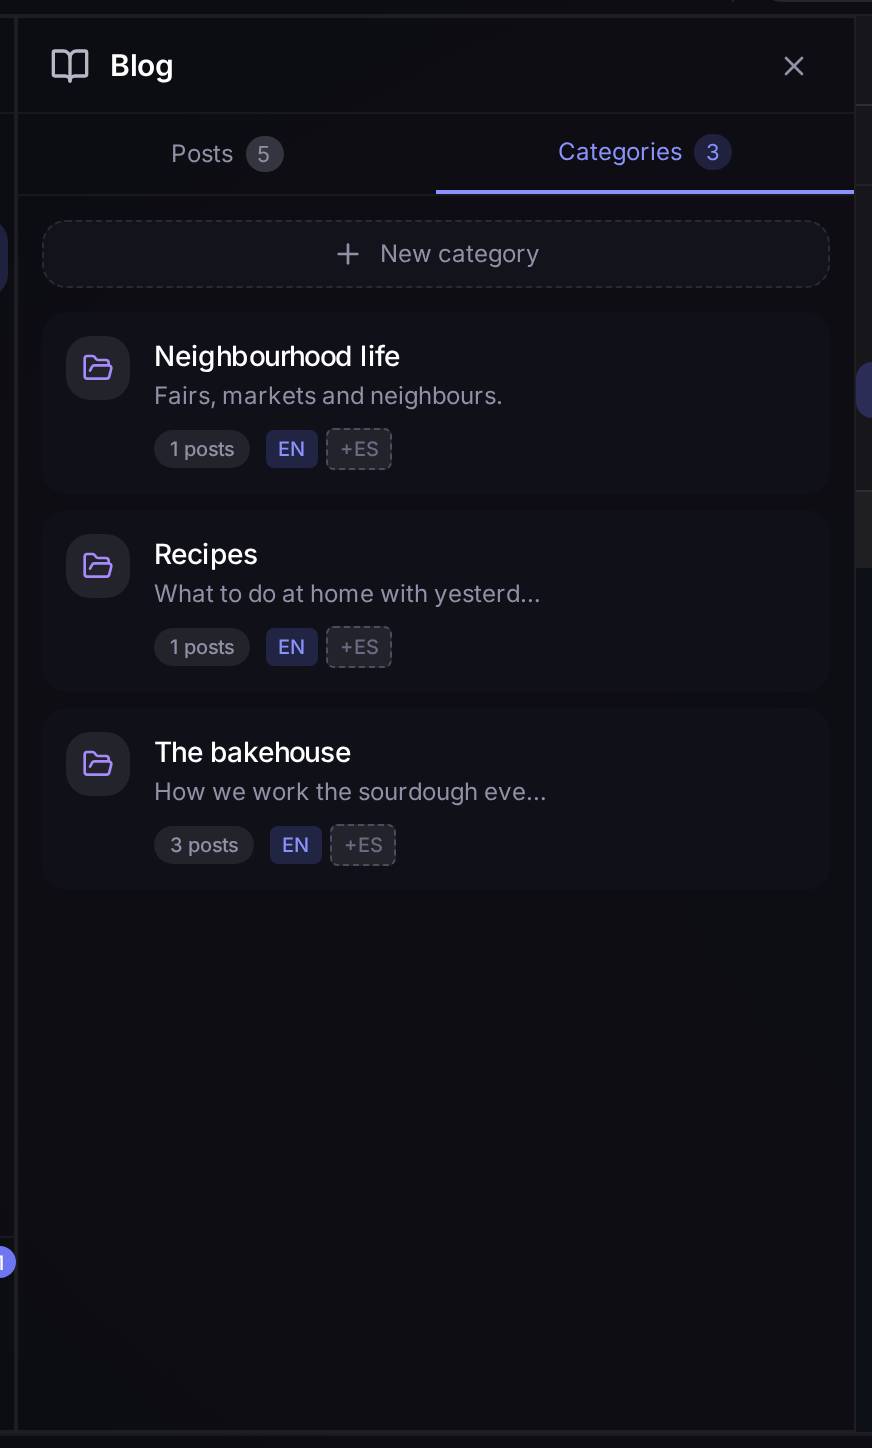
A concrete exampleYou want a category for your recipes using day-old bread: New category → name "Recipes" → description "What to do at home with yesterday's bread" → Save. From then on, whenever you write or edit a post you can assign it that category.
Posts and categories in other languages
What it's forJust as with pages, translating a blog post into another language without writing it again from scratch.
How to get thereIn the list of posts or of categories, the Manage translations button on an item.
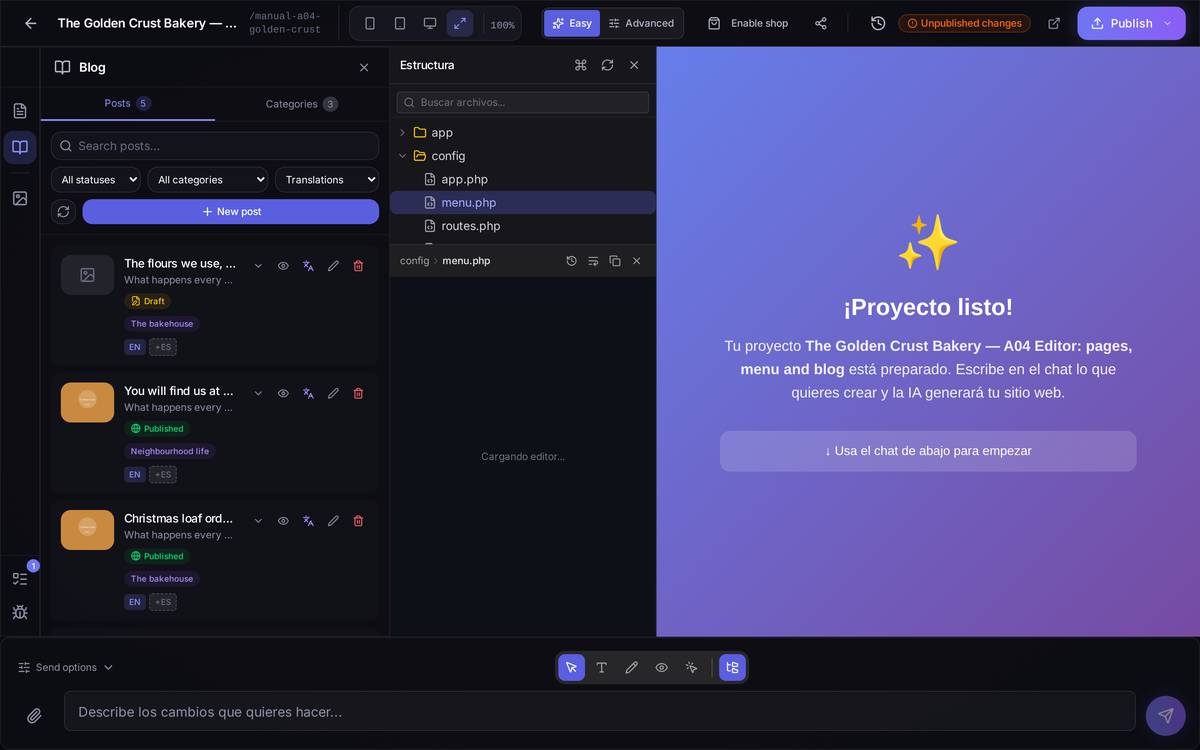
Watch out for… Same as with pages: the translation is an independent copy. If you correct the original post after translating it, the translation doesn't update itself.
4.5Your images and files
What it's forIt's your project's image library: you upload them here once and use them wherever you need — on a page, as a post's featured image, anywhere that asks for a photo.
How to get thereThe picture icon (Media) in the editor's left-hand bar.
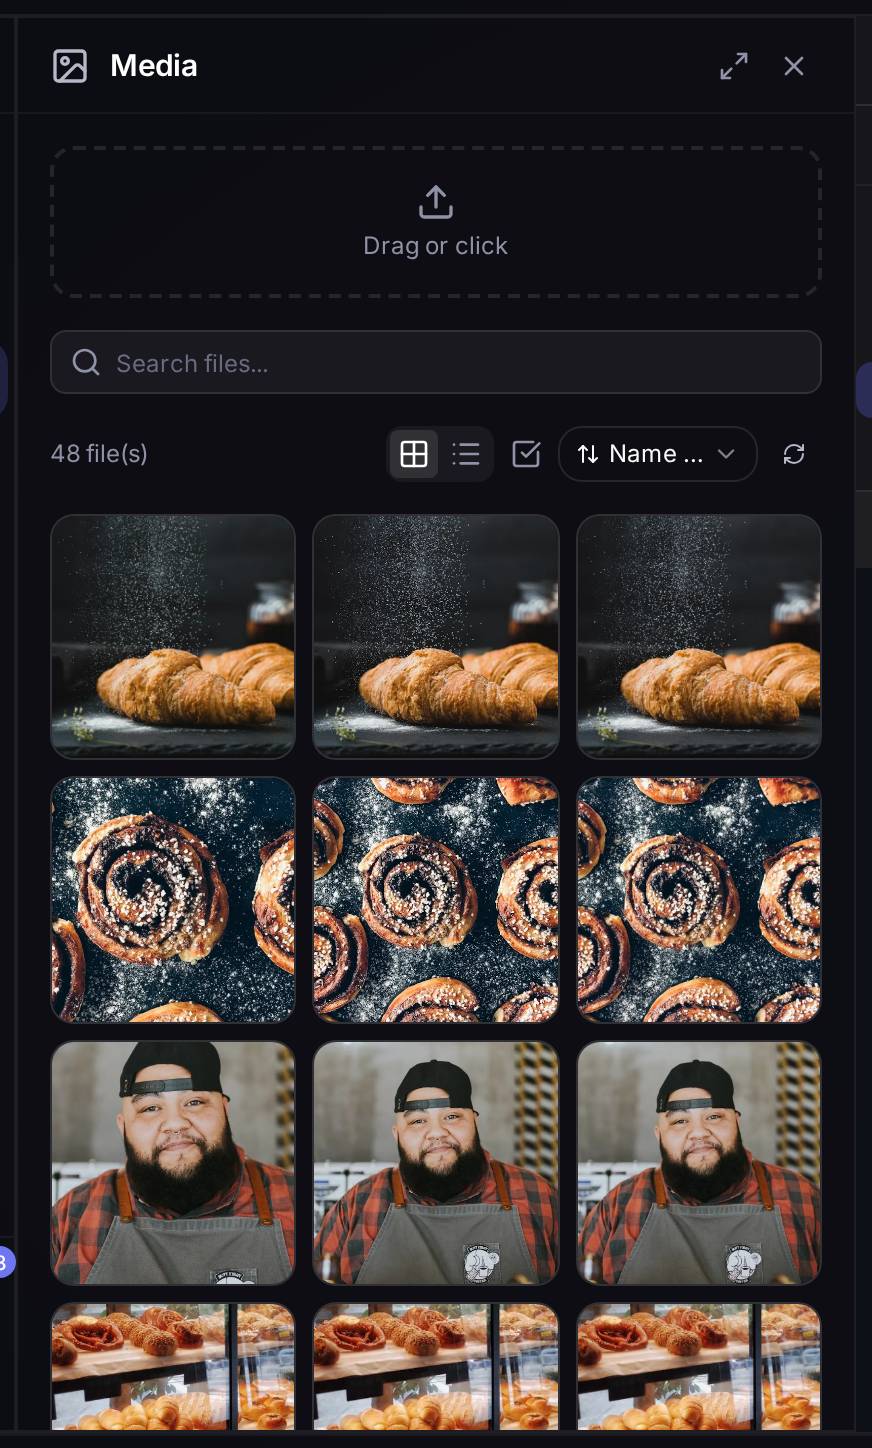
Watch out for… Deleting an image from here removes it from the library, not just from wherever you were using it: if that image is still in place on a page or a blog post, those slots are left without a photo.