Chapter 11 of 11
Shop: apps, shipping and settings
Turning features on, charging for delivery and getting the shop set up.
On this page
- 11.1The shop overview
- 11.2Apps: turning features on and off
- 11.3Building a custom app with the AI
- 11.4Delivery charges and zones (the full flow)
- 11.5The shop settings
- 11.6Getting data in and out of the shop
- 11.7Shop statistics
- 11.8Who changed what (the activity log)
- 11.9The project settings (not the shop ones)
- 11.10The shop in light or dark
- 11.11Things documented in other chapters
- 11.12Your shop's manuals
- 11.13Store accounts (assortment and store sheet)
This is where the shop is configured: which features it has, what you charge for delivery, how you take payment, what tax you apply and what the legal notice says. It's the part of the panel you touch least often but need to get right: almost everything decided on these screens affects what your customer sees and pays.
Two warnings before we start
- Many of these screens only appear in Advanced mode. Top right, in the shop header, there's an Easy | Advanced switch. In Easy mode the left-hand menu drops to six entries (Overview, Design, Apps, Products, Orders and Settings) and inside Settings you only get four tabs (General, Payments, Shipping and Legal information). If you can't find something, check that switch first. In this manual, whenever a screen needs it, it says so.
- Every screenshot was taken on an example shop, "The Golden Crust Bakery". The data (orders, customers, IBAN) is made up.
11.1The shop overview
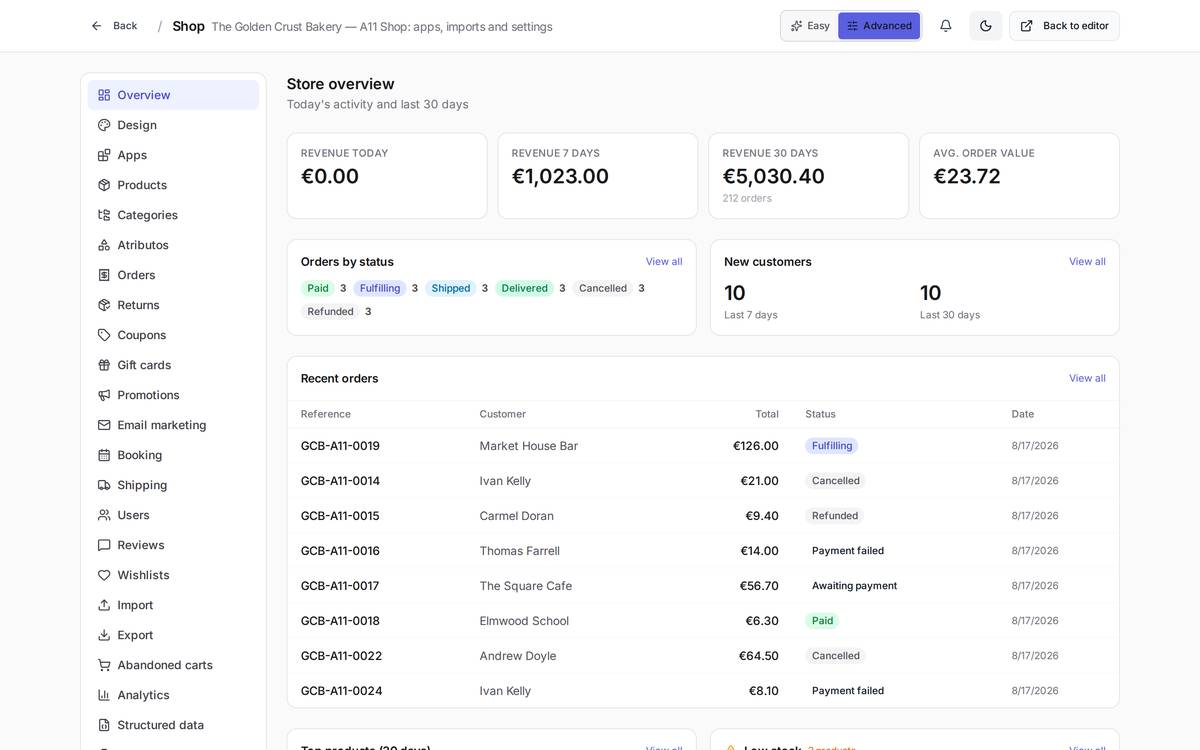
What it's forIt's the shop's home screen and what you look at every morning: how much you've sold today and over the last 30 days, which orders have come in, which products are running out and what's waiting for your attention.
How to get thereFrom your project's editor, click Shop in the header. It's the first screen that opens, the Overview entry in the menu. Visible in Easy mode too.
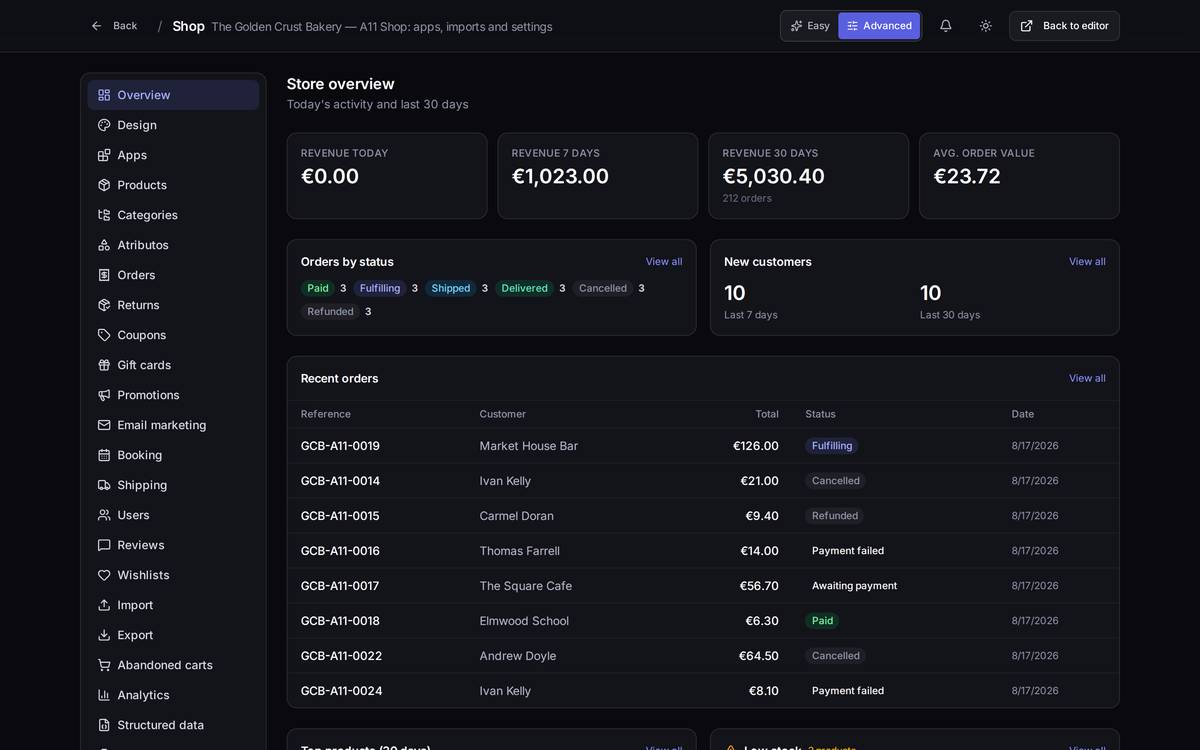
What's on screen
- Revenue today / 7 days / 30 days and Avg. order value. These are collected sales, not orders created. "Revenue today" sitting at €0.00 first thing in the morning is normal.
- Orders by status. Each pill is a status and the number of orders sitting in it. Click View all to jump to the order list already filtered.
- Recent orders. The eight most recent, with reference, customer, total and status.
- New customers. Signups in the last 7 and 30 days.
- Top products (30 days). What sells most, with a proportional bar.
- Low stock. Products about to run out. This is the card people look at most: if a product hits 0 it can no longer be bought.
- Abandoned carts / Pending returns / Reviews pending. Three counters of outstanding work; each one takes you to its own screen.
An exampleYou open the shop in the morning, see "Low stock: 3 products" and that the Cinnamon swirl is at 0. You click View all, open the product and put the day's stock in. Back on the overview, the card no longer flags it.
Watch out for… "today's" revenue and the "30 days" figure aren't calculated the same way: the 30-day block comes from the shop's consolidated history, so it can include orders that are no longer in the list (the ones you sent to the trash, for example). If the numbers don't tally to the cent, the order list is the one that counts.
11.2Apps: turning features on and off
What it's forYour shop doesn't ship with everything switched on. Apps are the features you can turn on or off: wishlists, reviews, mini cart, gift cards, subscriptions, bookings, selling to businesses… Turning an app on makes its section appear in the left-hand menu and its options appear in the storefront; turning it off makes them disappear.
How to get thereShop menu → Apps. Visible in Easy mode too.
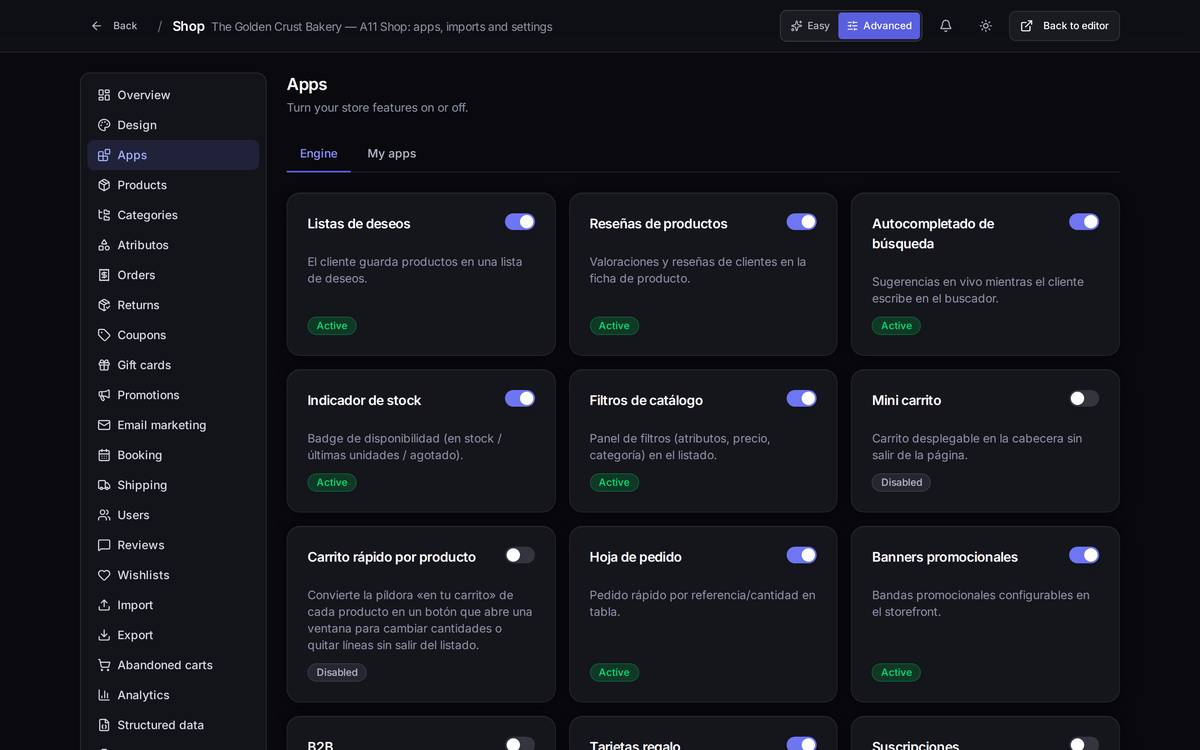
What's on screen
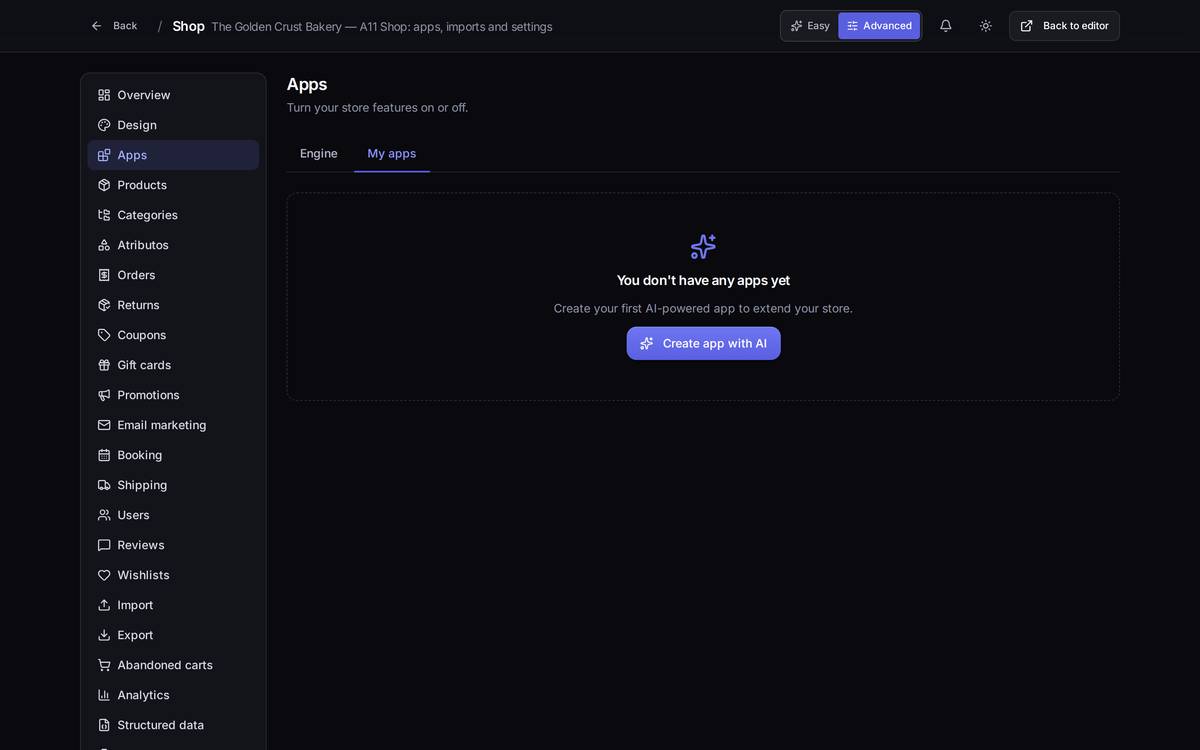
- Two tabs: Engine (the apps Speaksite ships) and My apps (the ones you build with the AI).
- Each card carries a name, a line about what it does and a switch. The change saves itself, with no save button.
- Click the card's name to open the app.
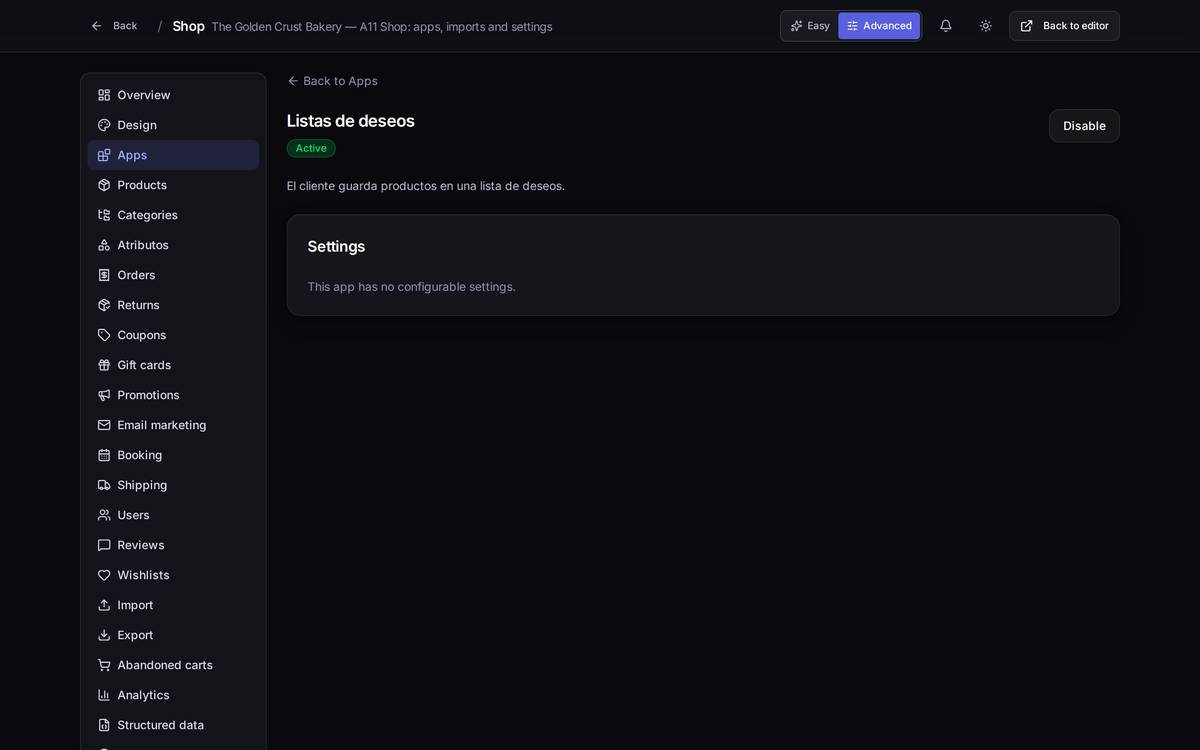
An exampleYou want your customers to be able to save products for later. Go into Apps, find the Wishlists card and flick its switch. The Wishlists entry appears in the left-hand menu, and in the shop every product gains its heart.
Watch out for…
- Turning an app off hides its section from the menu, but doesn't delete anything. Turn off Gift cards and the cards already sold still exist; you simply stop seeing them and customers stop being able to redeem them. Turn it back on and it all reappears.
- Turning off the mini cart or the catalogue filters changes the shop your customer sees immediately. Check it on the storefront before you call the change done.
- The app cards themselves are still labelled in Spanish (Listas de deseos, Mini carrito, Filtros de catálogo…): the catalogue hasn't been translated yet, so the names used in this chapter are the English equivalents. It's logged in the bug annex.
11.3Building a custom app with the AI
What it's forWhen no app in the catalogue does what you need, you can describe the feature you want to the AI and it builds you a draft for your shop.
How to get thereShop menu → Apps → My apps tab → Create app with AI button. Also available straight from the catalogue.
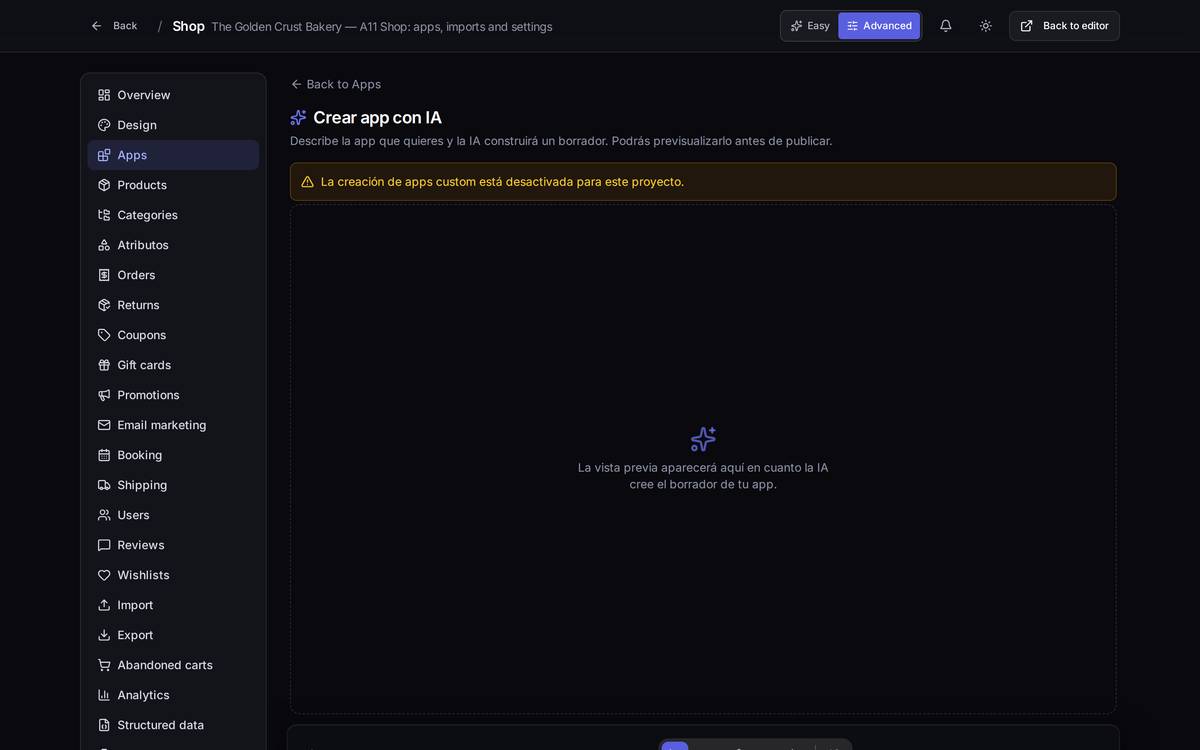
What's on screen
- The chat box at the bottom. That's where you describe the app in your own words. There's no form and no fields: it's a conversation.
- The preview in the middle. While there's no draft it stays empty. As soon as the AI builds the first version you see it running against your own shop, before you publish it.
- The notices at the top. They appear when something is stopping you from building:
- "Custom app creation is disabled for this project" (the one in the screenshot: the feature is switched off at platform level),
- "You have reached the maximum number of custom apps on your plan",
- "You have no AI queries left".
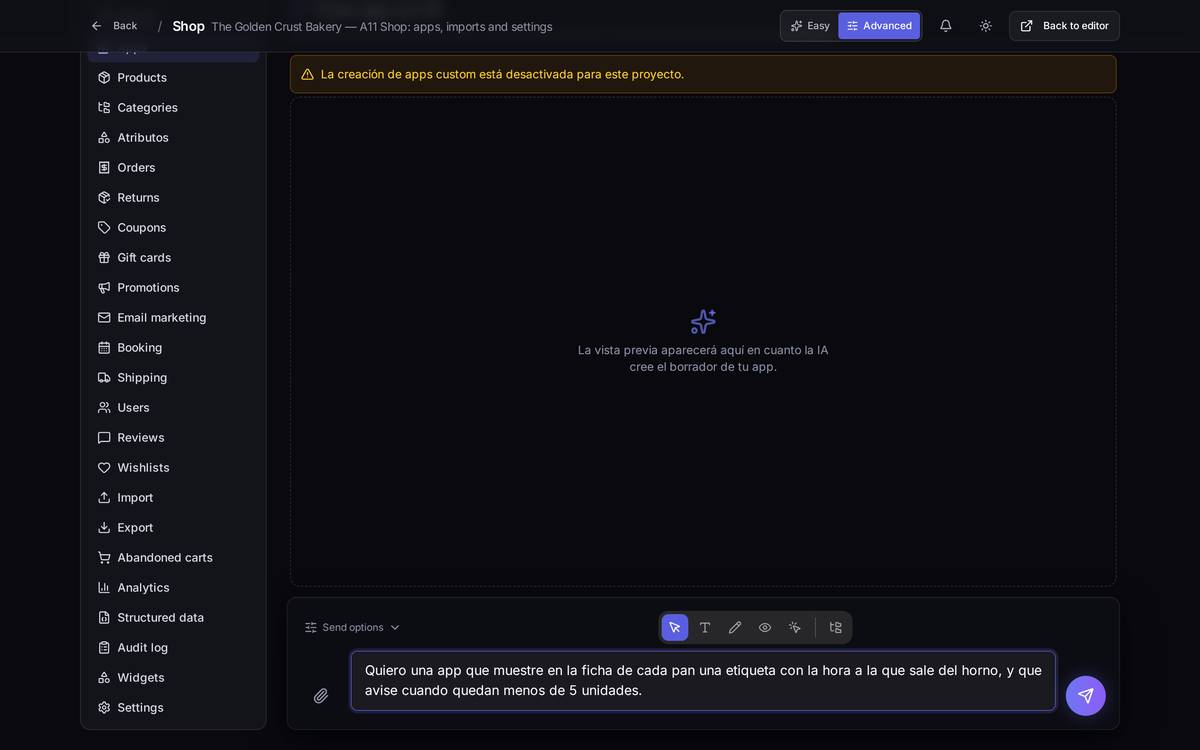
A worked exampleYou run a bakery and you want to advertise what time each loaf comes out of the oven. Go to Apps → My apps → Create app with AI and type: "I want an app that shows a label on each bread's page with the time it comes out of the oven, and warns when there are fewer than 5 left." Send it. The AI gets to work, a draft appears in the preview and you review it right there. Once you're happy, the AI itself asks you to confirm before publishing: until you say yes, your customers see nothing.
Watch out for…
- Every message spends AI queries from your plan. Write the whole request in one go rather than sending five short messages.
- Publishing is a separate step with an explicit confirmation. A draft doesn't touch your public shop. Review the preview before you approve.
- This screen could not be photographed with the feature switched on: in the environment where this manual was prepared it is disabled at platform level. The yellow notice in the screenshot is exactly what you'll see if it's off for you too; in that case turning it on isn't in your hands — ask Speaksite.
11.4Delivery charges and zones (the full flow)
This is the screen that gets touched most and the one that costs most money if you get it wrong. Speaksite has two levels of shipping and it's worth understanding the difference before you touch anything:
- One simple rule for the whole shop (Settings → Shipping tab): no shipping, free shipping, or a flat rate. This is what applies if you haven't created any methods.
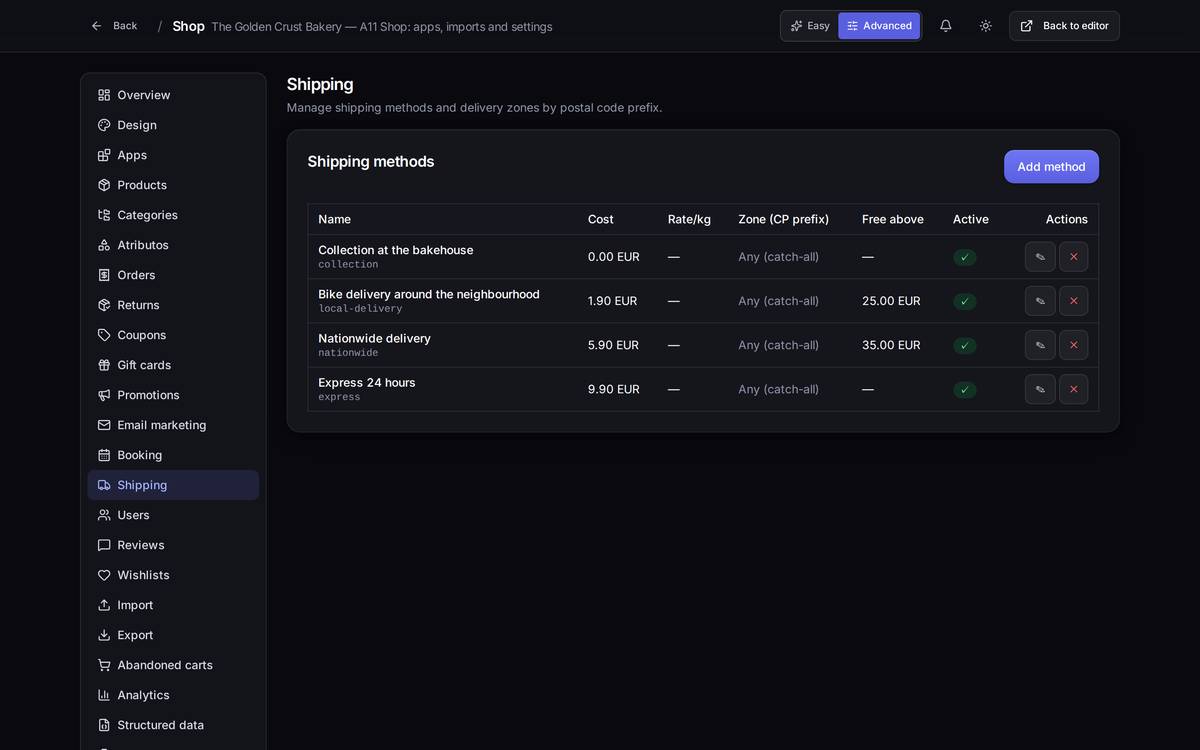
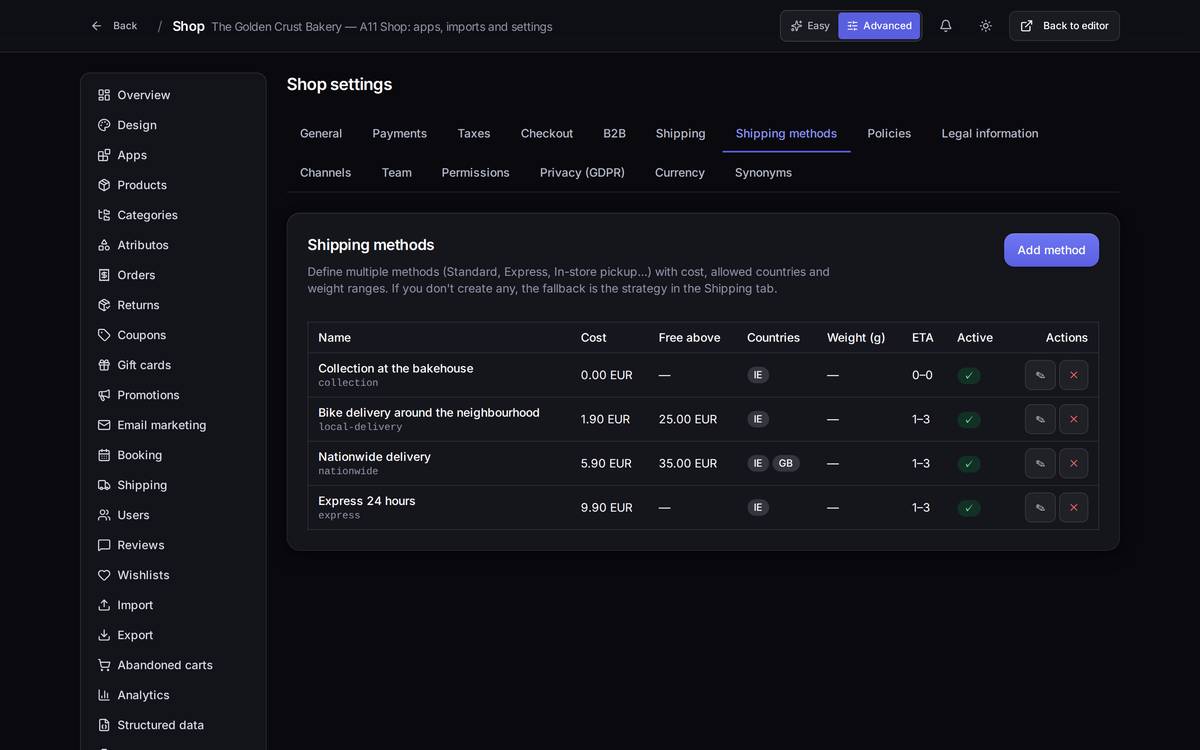
- Shipping methods by zone (the Shipping entry in the shop menu, or Settings → Shipping methods tab): a list of options —collection, local delivery, nationwide, offshore…— each with its price, its postal-code zone and its free-shipping threshold. The moment one method exists, the list takes over and the simple rule stops applying.
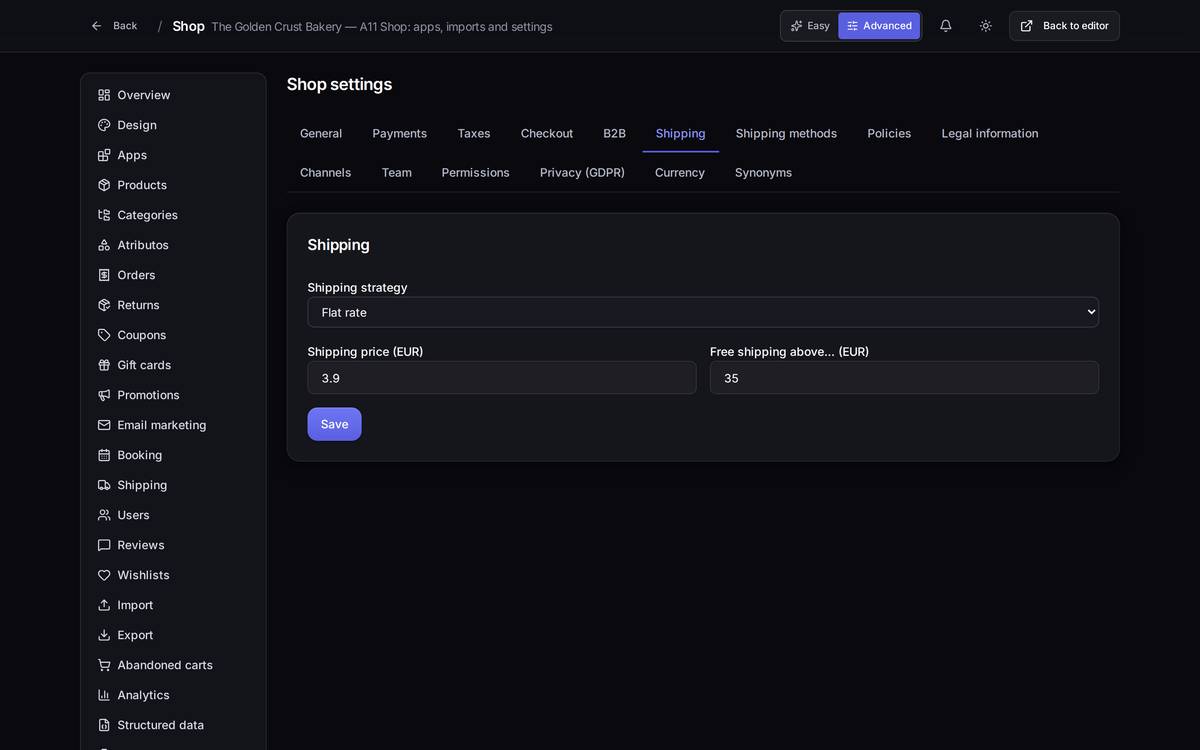
Where the list of methods lives
How to get thereShop menu → Shipping (Advanced mode required). The same methods also show under Settings → Shipping methods tab, but that screen doesn't show the zone column: to work with postal codes always go in through the menu.
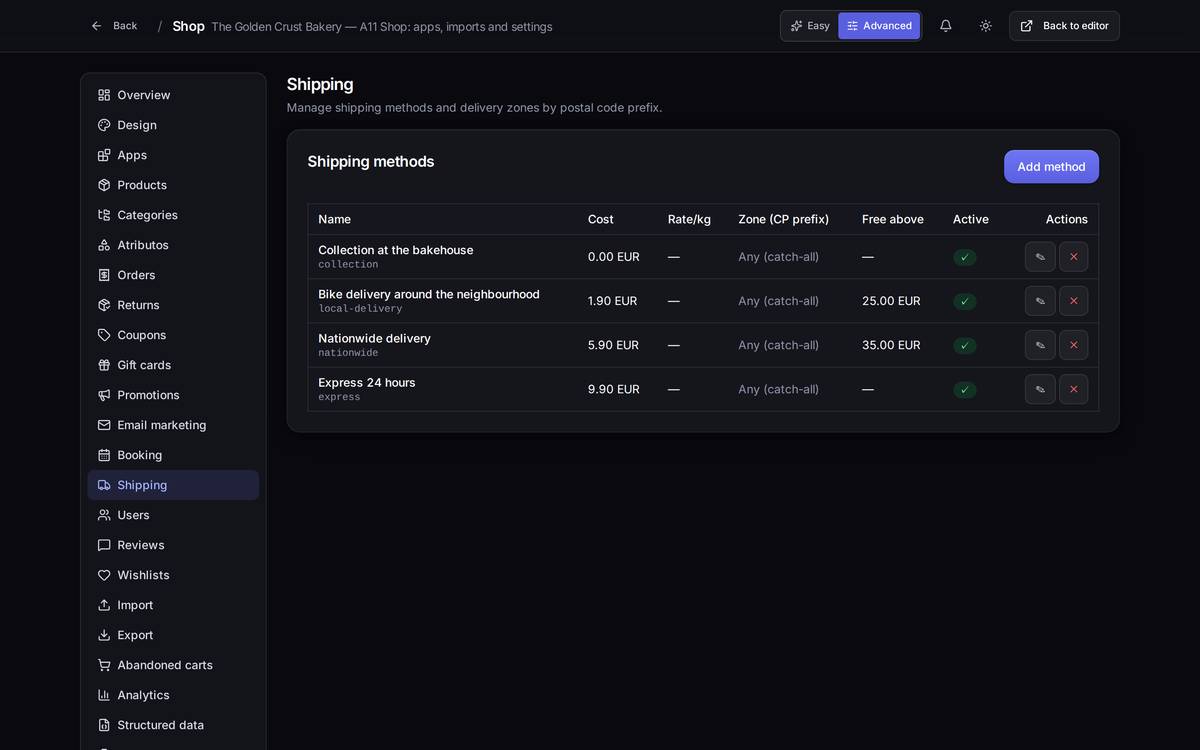
What each column holds
- Name: what the customer reads at checkout. Underneath, in grey, the internal code (
collection,express…), which the customer never sees. - Cost: what gets added to the order.
- Rate/kg: a surcharge per kilo. A dash means there's no surcharge.
- Zone (CP prefix): the first few characters of the postal code the method covers. "Any (catch-all)" means it's offered to everybody.
- Free above: the order value at which shipping drops to 0.
- Active: if it's ticked the customer sees it; if not it stays saved but hidden.
A full example: charging €4.50 in central Dublin
Let's create a zone from start to finish.
Step 1. Shipping menu → Add method button. An empty form opens.
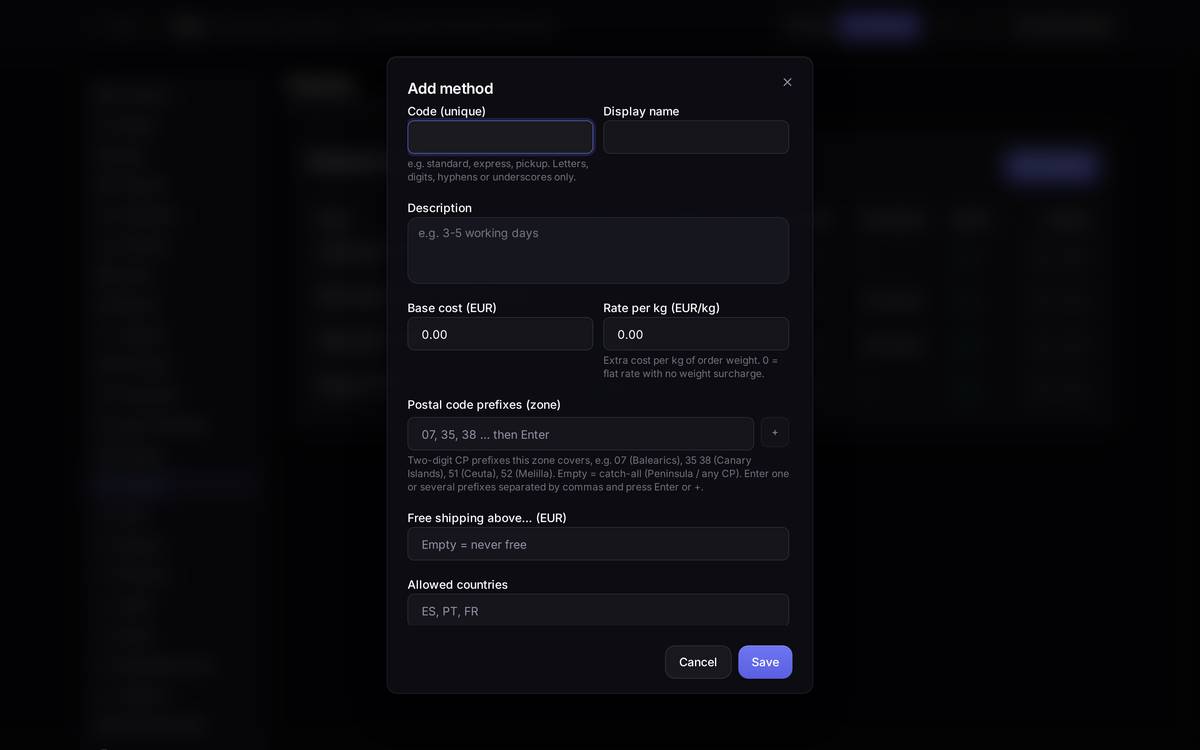
Step 2. Fill it in, top to bottom:
- Code (unique):
dublin-city. It's an internal identifier: letters, numbers, hyphens and underscores only, and it can't be repeated within the shop. - Display name:
Dublin City Centre. This one your customer does read. - Description:
Delivery within 24-48 h to central Dublin postcodes. - Base cost (EUR):
4.50. - Rate per kg (EUR/kg):
0.60if you want to charge more for heavy orders, or0for a flat rate. - Postal code prefixes (zone): type
D01, D02and press Enter or the + button. Each prefix becomes a blue tag; to remove one, click its cross. If you leave this empty, the method is offered across the whole country. - Free shipping above… (EUR):
40. Leave it empty if you never want to give it away. - Allowed countries:
IE. Empty = all countries. - Further down, optional: minimum and maximum weight (so a method only shows on orders of a certain size), delivery days and the order it's listed in.
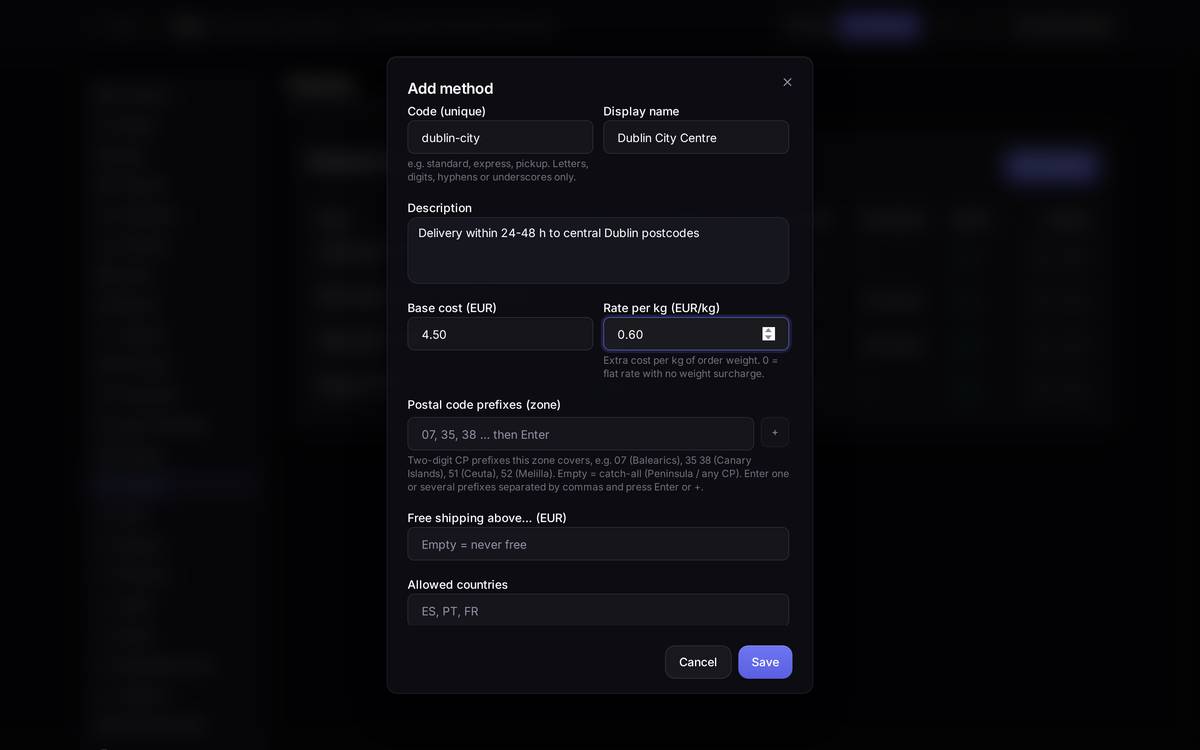
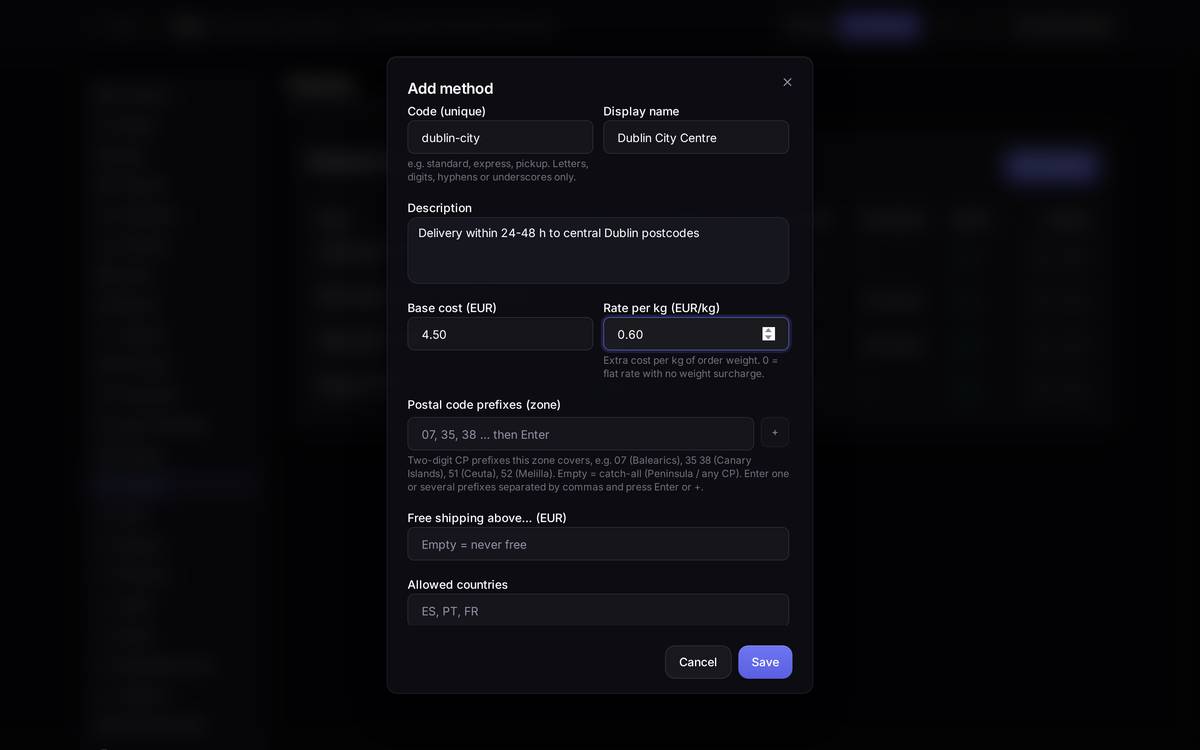
D01 and D02 are already tags: that's what defines the zone.Step 3. Click Save. The window closes and the new zone appears in the table you saw earlier, with its prefixes in blue. To check it really saved, reopen it with the pencil in the Actions column:
Step 4 (the check). Open your shop, put something in the basket and get to the payment step with a Dublin postcode. The new option should appear. Try a postcode from outside the zone too: if no method covers that area, that customer will not be able to complete the purchase.
When something goes wrong
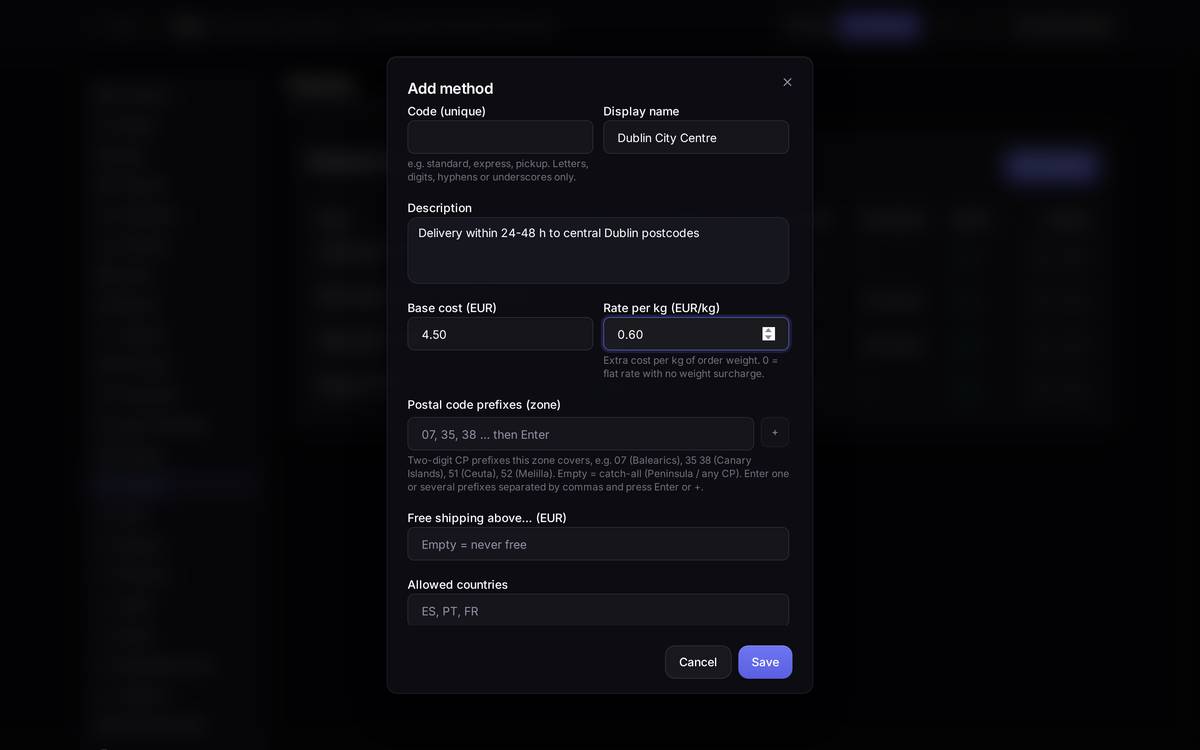
If you click Save and nothing happens, it's almost always one of two things: the Code is missing, or you've repeated a code that already exists. Close the window with Cancel, look at the list and go back in checking those two fields.
Watch out for…
- Creating your first method changes the rules for the entire shop: the flat rate or free shipping from Settings → Shipping stops applying the moment a method exists. If all your customers suddenly see a delivery price you weren't expecting, look here.
- A customer whose area no method covers cannot buy at all. Always leave at least one method with an empty zone (catch-all) as a safety net.
- Deleting a method cannot be undone. If you only want to withdraw it for a while, edit it and untick Active: it stays saved and stops being visible.
- Prefixes are prefixes, not whole postcodes:
D02covers every postcode starting with D02. For all of the Dublin postal districts,Don its own is enough.
Per-product delivery charges
What it is forSome articles cost more to send whatever method the customer picks: the fragile ones, the frozen ones, the ones that go on a pallet. Instead of raising the price of every delivery method, you give those articles their own charge. It lives in the Per-product delivery charges card, just below the list of methods in the Shipping menu.
What a rule is. A rule says three things:
- What it applies to. Articles you pick yourself from a list, a whole family, or a subfamily. You can mix them: "these four articles and also everything in Frozen".
- How much it charges. A fixed amount, a per-kilo surcharge, or both. If you tick per unit, the amount is multiplied by the quantity in the basket.
- Whether it adds or replaces. Surcharge (the usual one) is added to the delivery method the customer chose. Replace ignores the method's price and charges the rule's instead. A pallet is usually "replace": it makes no difference that they had picked Standard at €4.50.
The usual example. You want everything in the Frozen family to pay €6 more:
- Shipping menu → Per-product delivery charges card → Add rule.
- Name:
Frozen. Leave the mode on Surcharge. - Amount:
6. - Under Families and subfamilies, find Frozen and tick it. Leave include subfamilies on if you want it to reach whatever hangs off it too.
- Save.
Check it before a customer pays it. The Test a basket button (above the table, next to New rule) lets you drop in a few articles and a postcode and shows you exactly what would be charged, broken down by which rule applied and how much each one adds. It is not a separate simulation: it uses the same arithmetic as the real basket.
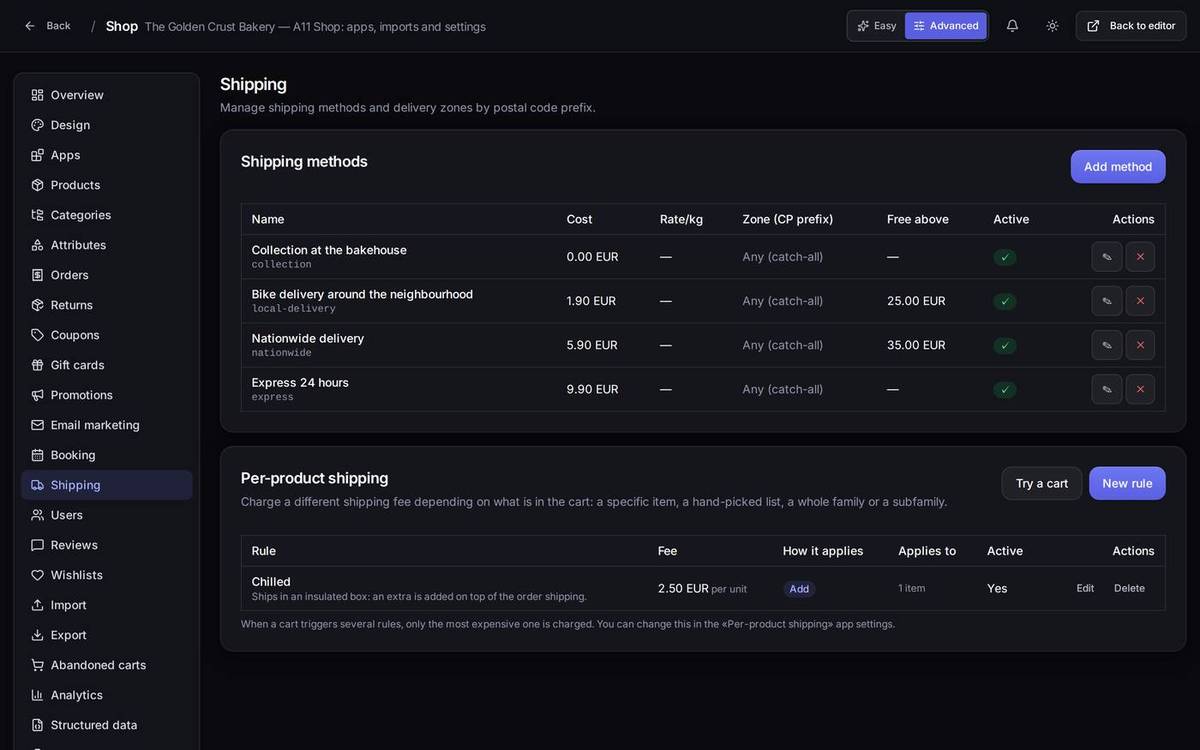
When several rules match. If the basket carries something fragile and something frozen, by default only the more expensive of the two charges is applied. That is the one that surprises the buyer least. In the app's settings you can change it to add once per distinct rule, or to add once per basket line — but think twice: adding up is the fast lane to a €40 delivery and an abandoned basket.
When two rules reach the same product, the more specific one wins, not the newer one: what you assigned by hand to the product beats the subfamily, and the subfamily beats the family.
The customer sees it coming. With the app switched on, the product page warns that the article carries a special delivery charge and how much it is, and the postcode calculator breaks down where every euro comes from. If you would rather not announce it on the product page, switch Warn on the product page off in the app's settings: the charge is still made, but the customer does not see it until the basket.
Careful with the per-kilo surcharge. A rule's €/kg is worked out from the weight of the articles the rule reaches, not the whole basket.
11.5The shop settings
Everything that follows is in the same place: shop menu → Settings. What changes is the tab. In Easy mode you'll only see four (General, Payments, Shipping and Legal information); the rest require Advanced mode.
General
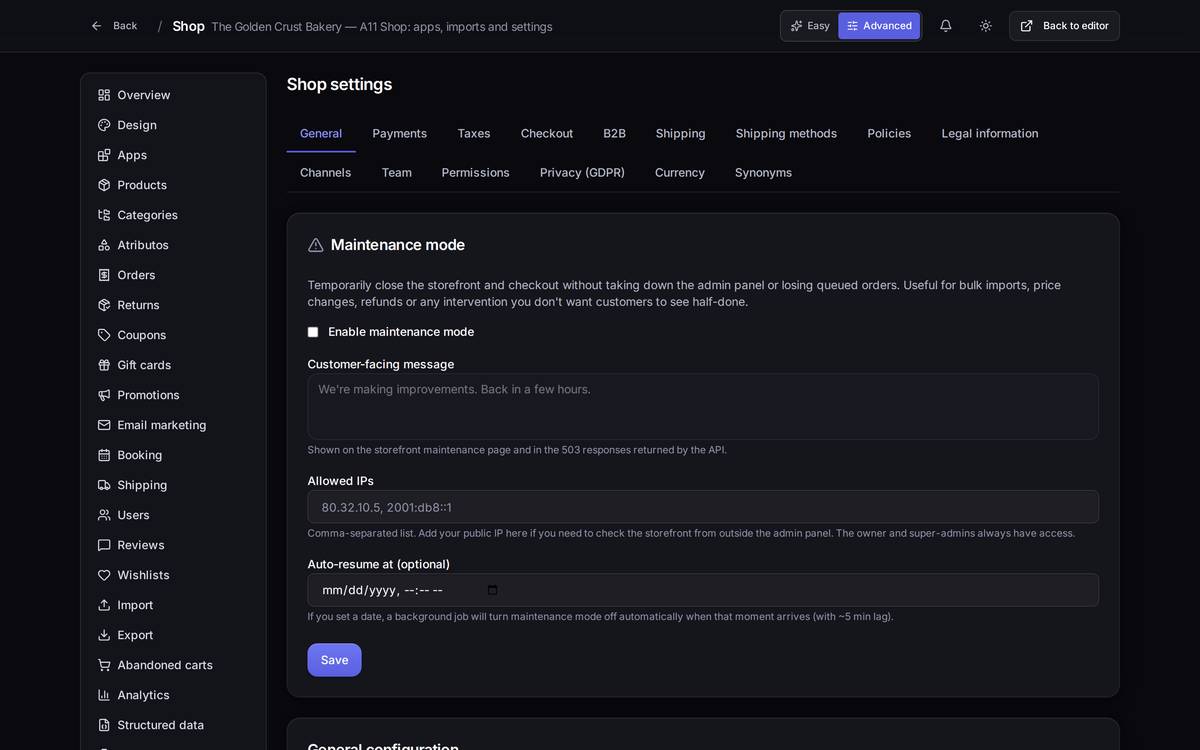
- Country your shop operates in. This isn't decoration: it decides which modules appear. With Spain you get Bizum and pay-later methods, AEAT invoicing and VeriFactu; with any other country those tabs disappear from the panel.
- Currency. The currency you actually charge in.
- Display currencies. Extra currencies the customer can see for reference. The charge is always made in the main currency.
- Notification email. Where new-order alerts reach you.
- Tax rate. Careful with this field: it's entered in basis points (2100 = 21%). It's explained on the screen itself, but it's the number one cause of wrong VAT.
- Tax-inclusive prices: whether your prices already include tax or it's added at the end.
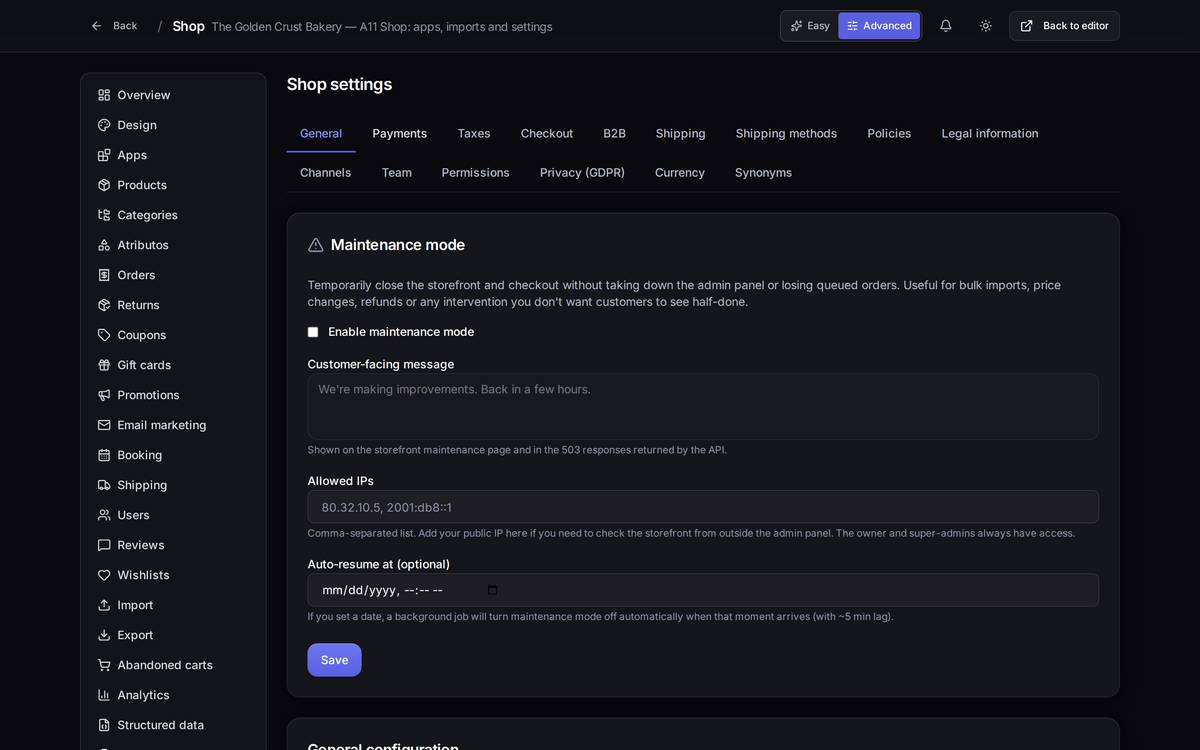
- Maintenance mode: closes the shop to the public while leaving the rest of the site standing. Useful while you're changing prices.
Watch out for… changing the country once you're already selling: it hides tabs you were using (Spanish invoicing, for instance) and changes the suggested currency. Changing the currency when you already have orders doesn't convert anything: your products keep the same numbers, only the symbol changes.
Payments — read it all before touching anything
What it's forConnecting the way the money reaches your account. Speaksite never handles the money: you get paid, through whichever gateway you connect.
How to get thereSettings → Payments tab. Visible in Easy mode too.
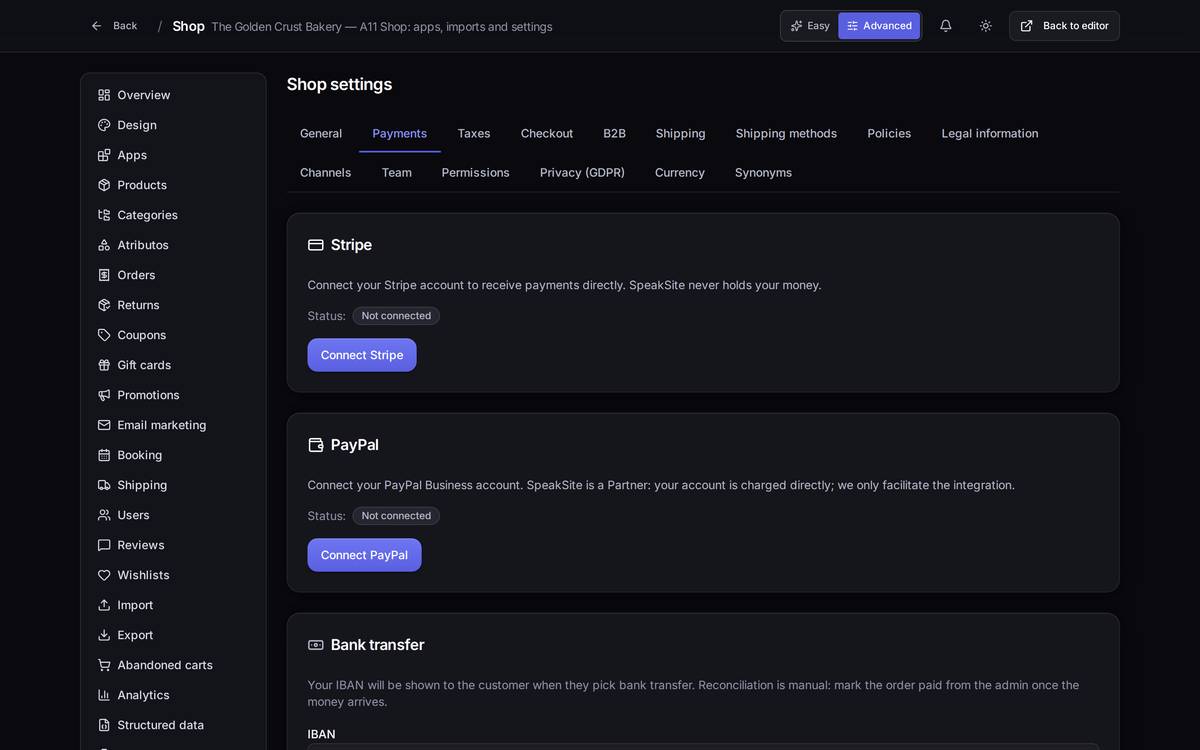
The four ways of getting paid
- Stripe (card). You connect it with the Connect Stripe button: it takes you to Stripe, you identify yourself there and come back. No keys to copy.
- PayPal. Same again: Connect PayPal.
- Bank transfer. You enter your IBAN and the account holder. The customer sees those details when they choose transfer and pays you by hand. Reconciliation is yours: when the money arrives, you mark the order as paid.
- Redsys (the virtual POS used by Spanish banks). Here you do have to copy details your bank gives you: Merchant code (FUC), Terminal and Secret key (SHA256).
Test and live: the mistake that costs most. Redsys has an Environment dropdown with two values:
- Test (sis-t.redsys.es) — the test bank. Test cards work and nothing is really charged.
- Live (sis.redsys.es) — the real one. Money really moves.
Each environment has its own keys, and they are not interchangeable. That's where the two classic accidents come from:
- Test keys on a shop that's already selling: your customers pay against the test bank, the order is marked as paid and the money doesn't exist.
- Live keys with the environment set to Test (or the other way round): every payment fails and you can't work out why. The symptom is one order after another sitting in "Payment failed".
Rule of thumb: when you move from test to live, change both things at once — the environment dropdown and the secret key — and make a real €1 order with your own card before you announce the shop.
About keys and security. The secret key is written in but never shown again: come back to the screen and you'll see an empty field with a note that one is already stored. That's deliberate. Don't copy it into emails, shared documents or screenshots: no real key appears anywhere in this manual, and none should appear in yours either. If you suspect one has leaked, ask your bank for a new one and change it here; the old one stops working.
A worked exampleYour bank sends you the FUC, the terminal and two keys (one for testing and one live). First you paste the test one, leave the environment on Test, save, and make a complete purchase in your shop with a test card: the order should reach you marked "Paid". Once that works, you come back here, paste the live key, switch the environment to Live, save, and repeat the purchase with your real card for the smallest amount you can. Only then do you open the shop.
Watch out for… enabling a payment method on the Checkout tab without having configured it here: it will be flagged as "Missing details" and your customer may end up unable to pay.
Spanish payment methods
Bizum runs inside Redsys: it needs the same POS configured. The pay-later options are agreements with finance companies and ask for their own credentials too.
Taxes
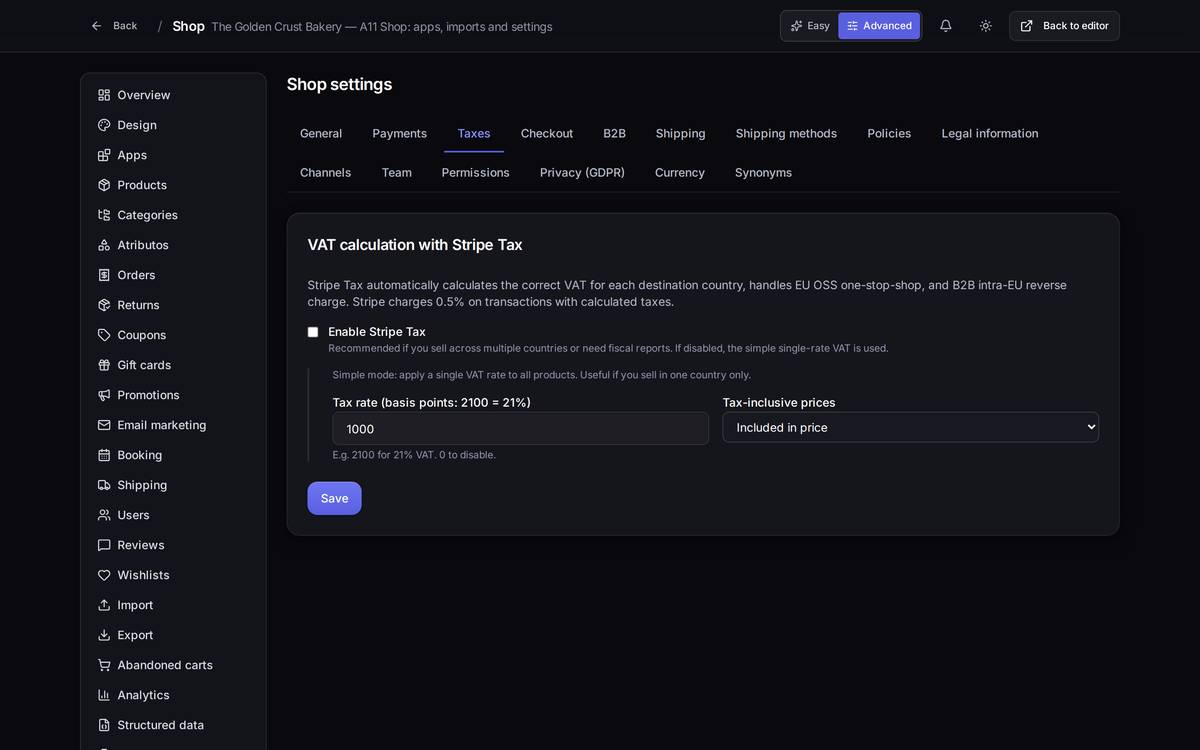
You have two ways of working: the simple VAT rate on the General tab (one percentage for everything) or automatic calculation, which applies the right rate depending on where you're shipping to, handles the EU one-stop shop and B2B reverse charge. The automatic option needs your origin address filled in and carries a fee from the gateway.
Watch out for… changing your VAT regime halfway through a quarter: orders already issued are not recalculated. If you sell outside your own country, talk to your accountant before touching it.
Checkout
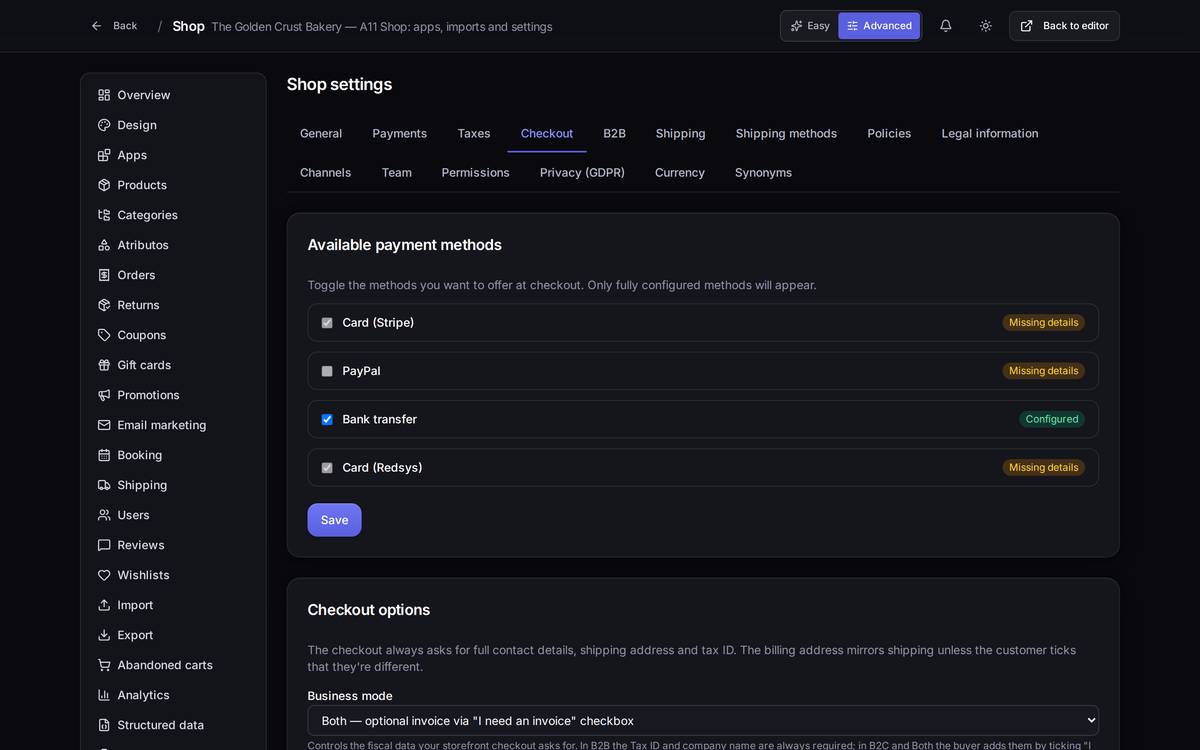
Here you choose which of the configured payment methods are shown to the customer and what details they're asked for. The fewer fields, the fewer abandoned baskets; but if you invoice, you need the tax ID.
Selling to businesses
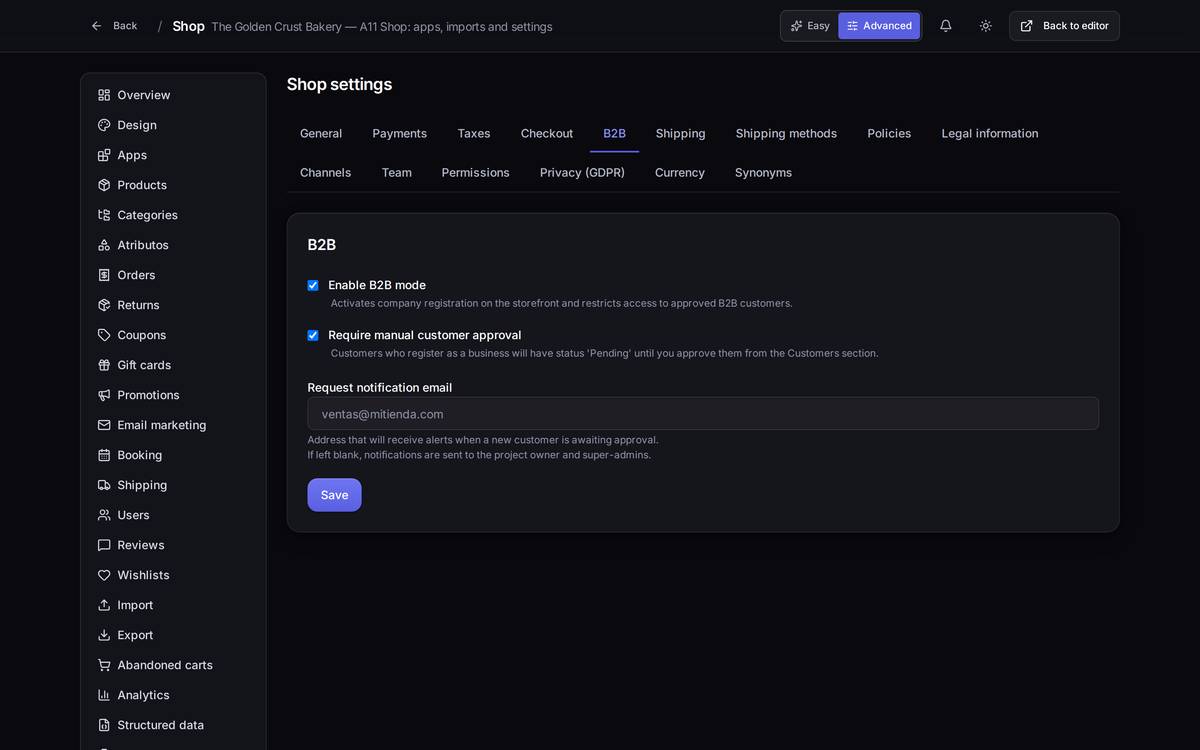
Turn it on and a company registration appears in the shop. With manual approval switched on, each signup stays "Pending" until you approve it from Customers: that's what stops just anybody signing up on wholesale prices.
Shipping methods
Policies
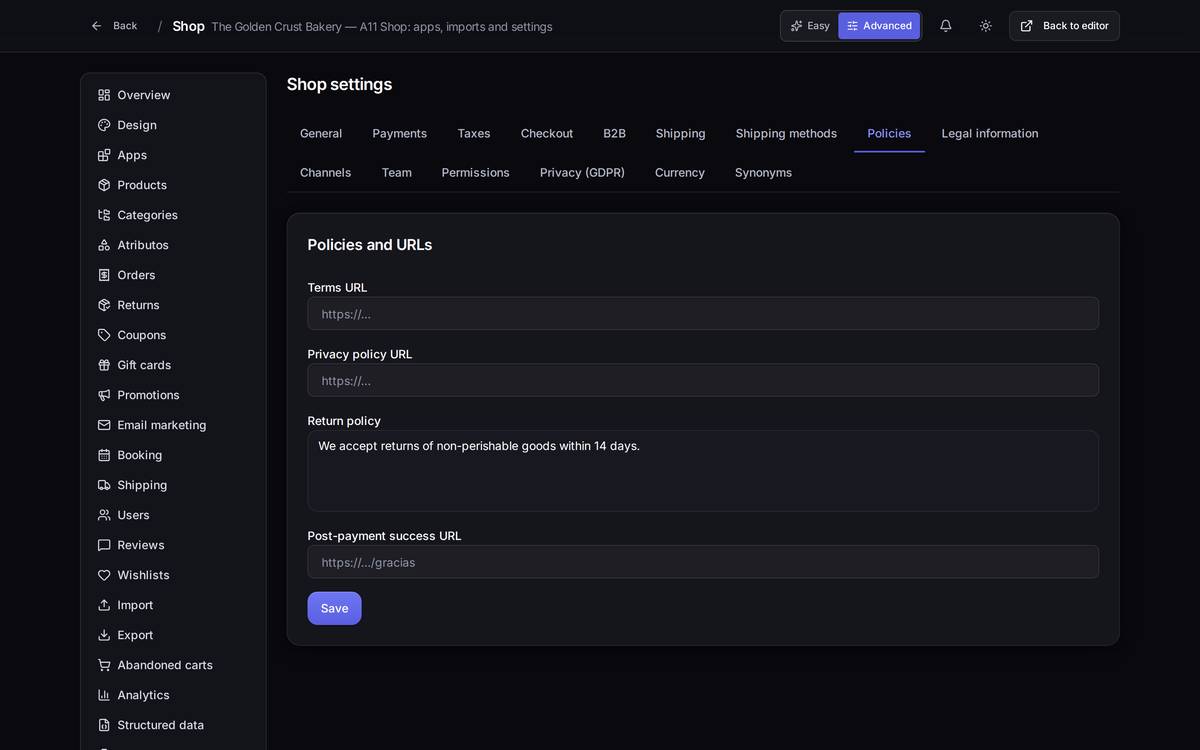
These are links, not texts: they point at pages on your own site. If you leave them empty, checkout has nothing to link to.
Legal information
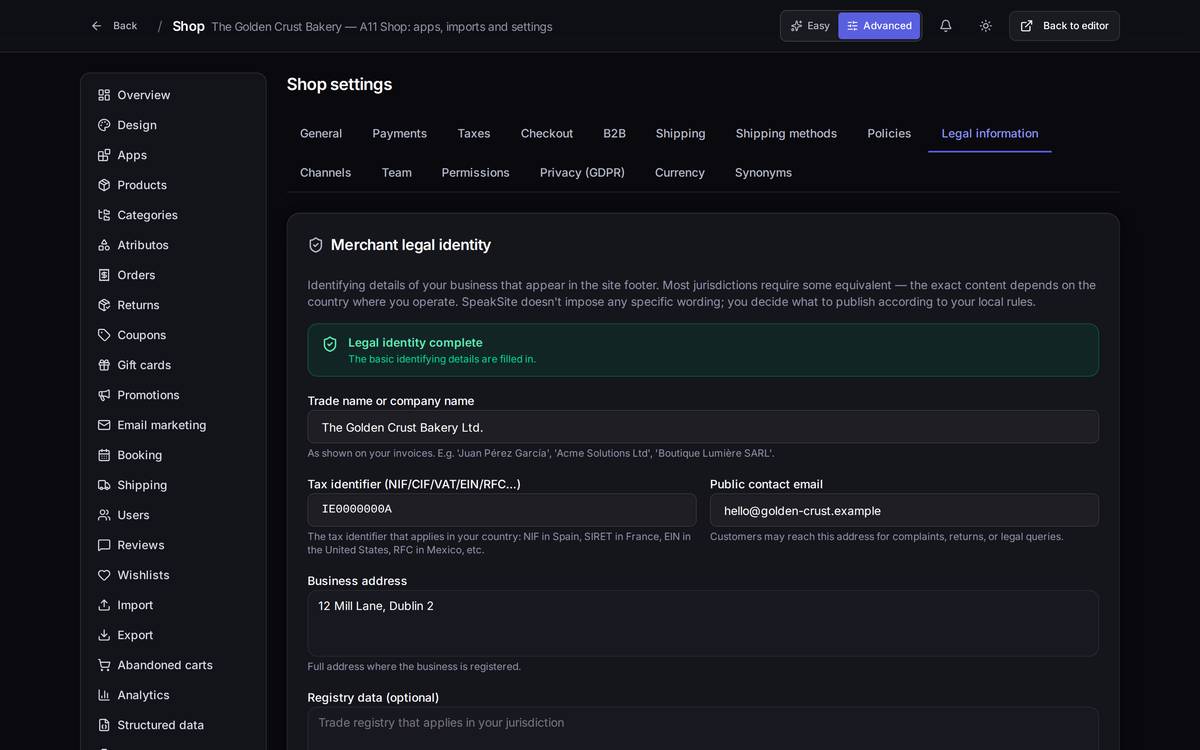
shop.settings.legal.generator…), and the page names themselves are still in Spanish; it's a known bug and it's in the annex.What's on screen
- Trade name or company name, Tax identifier, Public contact email and Business address. With those four filled in, the light at the top turns green.
- Registry data and Additional legal information: optional, only if your line of work requires them (professional registration number, authorisations…).
- Show legal warranty text on each new physical product page: tick this and you have to write the text yourself on each product; Speaksite doesn't draft it.
- Withdrawal form (PDF): the path to the form once you've uploaded it to your files.
- The generator: creates a draft Legal Notice, Privacy Policy, Cookie Policy, Terms and Conditions and Return Policy from the details above.
An exampleYou fill in company name, tax ID, email and address, save, and scroll down to the generator. You click the button on the "Legal Notice" row: the page is created with your details. You repeat for the other four, open them in the editor and read them all the way through before publishing.
Watch out for…
- Generating a page again replaces whatever was there. If you had tweaked it by hand, you lose those tweaks. The confirmation window warns you… once the text in that window has been translated (see the annex).
- Speaksite does not give legal advice. The generated texts are a neutral starting point: go through them with whoever looks after your business before you publish the site.
Sales channels
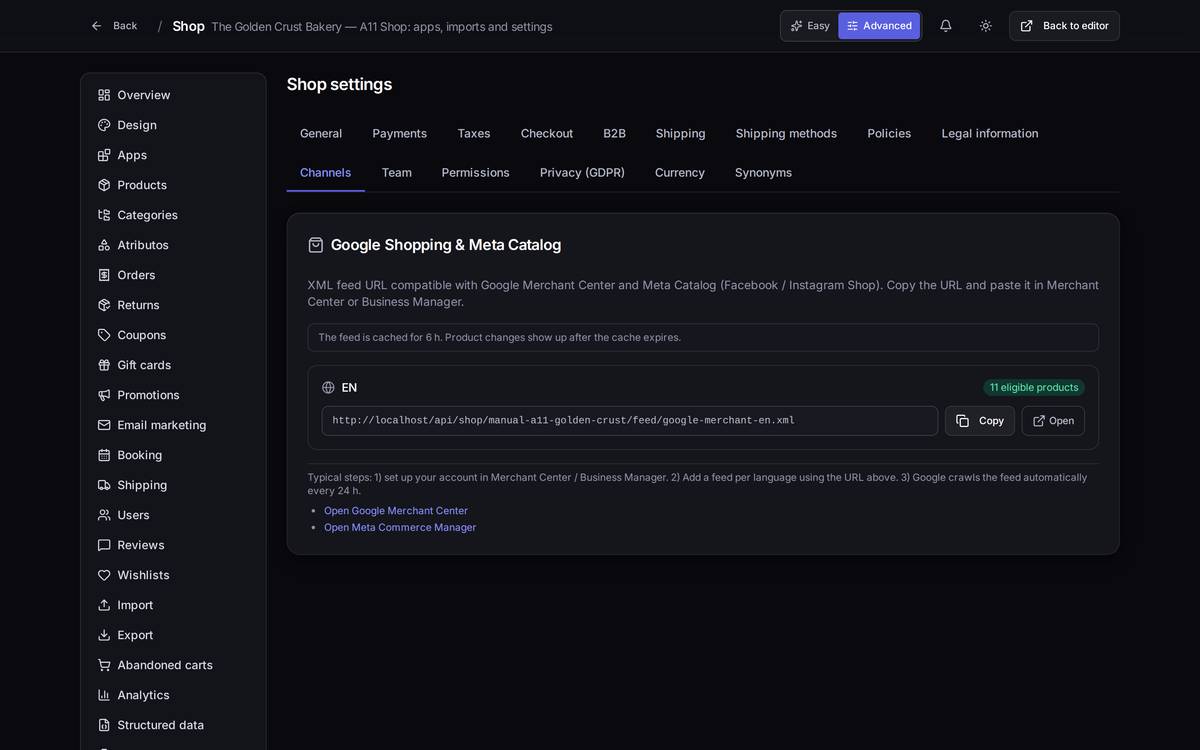
Speaksite generates a file with your catalogue automatically. You copy that address and paste it into your Google or Meta account; they read it periodically. Product changes take as long to show up as it takes the cached copy to expire.
Spanish invoicing and AEAT
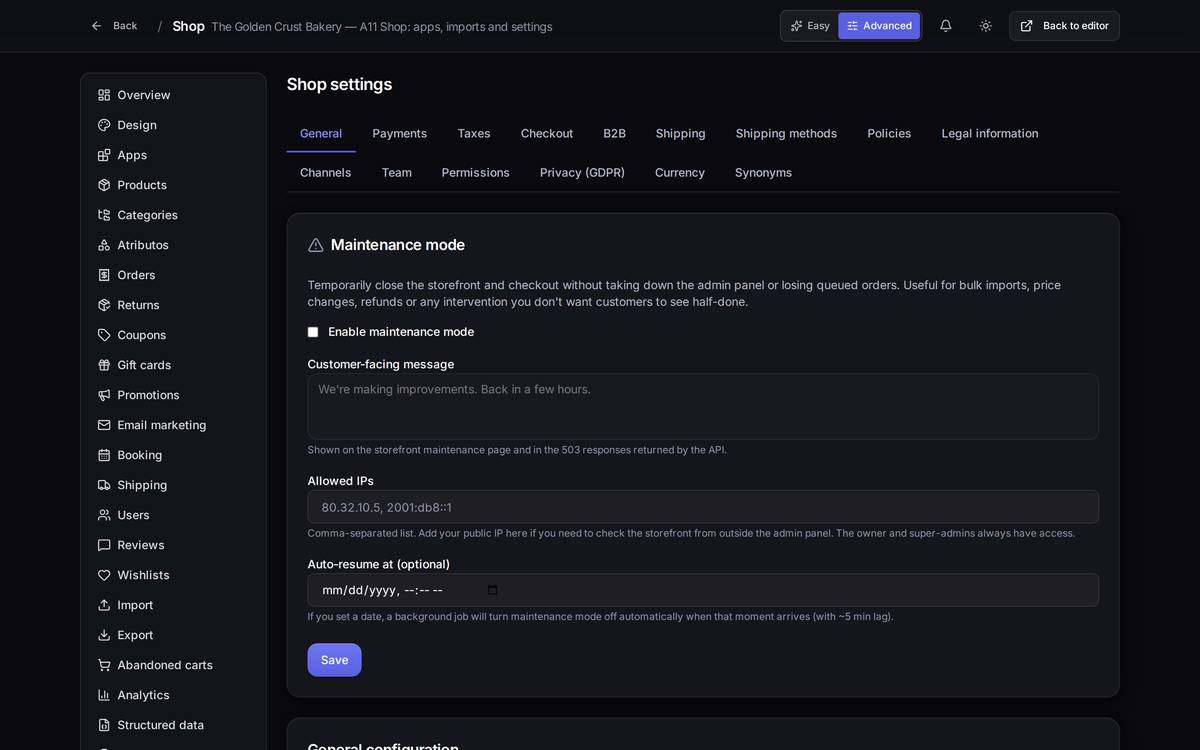
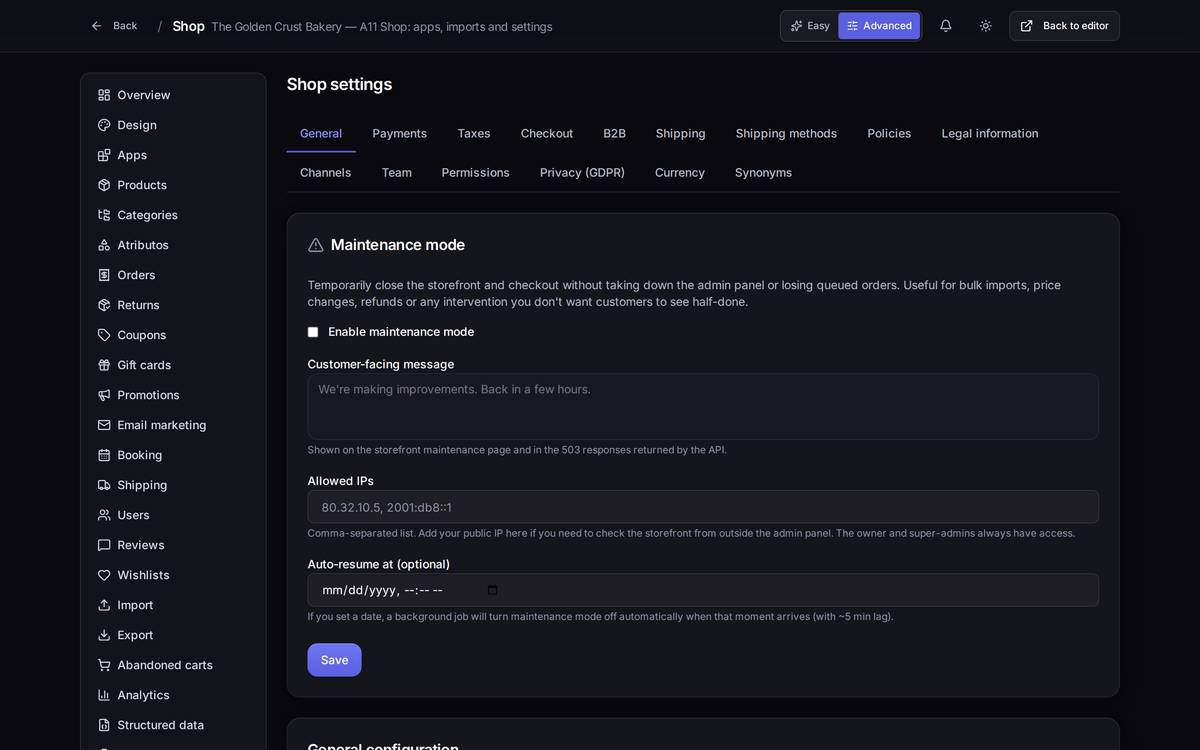
Both only appear if the shop's country is Spain.
Watch out for… VeriFactu is not a cosmetic setting: once you start submitting invoices to the tax authority, those invoices are on the record. Don't switch it on "just to see".
Team and permissions
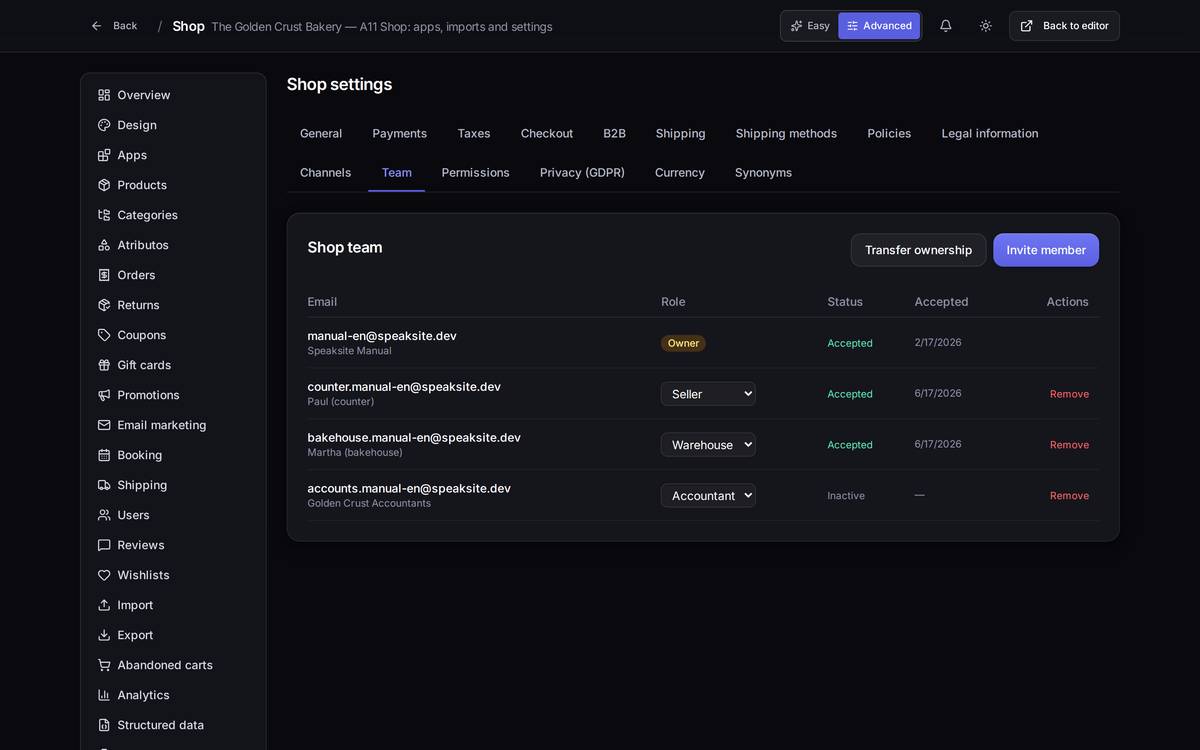
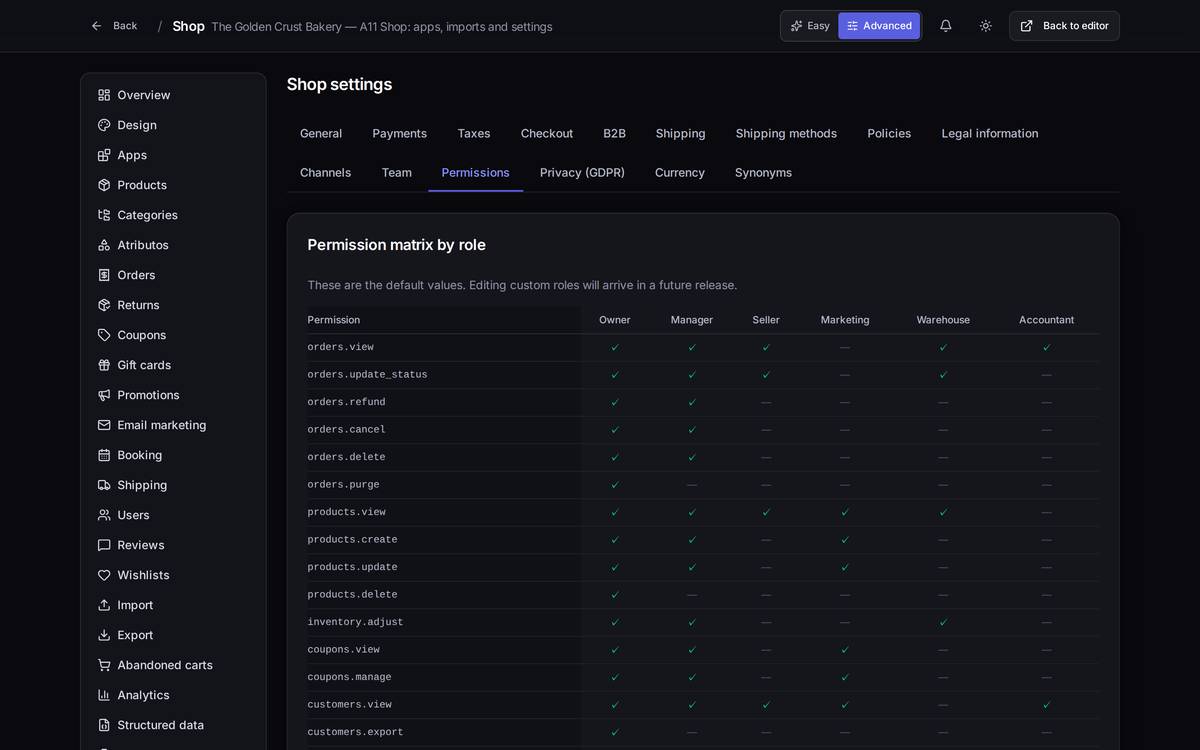
Invite by email and give each person the lowest role that does the job. Anyone with access to Settings can change your payment details.
Privacy and customer data
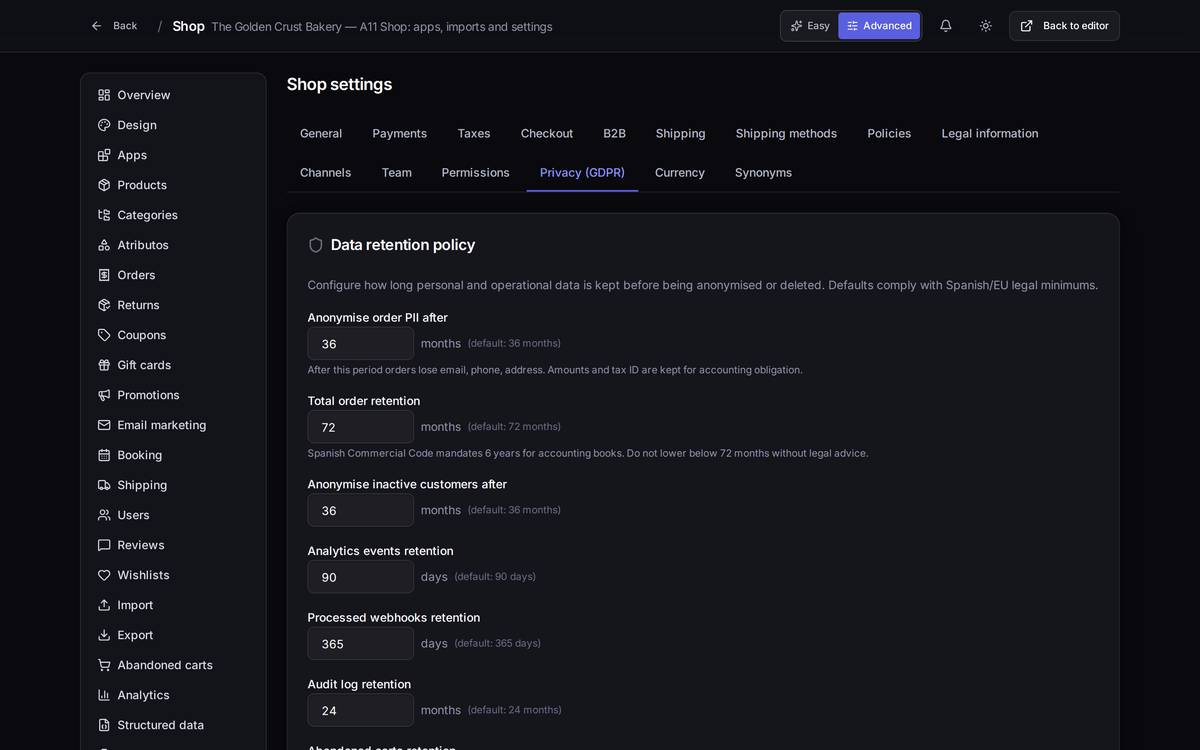
Two boxes here are the ones that really matter:
- Anonymise order PII after (36 months by default): once that period passes, orders lose their email, phone and address but keep amounts and tax ID for your accounts. "PII" means the data that identifies a person.
- Total order retention (72 months by default): commercial law requires accounting records to be kept for six years. Don't go below 72 without talking to your accountant.
Below that, the GDPR action log records every data export or deletion you've handled.
Watch out for… these periods act on their own, with no warning. Putting 6 in "Total order retention" means that after six months your orders start disappearing, and that can't be undone.
Currency
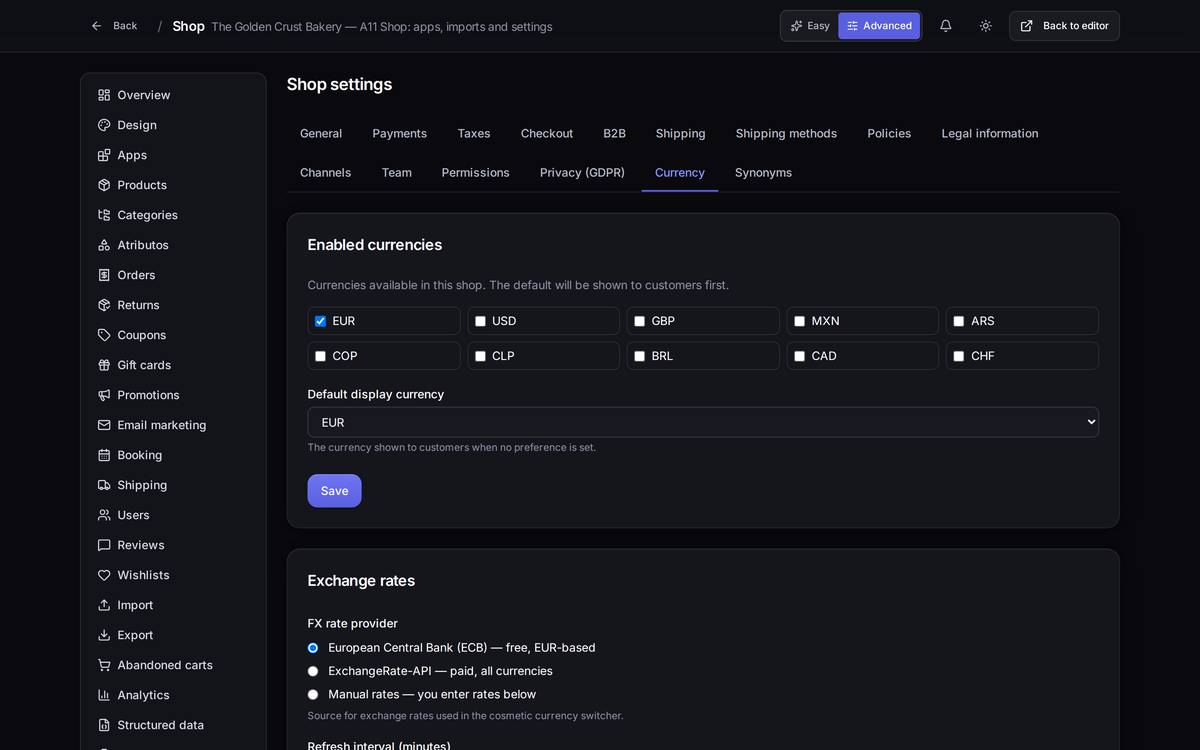
You can show prices in several currencies for reference and choose the source of the rates (European Central Bank for free, a paid provider, or entered by hand).
Watch out for… this is for display only: the charge is always made in the main currency from the General tab. A customer who sees $12 pays the equivalent in euros.
Search synonyms
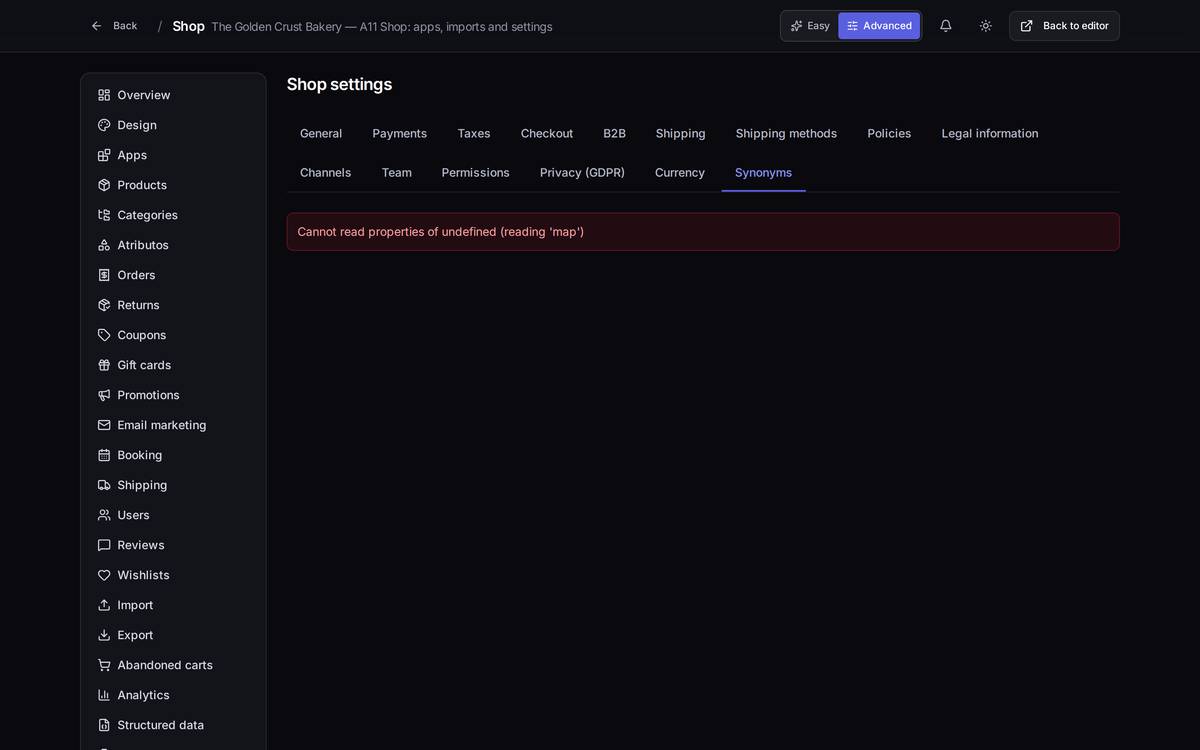
The idea is to teach the search box that "bun" and "bakery" mean the same thing. Right now this tab doesn't work on any project; until it's fixed, there's nothing to configure here.
11.6Getting data in and out of the shop
Importing
How to get thereShop menu → Import (Advanced mode required).
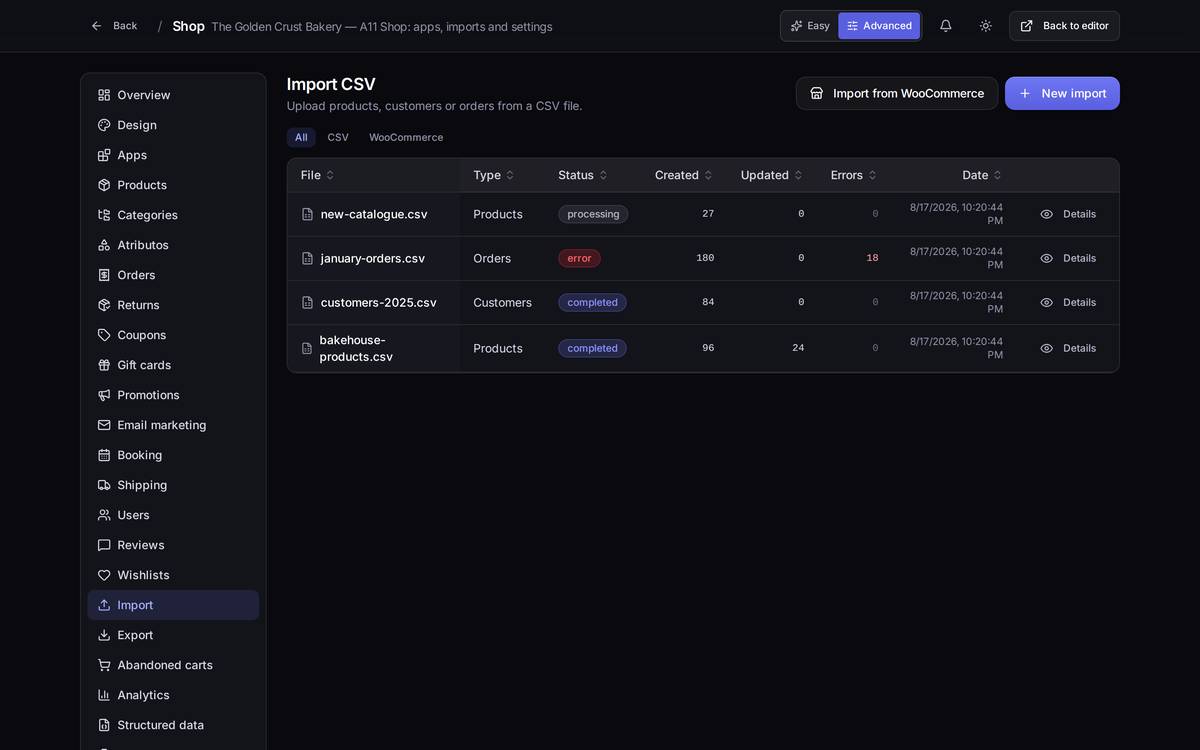
completed, processing, error).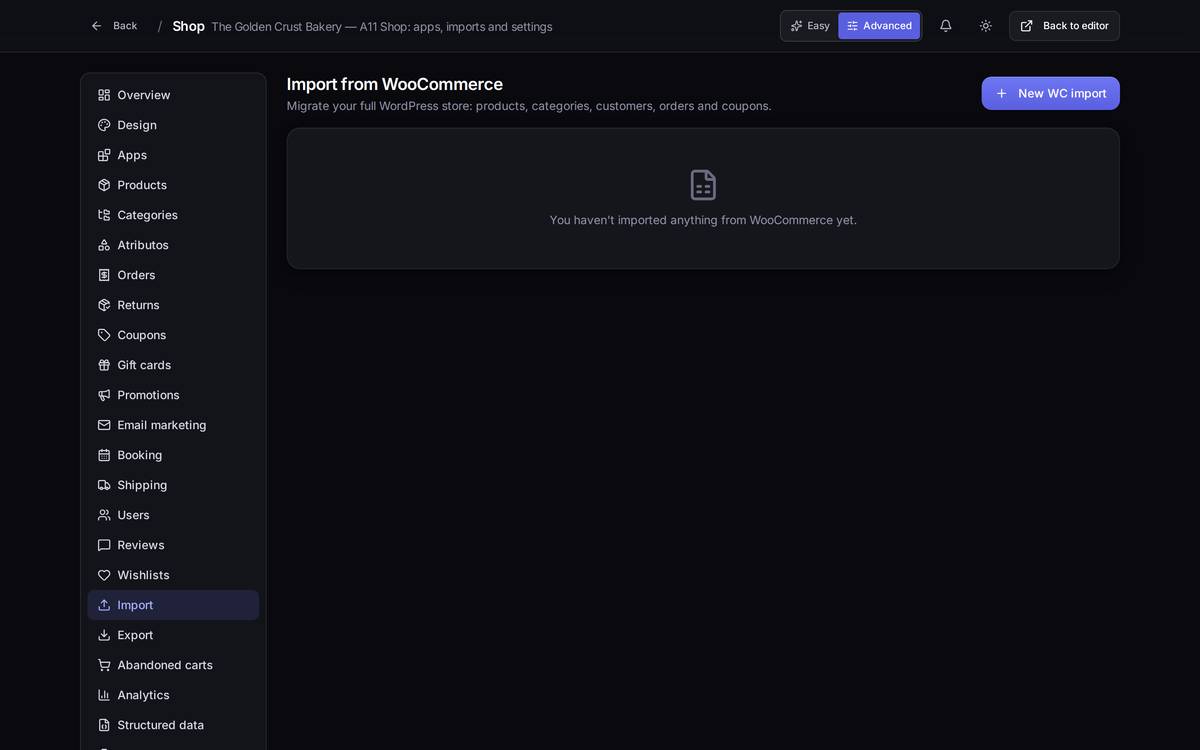
An exampleYou're coming from WooCommerce. In your WooCommerce you generate a read-only API key, paste it here alongside the shop's address and start the import. Speaksite brings across products, categories and images and leaves you a report of what went in and what didn't.
Watch out for… an import adds on top of what you already have. Run it twice without looking and you're left with duplicate products. Check the history before you repeat one.
Exporting
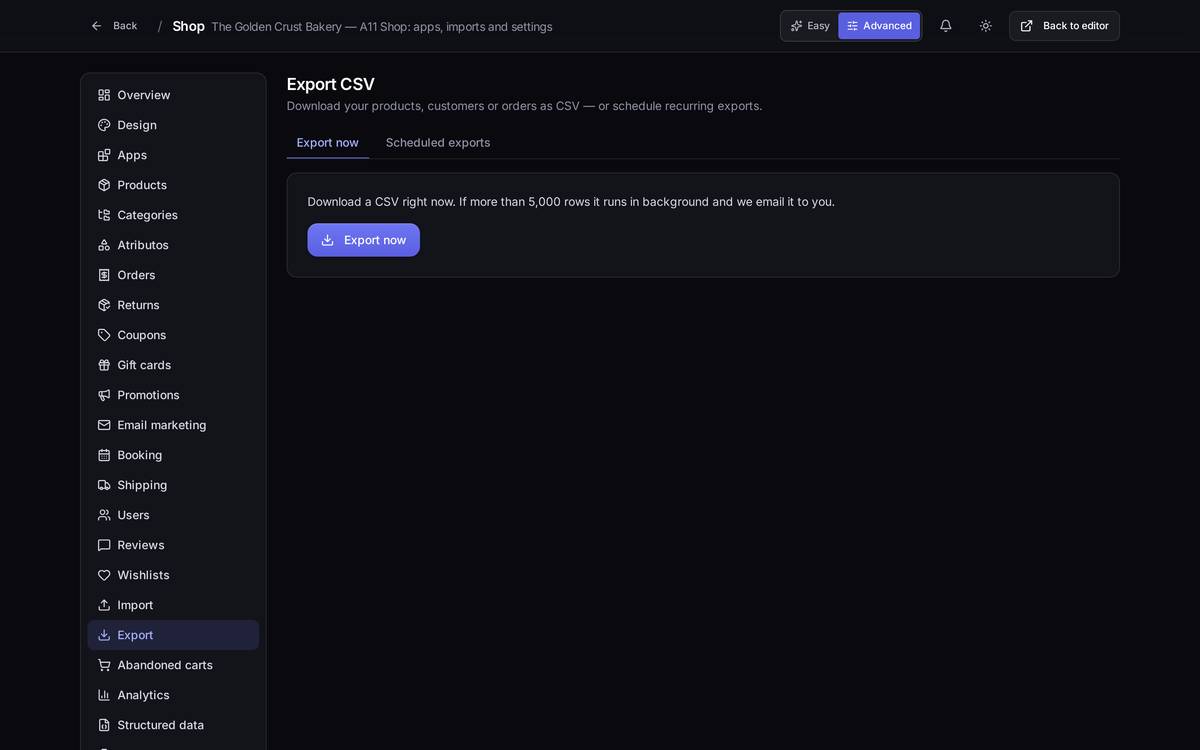
This is your emergency exit: you can download your data whenever you like. The customer and order files contain personal data — look after them.
11.7Shop statistics
How to get thereShop menu → Analytics (Advanced mode required).
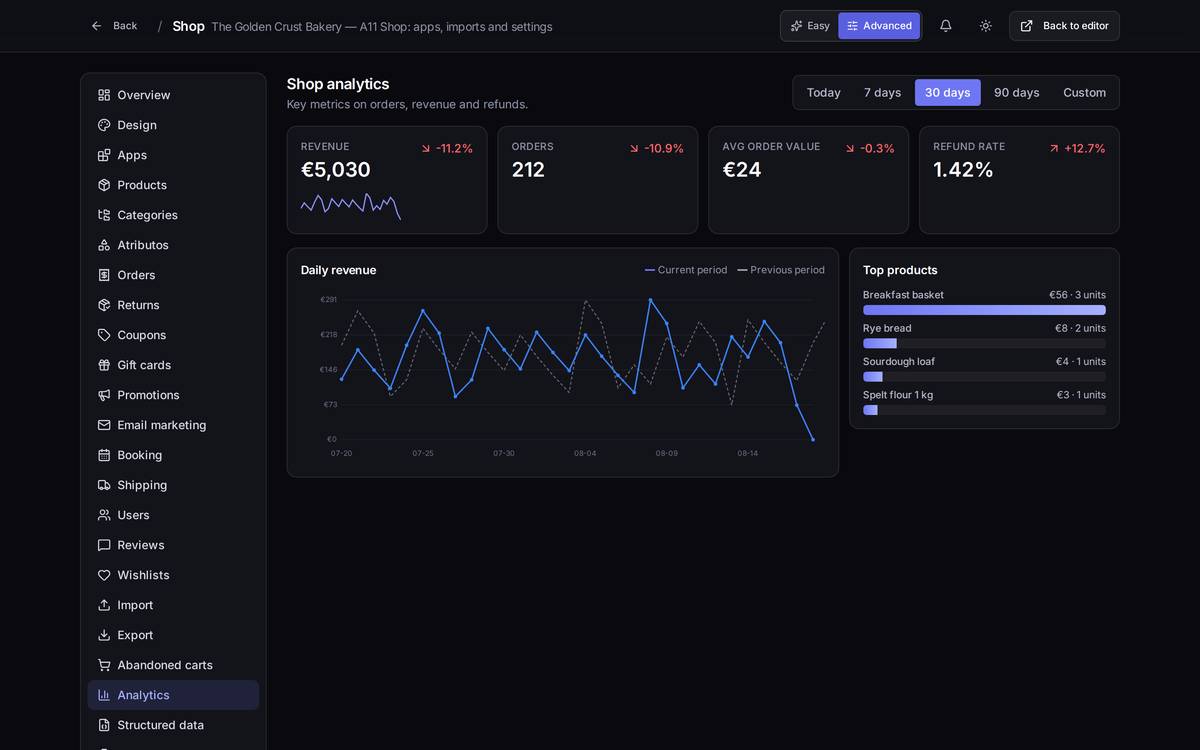
This is the long view: what the overview shows you for today, you see here by week and by month. It's for deciding when to run a promotion, not for balancing the till.
11.8Who changed what (the activity log)
What it's forIt records every significant change: who made it, when and from where. It's the first place to look when a price turns up changed and nobody knows why.
How to get thereShop menu → Audit log (Advanced mode required).
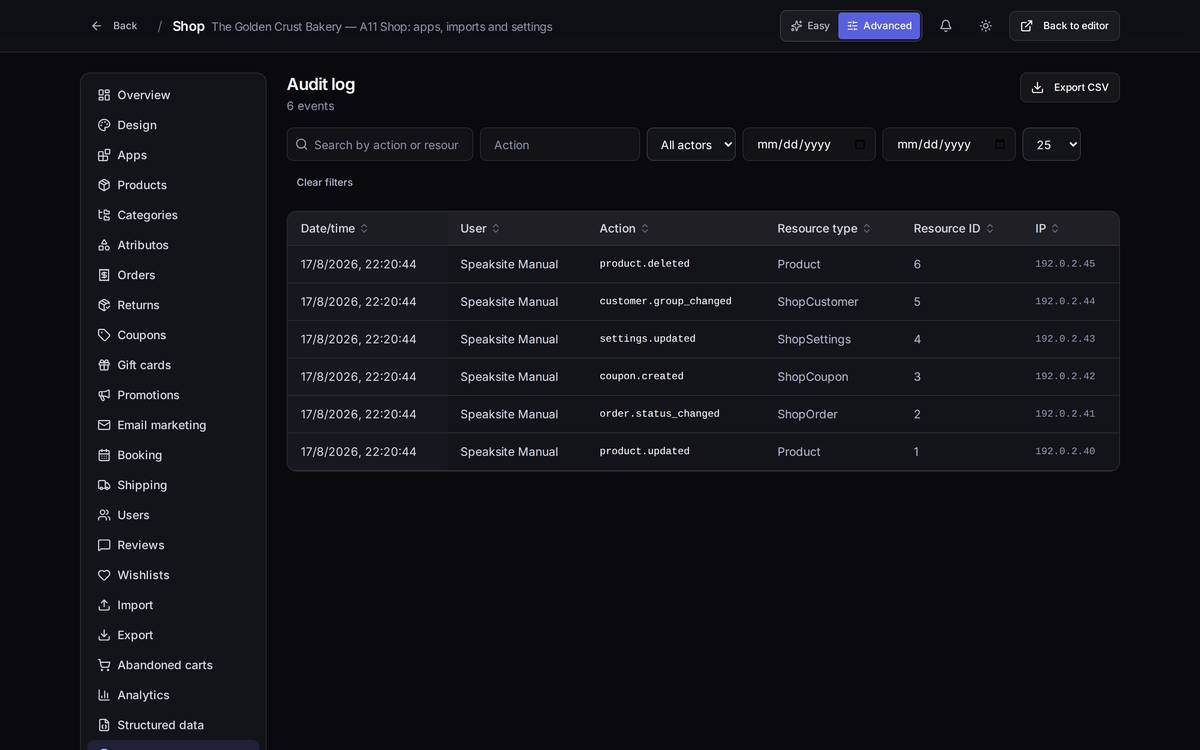
What's on screen. A search box, a filter by type of action, another by who did it and two dates to narrow the period. Export CSV takes away whatever you're looking at, already filtered. Click a row to open the detail.
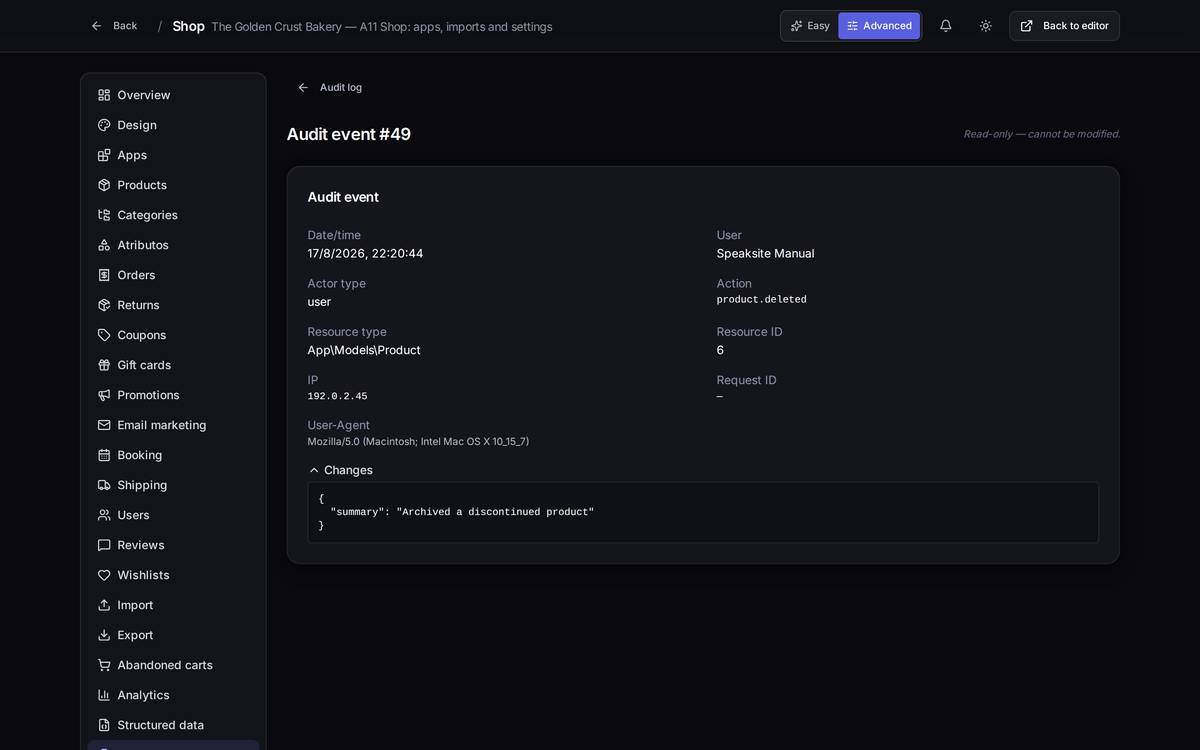
An exampleA customer complains that their discount group has been changed. You come in here, search for the action customer.group_changed, click the row and see who did it and when, and what was recorded in the Changes block.
Watch out for… the Action column shows internal identifiers (product.deleted, settings.updated) and Resource type shows the technical table names. They're readable enough, but they aren't translated: it's noted in the bug annex. And both date fields are filled in month/day/year format, not day/month/year.
11.9The project settings (not the shop ones)
Careful, these are two different things: the settings above are the shop's; these are the whole website's. They live somewhere else.
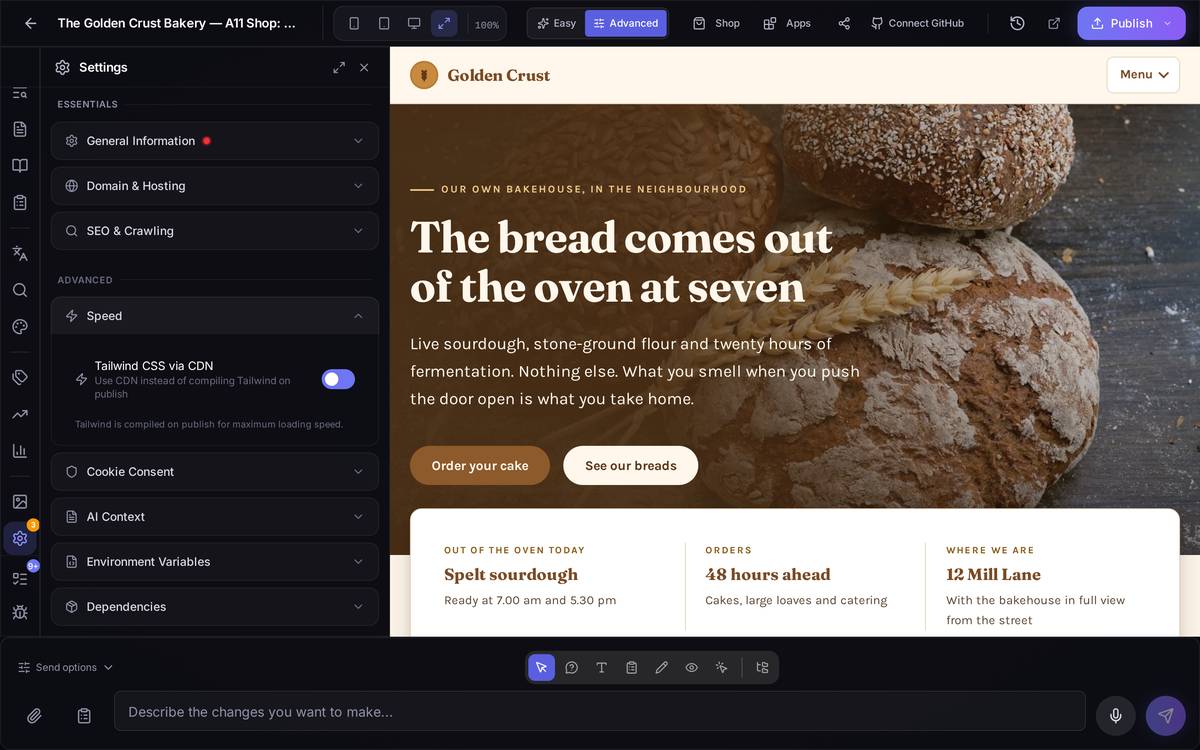
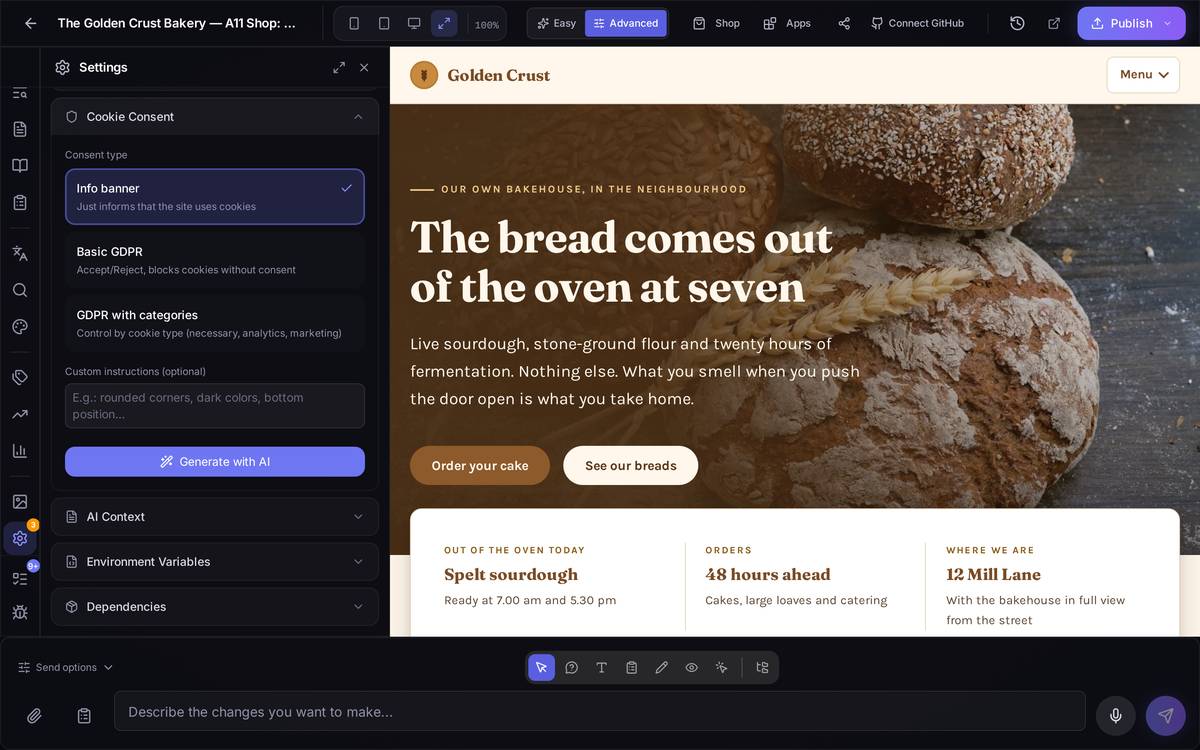
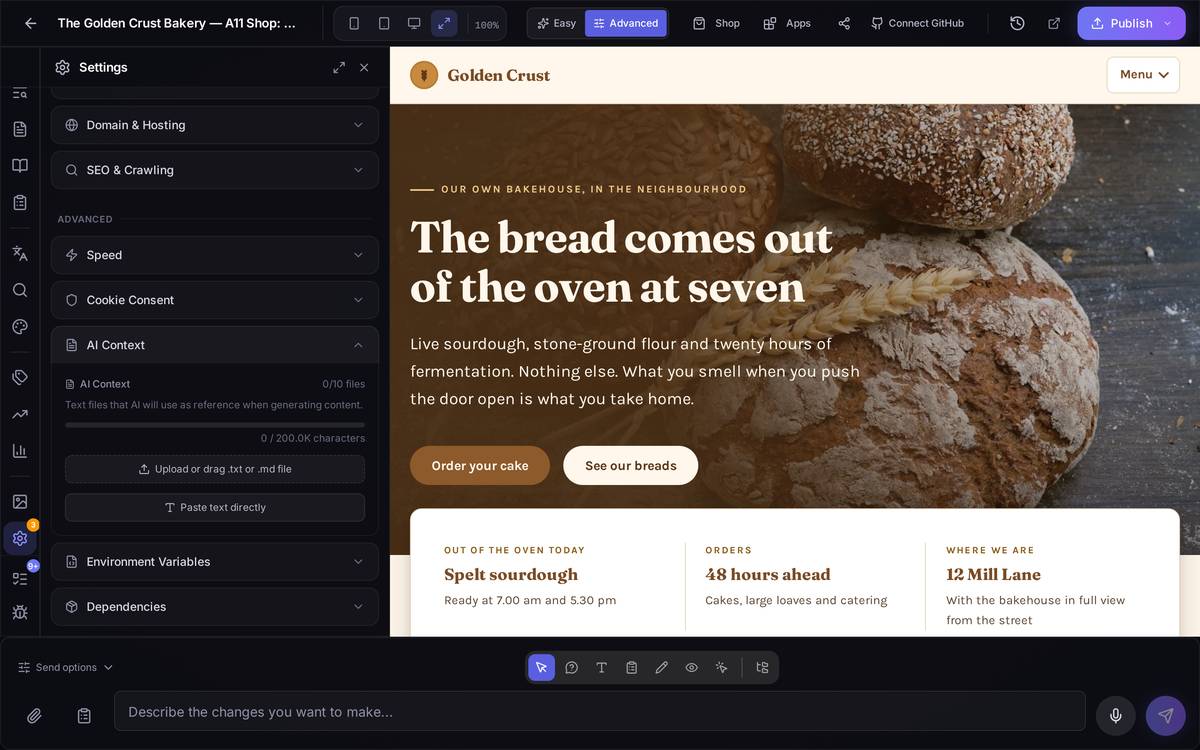
How to get thereGo back to the editor (Back to editor), put the switch on Advanced and click the cog icon (Settings) in the narrow bar on the left. A panel opens with collapsible sections.
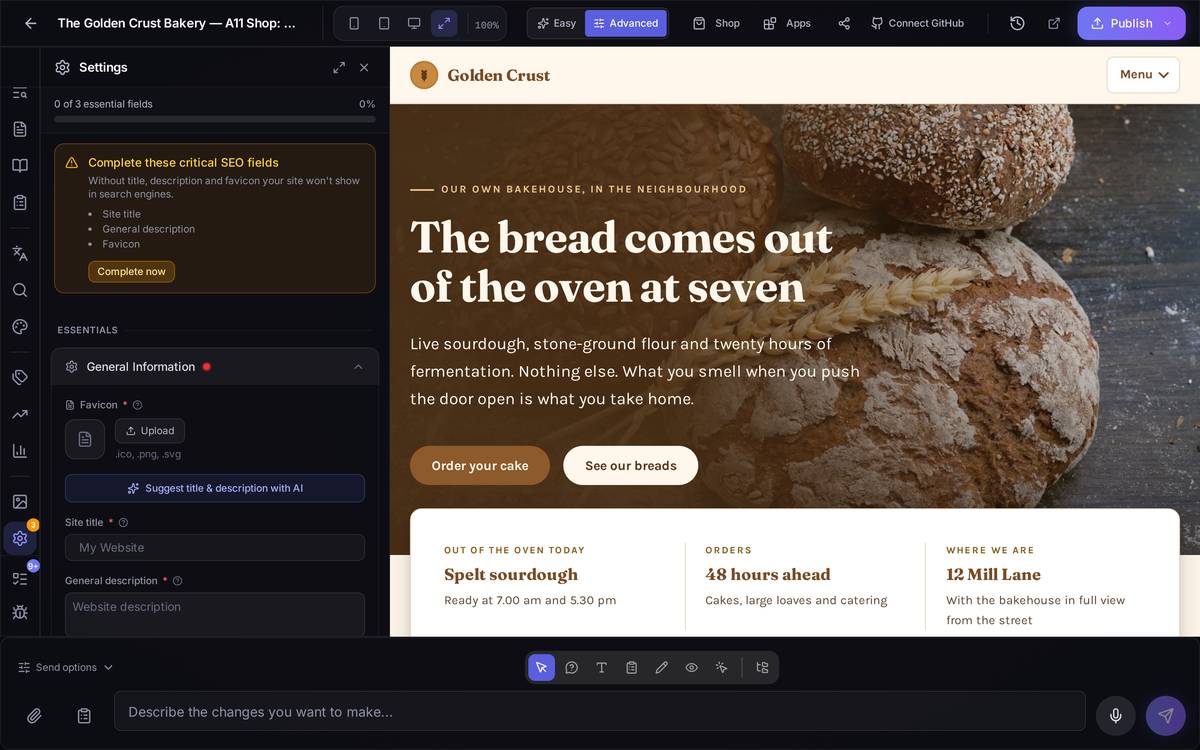
- General Information: site title, description and favicon. These are the three fields Google needs; the counter at the top tells you how many you're missing.
- Domain & Hosting: your own address.
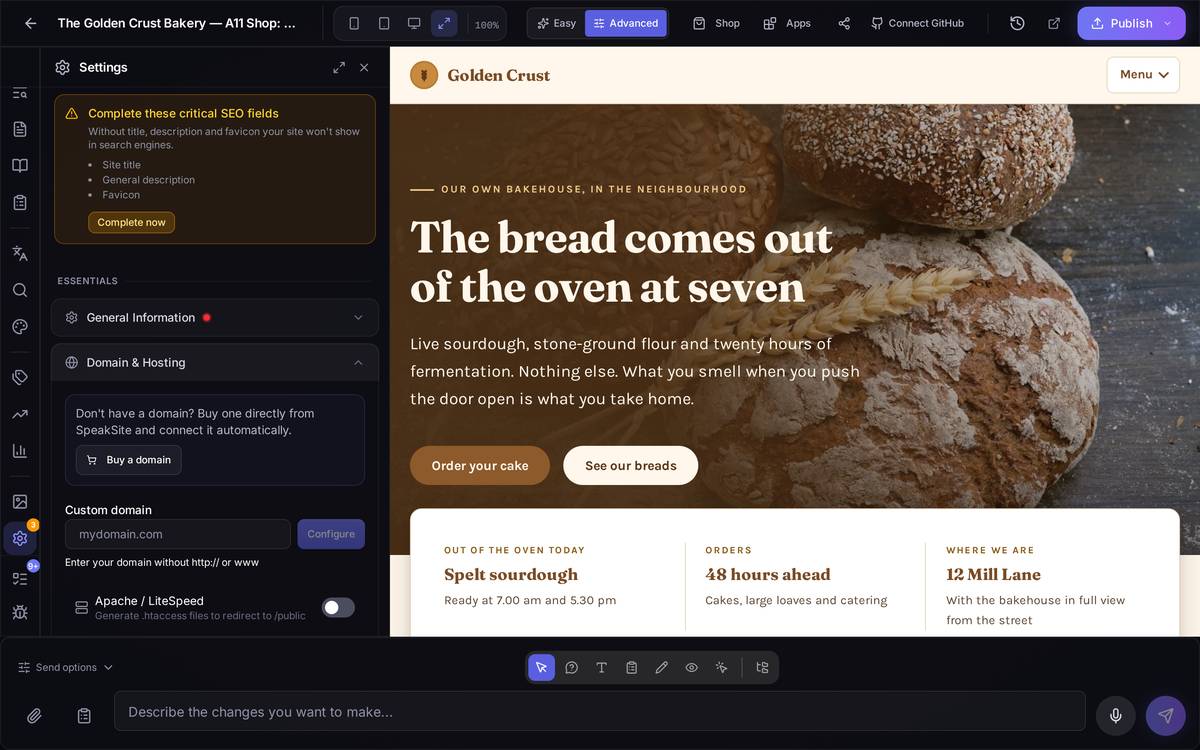
http:// and no www). On the free plan this section appears locked; the screenshot is from a paid account.- SEO & Crawling: what the search engines see.
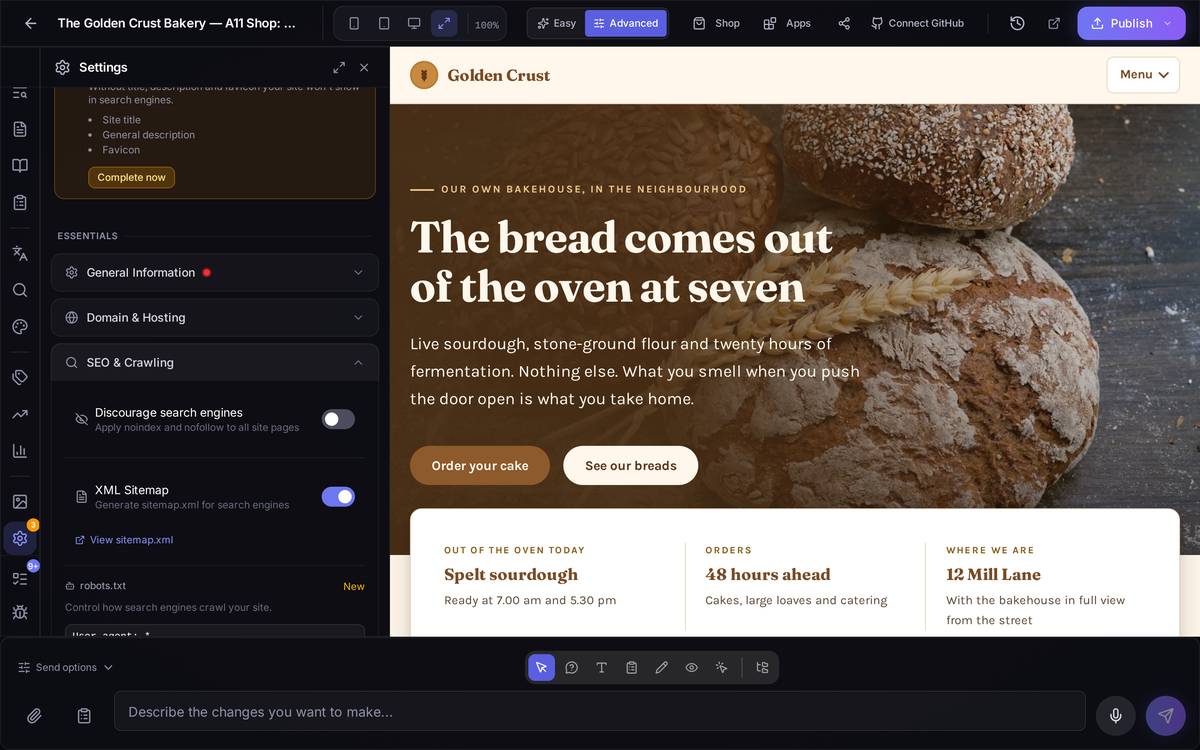
- Speed and Cookie Consent:
- AI Context, Environment Variables and Dependencies: the most technical part of the panel. The context is what the AI takes as read about your business when you ask it for changes; the variables and the dependencies are only touched if somebody asks you to.
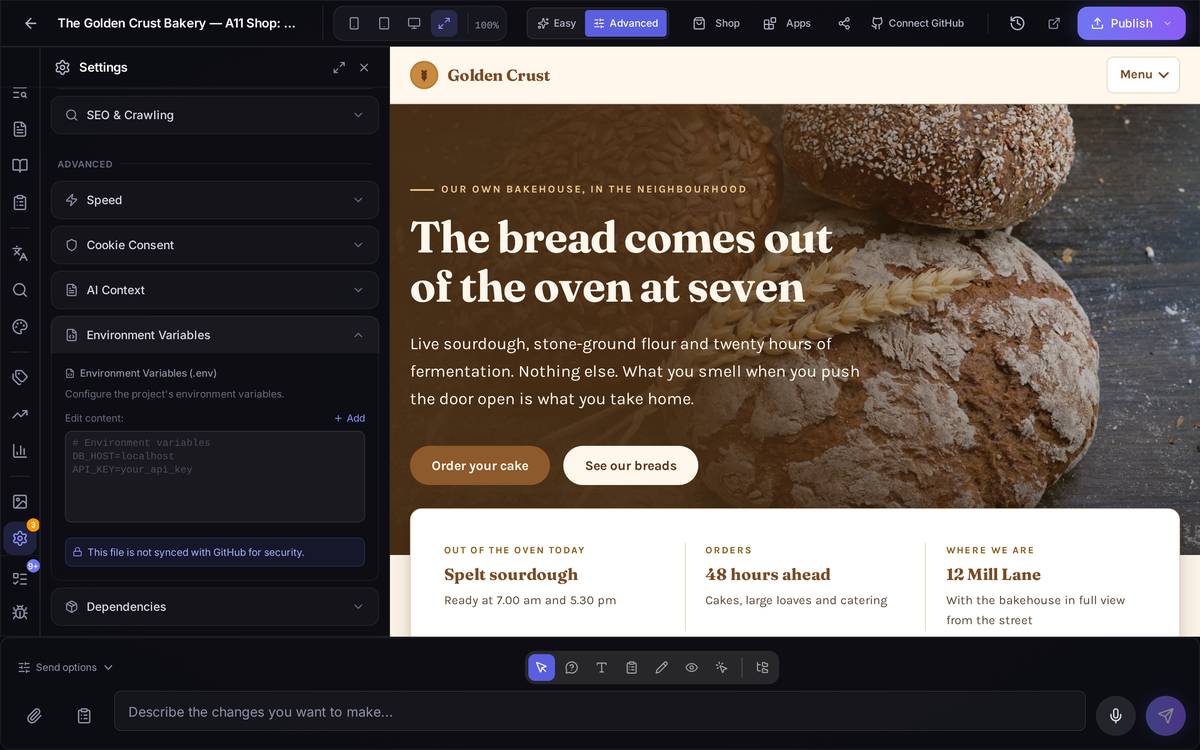
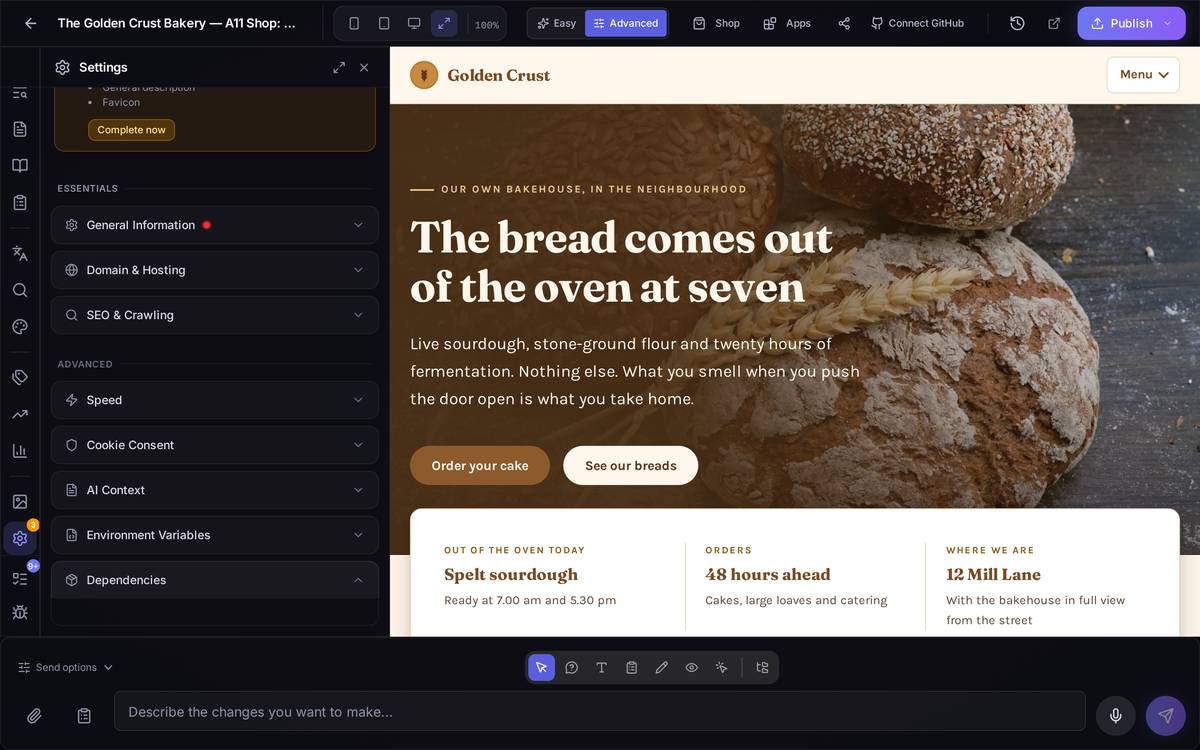
Watch out for… the Environment Variables contain keys. Anyone with access to the project can see them. And Domain is only available on a paid plan: if that section comes up locked for you, it isn't a fault.
11.10The shop in light or dark
The shop part of the panel has a theme switch, the sun/moon icon in the header next to the notifications one. It only changes how you see it, in this browser: it doesn't affect your public site or your colleagues.
11.11Things documented in other chapters
Three features handled from this same menu are explained elsewhere in the manual, so as not to tell the story twice:
- Bookings and appointments (Booking menu): calendar, resources and the list of appointments.
- Widgets (Widgets menu): the blocks you can place in the shop.
- Structured data (Structured data menu): the suggestions Speaksite makes so that Google understands your products better, and the screen where you review them one by one before applying them.
And one that doesn't exist today: the screen inventory allows for "repair pages", "repair translations" and "adapt the project" blocks inside the project settings. They're planned, but no live screen in the panel shows them, so they can't be used or photographed. Noted in the bug annex.
11.12Your shop's manuals
What it is forKeeping and reading, inside the panel itself and with your session open, your shop's internal documents: how it is set up, what was handed over to you, continuity plans — any PDF or document that is not for showing in your shop window, only for you and for whoever you let into the panel.
How to get thereShop menu → Manuals (Advanced mode required; in Easy mode this entry does not appear).
What is on screen. A list of documents, each with its title, its file type (PDF, HTML, image…), its size and the date it was last modified. Every row carries two buttons: Open (shows it in a new tab) and Download. If there is no document yet, the list says there are no manuals for this shop.
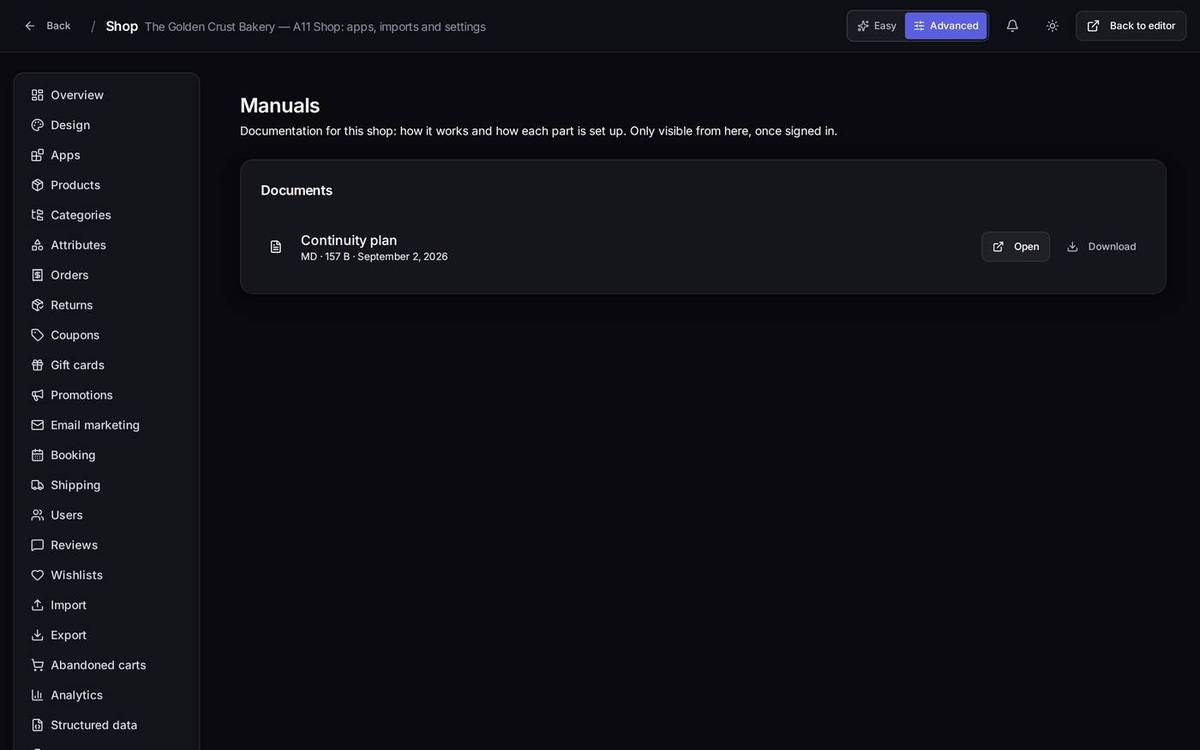
Watch out for… this screen is read-only: there is no button for uploading a new document yourself from here. Speaksite leaves the manuals for you — if you need one added, ask your usual contact. And because they are internal documents, they cannot be seen from outside the panel: every read requires a signed-in session and access to this shop, even if you know the file's exact address.
11.13Store accounts (assortment and store sheet)
What it is forIf, besides selling to your customers, you also distribute stock to your own points of sale — branches, vans, warehouses — you can set them up as store accounts: they do not see prices (just like a business account) and can only order from one specific list, their assortment: the references that store really moves, each with the quantity it usually orders. This feature only makes sense with an ERP connected, so it only shows up in shops that have one.
How you switch it on. Same as any other feature: Shop menu → Apps → the Hoja de tienda card, with its switch (the app names on this screen are not translated yet, so the card keeps its Spanish name even in the English panel). Turning it on puts the lock in place: a store account can only add to the cart what is in its assortment; anything it is missing it orders separately, in the note to the office, and if that repeats it gets added to its list.
What the assortment is. The list of references for a store, with the quantity it usually orders of each one — not an average, but the number that store repeats over and over. It is calculated on its own, from the history of movements with the ERP: there is no need to type it in by hand, item by item.
What does not have its own screen yet. Setting up a new store account, recalculating its assortment, or creating an internal product (change for the till, in-store material — things only your own stores can order and that never appear in the shop window) is not done from any screen in the panel: today your Speaksite contact does it, with the matching ERP warehouse code. Ask them when you need it: opening a store, correcting its list or setting up an internal product.